GitLab单点登录
概述
本文档基于GitLab-ce版本,为您介绍Gitlab系统与竹云IDaaS单点登录配置过程。
GitLab的docker版本安装参考
GitLab官方saml配置参考
认证配置
GitLab配置
查看版本号。
shellcat /opt/gitlab/embedded/service/gitlab-rails/VERSION修改GitLab配置文件,{gitlab默认安装路径}/etc/gitlab/gitlab.rb
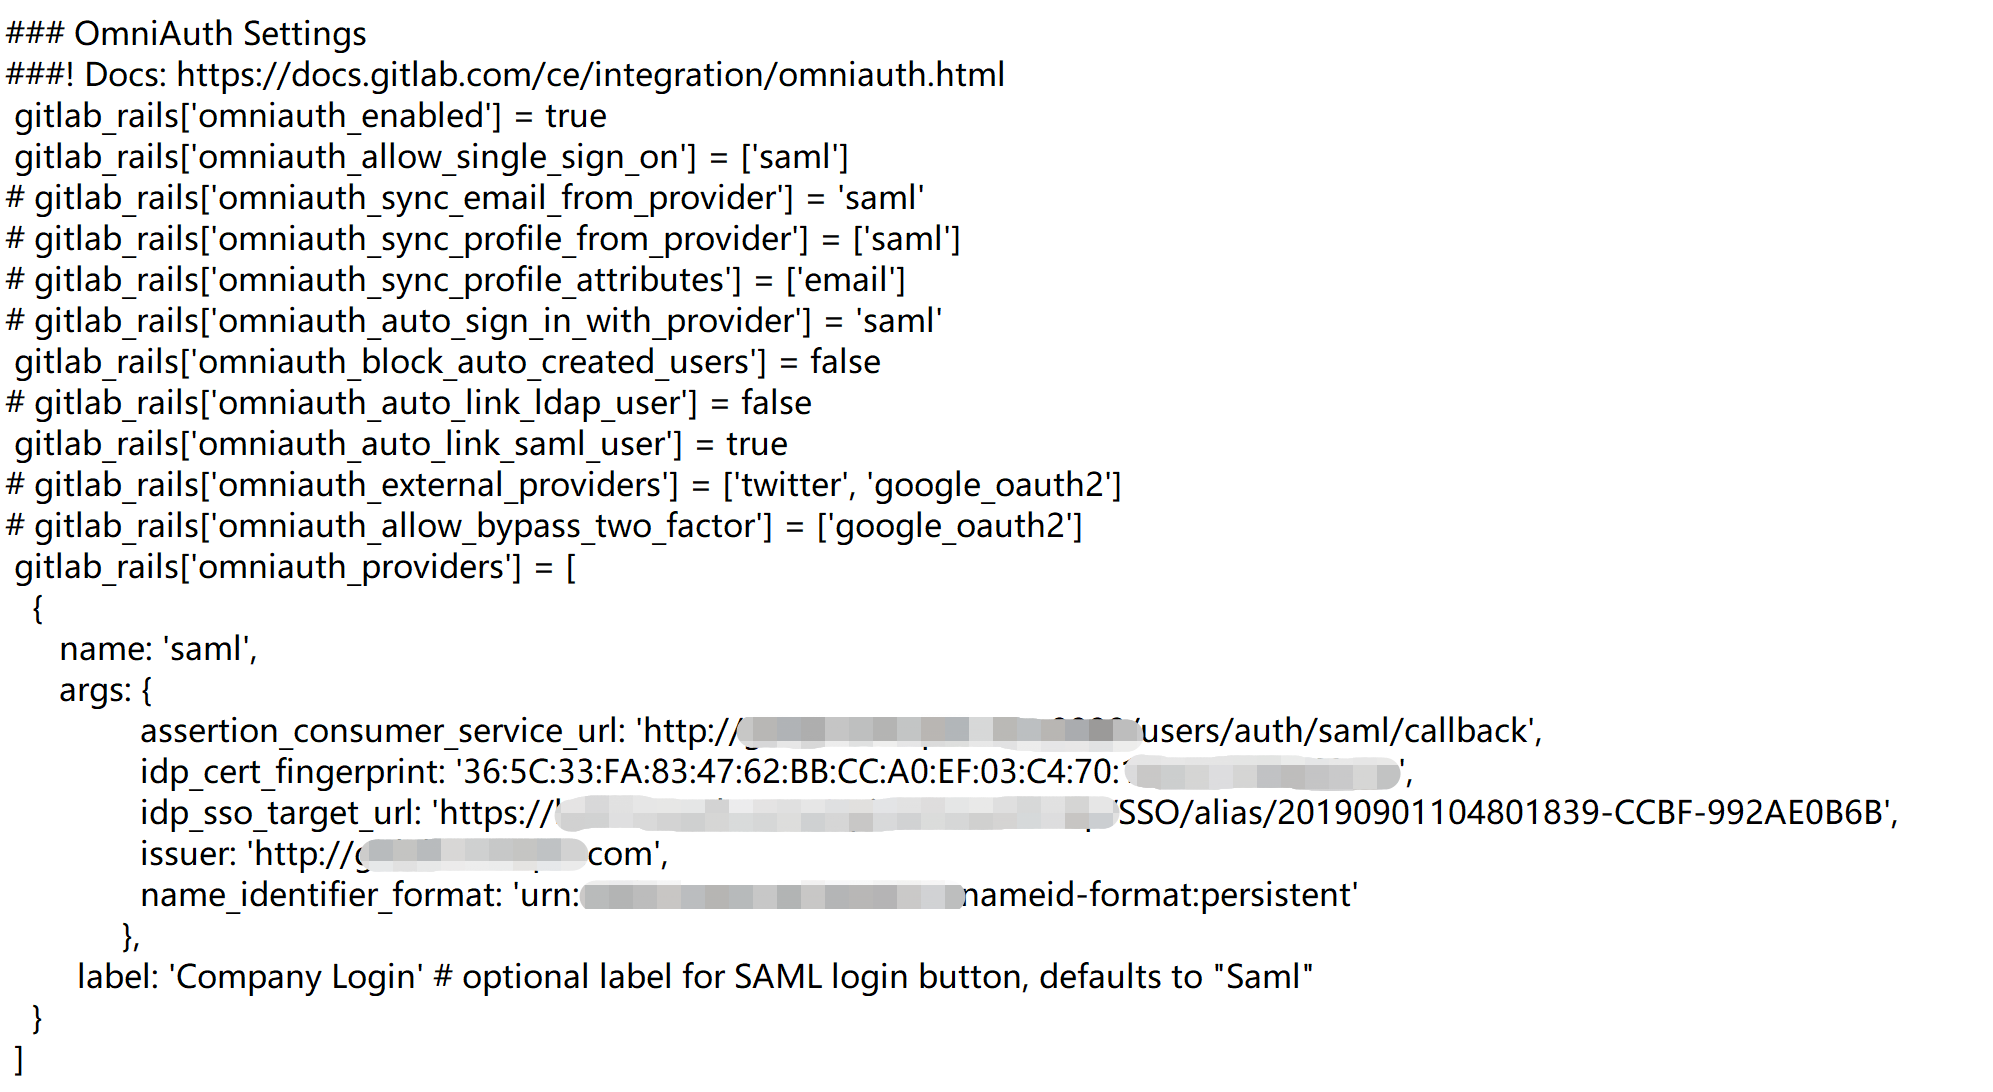
参数配置如下:
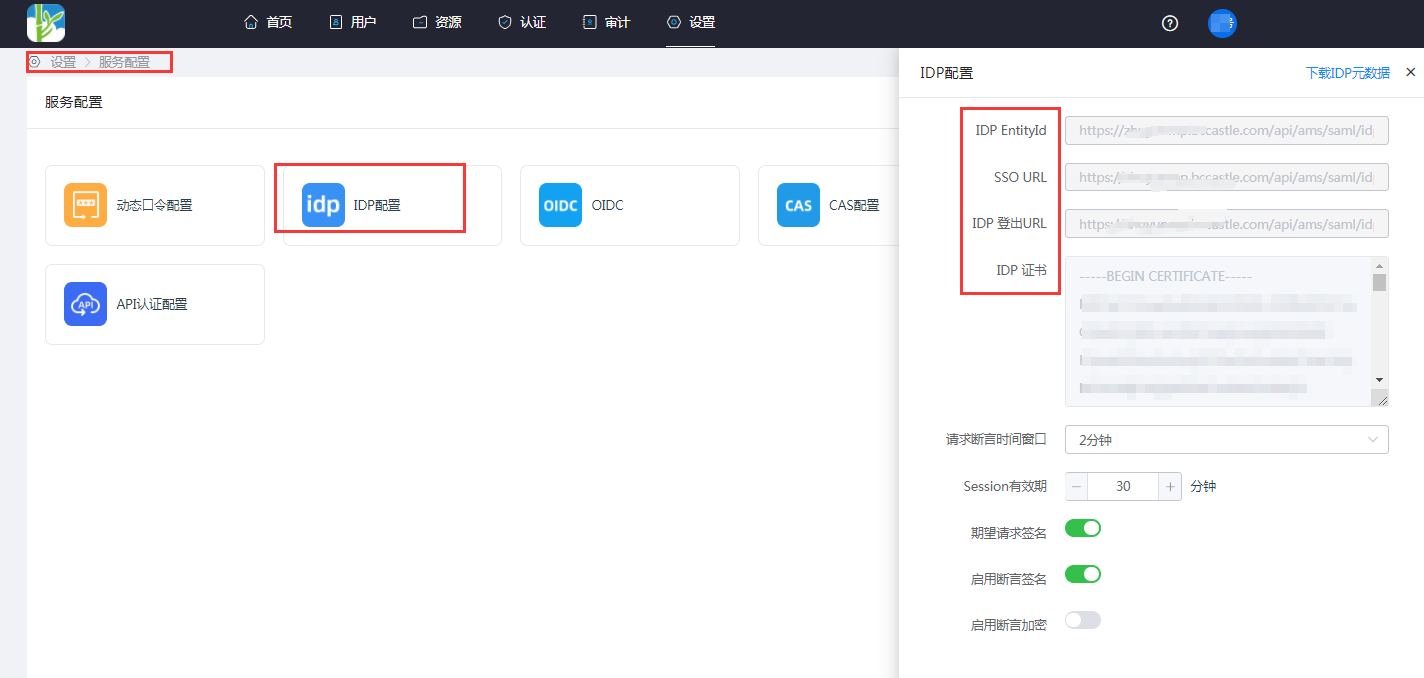
参数 说明 gitlab_rails['omniauth_enabled'] = true 允许用户使用SAML进行注册而无需手动创建账户: gitlab_rails['omniauth_allow_single_sign_on'] = ['saml'] 允许saml单点登录 : gitlab_rails['omniauth_auto_link_saml_user'] = true 允许自动将SAML用户与GitLab中现有用户关联 : assertion_consumer_service_url 断言消费地址,示例: https://{gitlab.example.com:8880}/users/auth/saml/callback {}内替换实际地址 idp_cert_fingerprint 证书指纹,获取方式见下文 idp_sso_target_url IDP的 SSOURL,在竹云IDaaS 企业中心-【设置】-【服务配置】-【IDP配置】中获取, 示例:https://{your-doamin}/api/v1/saml2/idp/sso issuer GitLab的域名地址 ,示例:https://gitlab.example.com name_identifier_format 支持NameId格式,默认'urn:oasis:names:tc:SAML:2.0:nameid-format:persistent' label GitLab登录界面sso按钮标签名称 TIP
IDP证书指纹获取方式(任选其一):
复制竹云IDaaS 企业中心-【设置】-【服务配置】-【IDP配置】中的IDP证书内容,保存为 idp.cer文件,查看证书文件。
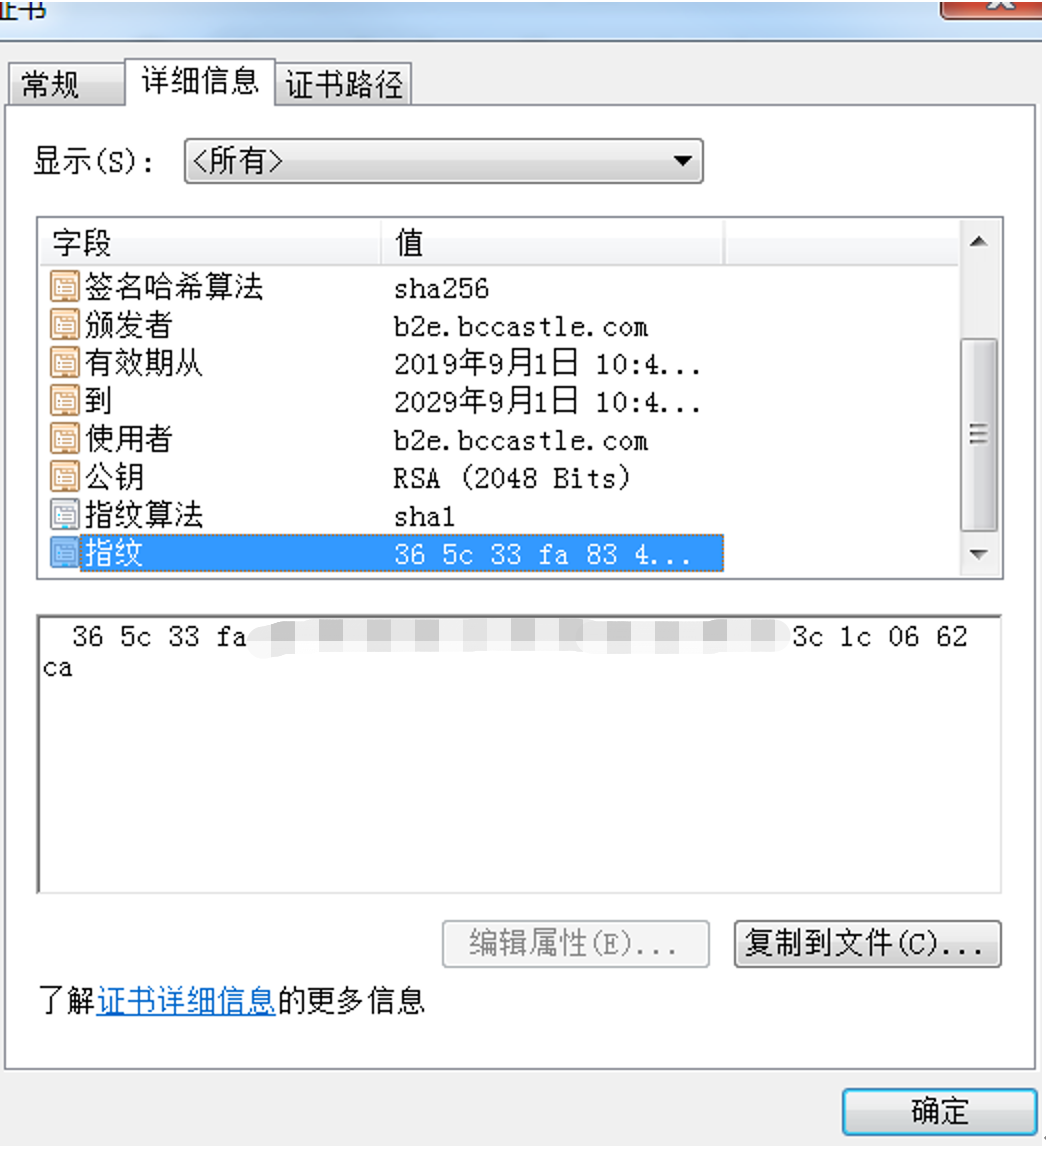
复制证书内容,通过在线工具计算证书指纹。
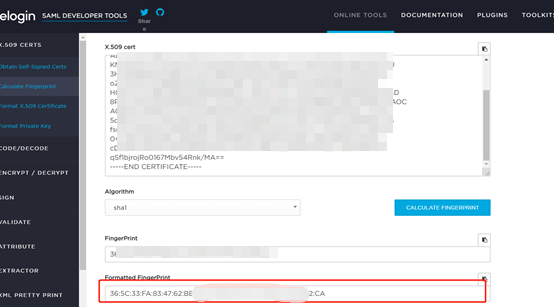
修改完配置后,重启GitLab。
shell
# 停止Gitlab服务
gitlab-ctl stop

# 刷新Gitlab配置
gitlab-ctl reconfigure

# 启动Gitlab服务
gitlab-ctl start
竹云IDaaS 配置
登录企业中心,添加GitLab预集成应用。
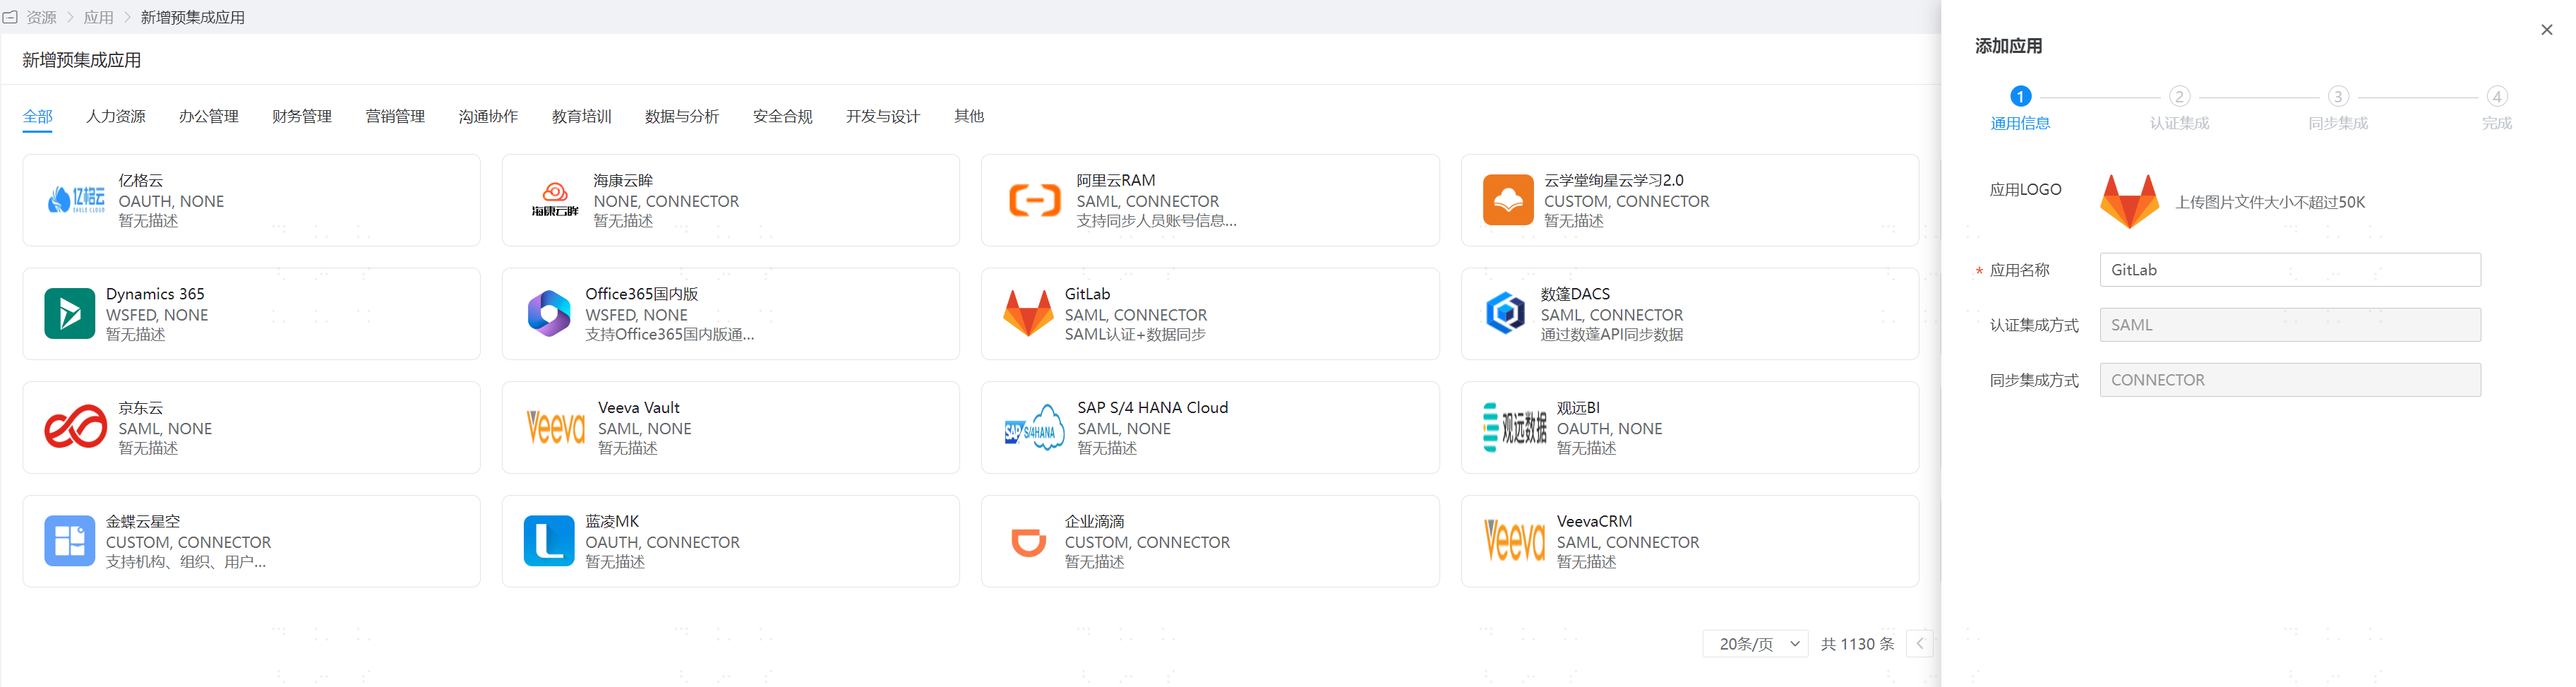
配置认证参数,可以直接导入metadata文件,metadata文件的下载地址为gitlab服务的地址,比如https://{gitlab.example.com:8880}/users/auth/saml/metadata
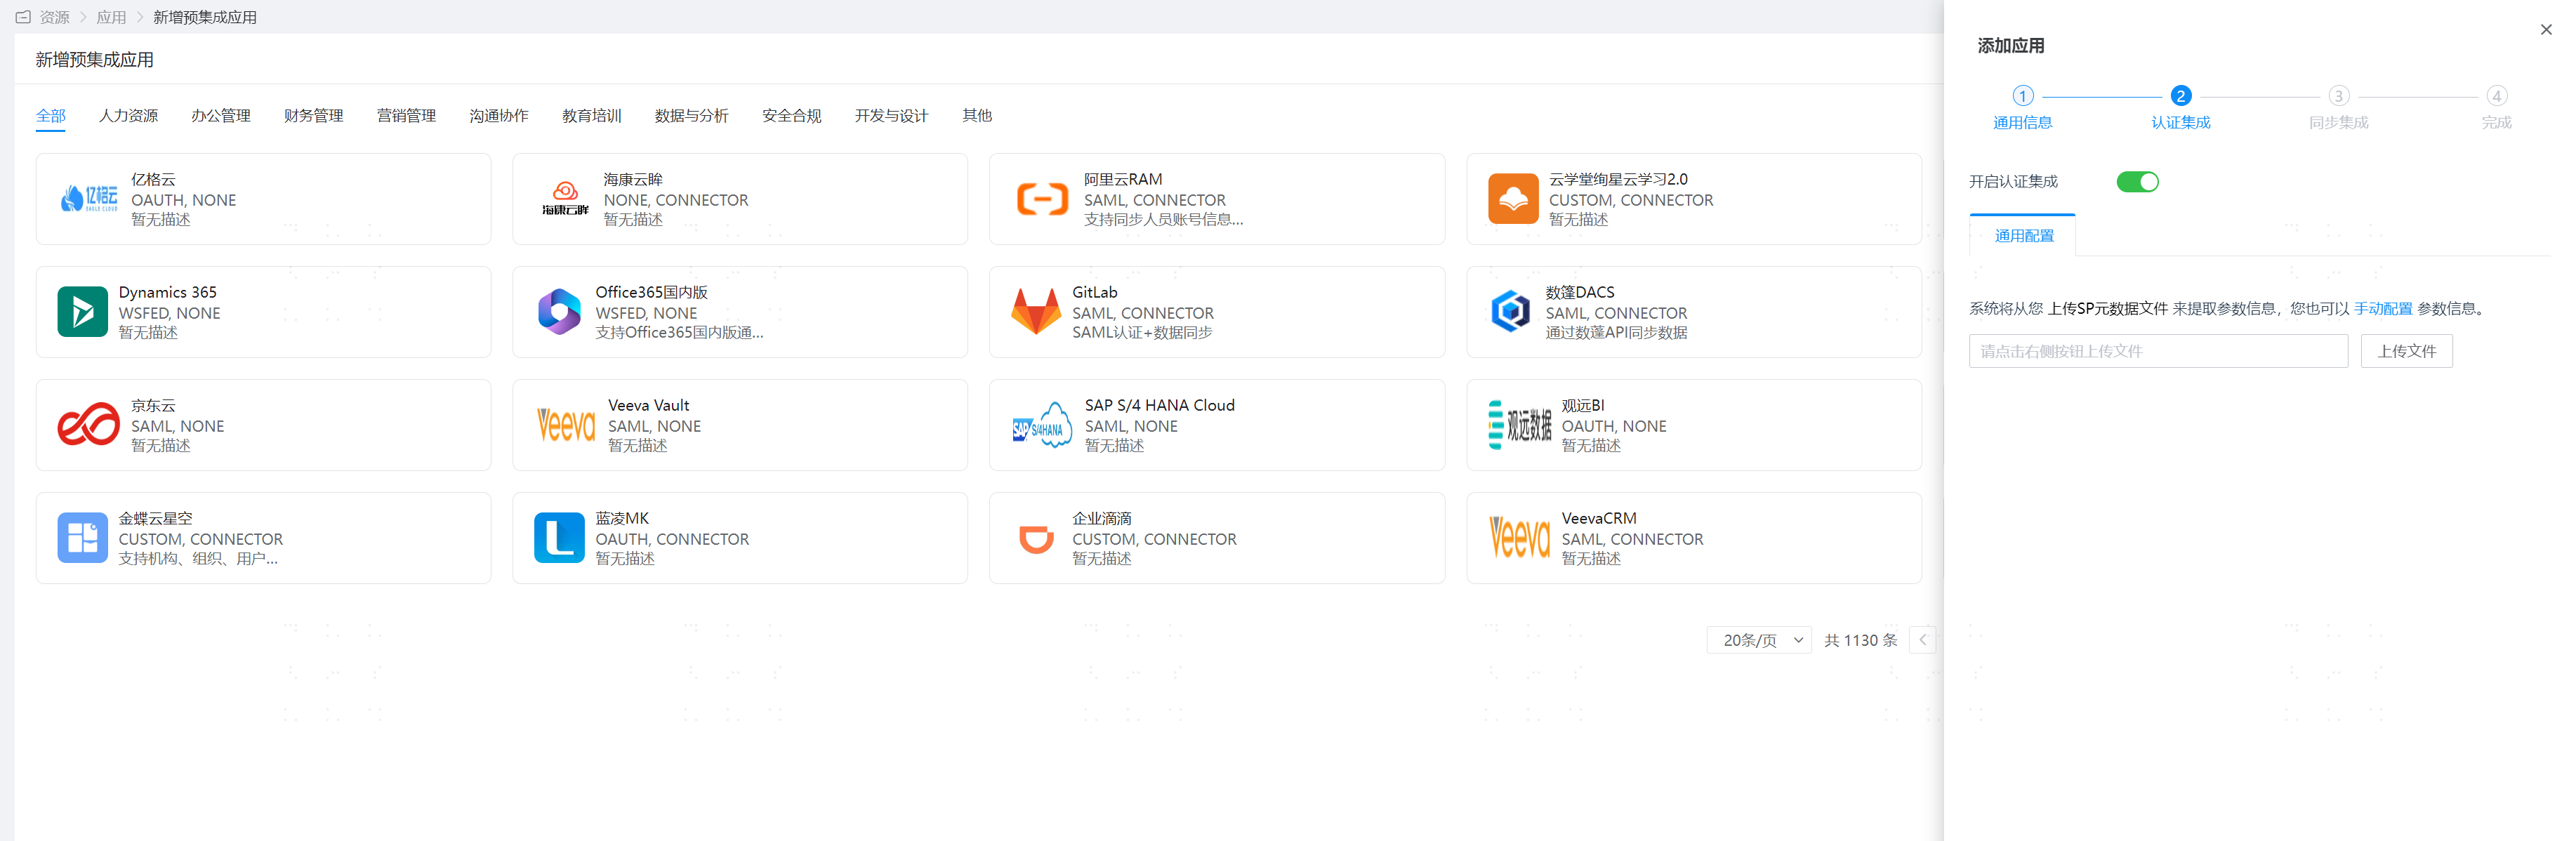
进入应用详情, 配置认证集成
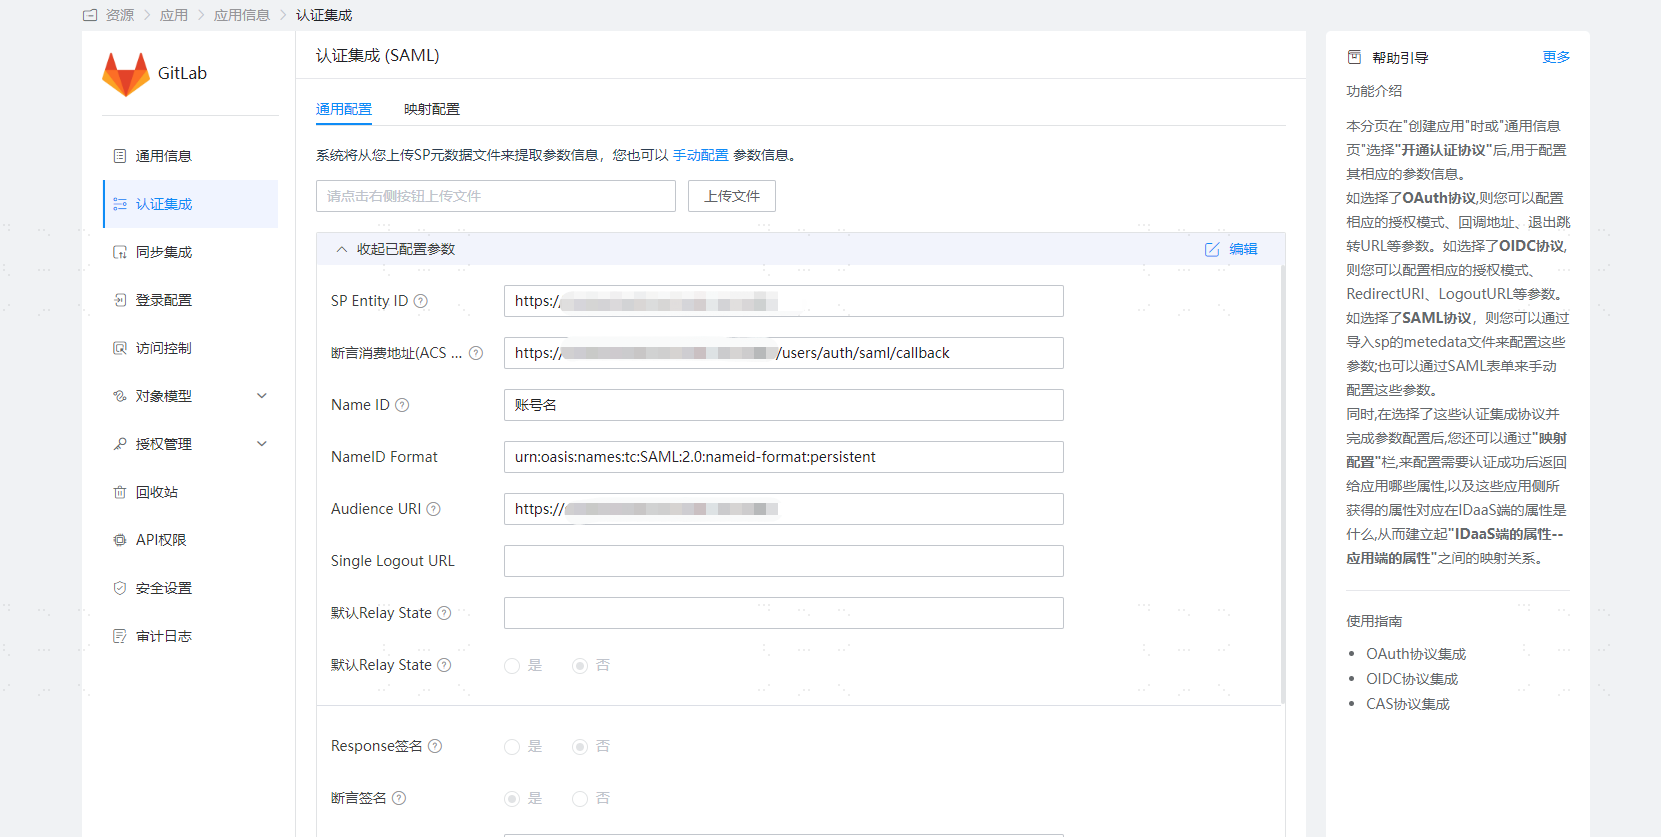
参数 参数说明 SP Entity ID gitlab.rb文件中的issuer参数 断言消费地址(ACS URL) gitlab.rb文件中assertion_consumer_service_url NameID 账号名 NameID Format gitlab.rb文件中的name_identifier_format Audience URI gitlab.rb文件中的issuer参数
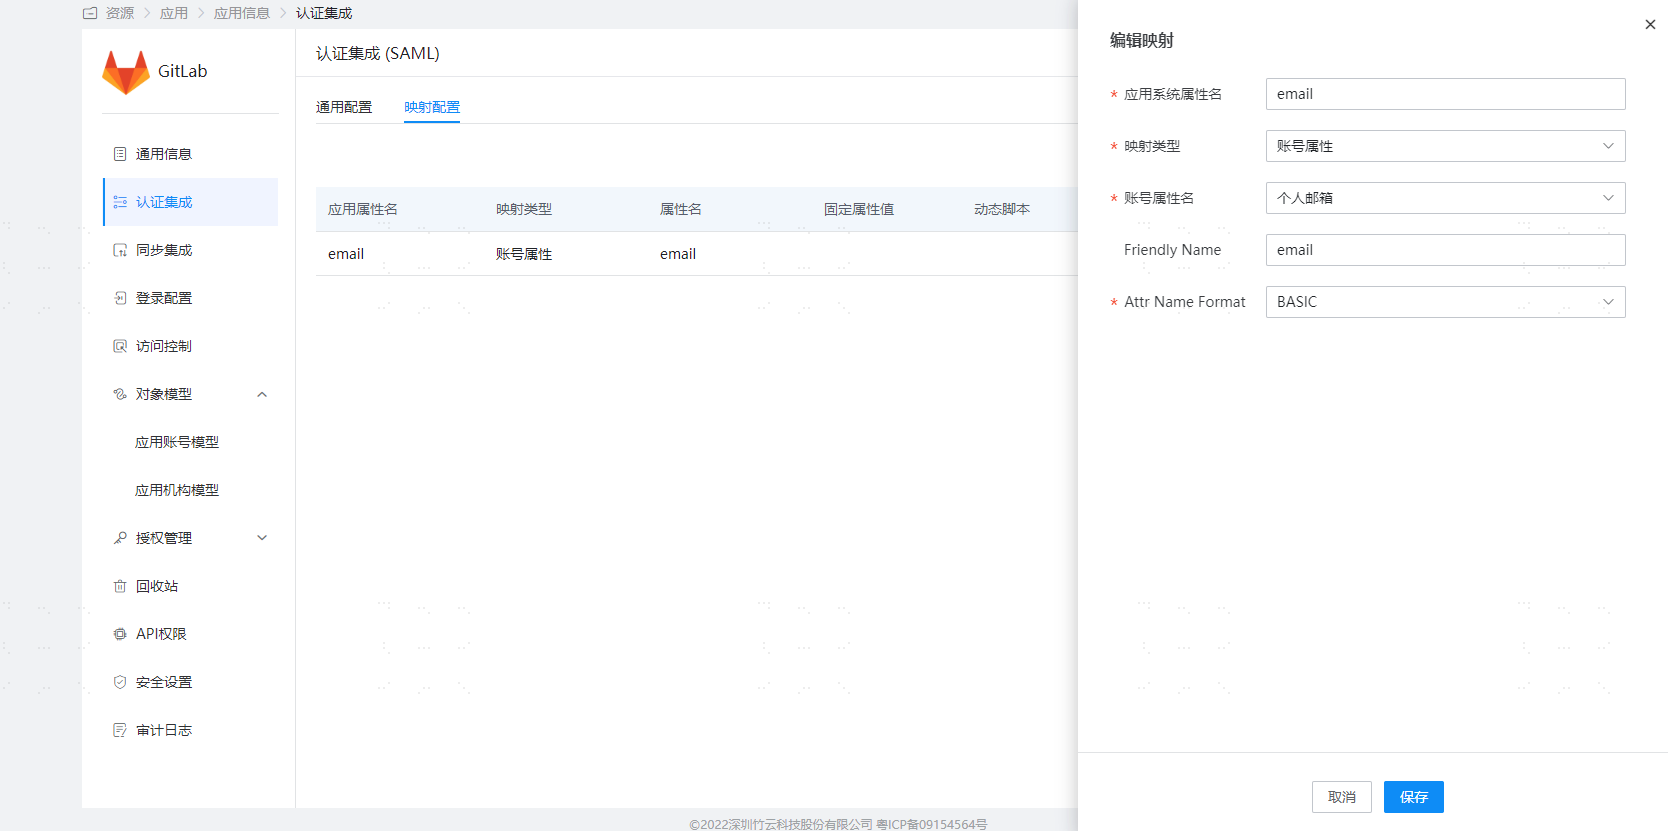
4配置属性映射,添加 email 属性
- 进入应用详情-授权管理-应用账号,点击添加账号按钮,选择授权用户。
登录验证
GitLab与竹云IDaaS集成后有2种访问方式,分别为:
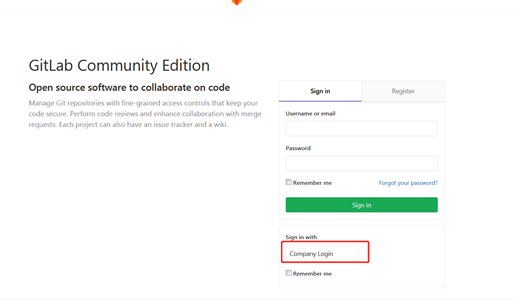
通过GitLab登录页发起:
用户在竹云IDaaS 用户中心点击GitLab图标登录: