GitLab Single Sign-On
Overview
This document is based on the GitLab-ce version and introduces the single sign-on configuration process between GitLab and BambooCloud IDaaS.
GitLab Docker version installation reference
GitLab official SAML configuration reference
Authentication Configuration
GitLab Configuration
View the version number.
shellcat /opt/gitlab/embedded/service/gitlab-rails/VERSIONModify the GitLab configuration file,
{gitlab default installation path}/etc/gitlab/gitlab.rb.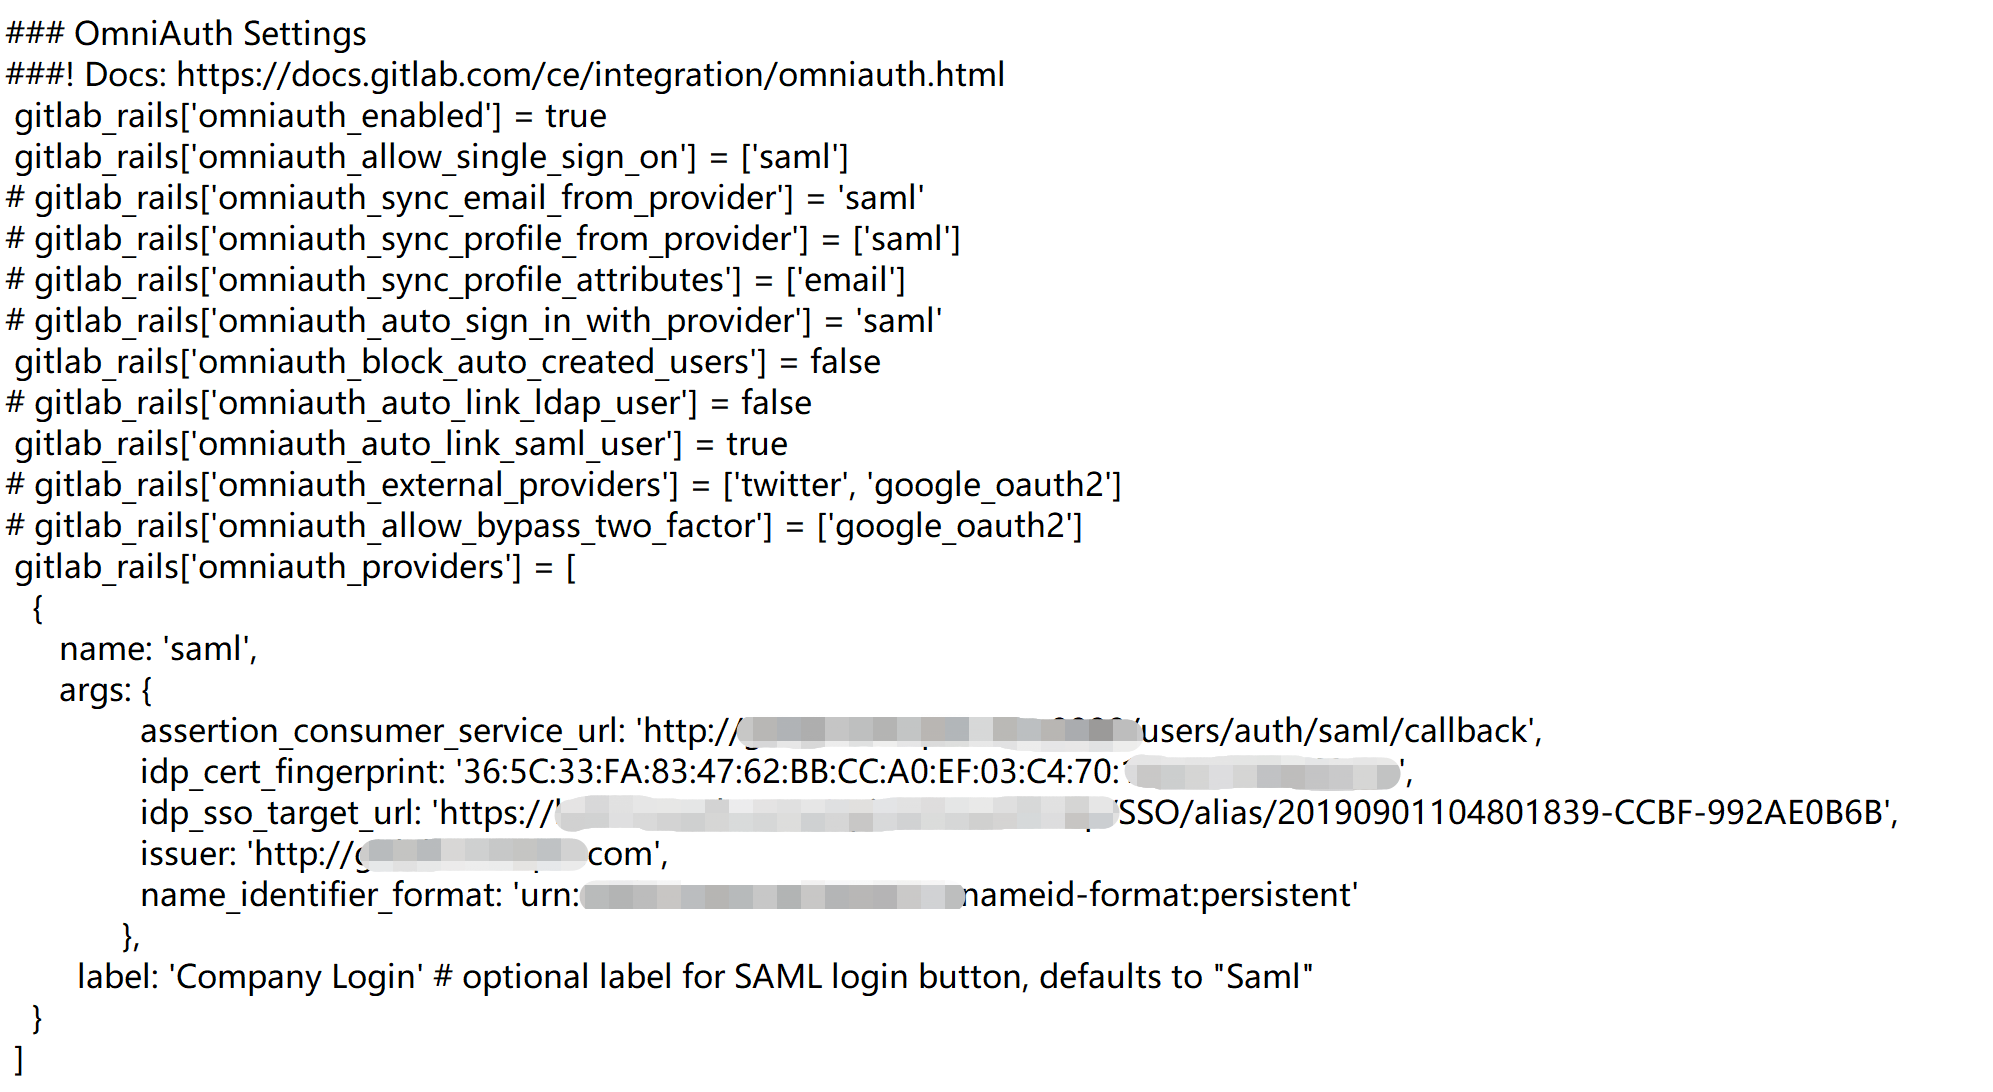
Parameter configuration is as follows:
Parameter Description gitlab_rails['omniauth_enabled'] = trueAllow users to register using SAML without manually creating accounts gitlab_rails['omniauth_allow_single_sign_on'] = ['saml']Allow SAML single sign-on gitlab_rails['omniauth_auto_link_saml_user'] = trueAllow automatically associating SAML users with existing GitLab users assertion_consumer_service_urlAssertion consumer service URL, example: https://{gitlab.example.com:8880}/users/auth/saml/callback. Replace{}with the actual address.idp_cert_fingerprintCertificate fingerprint, see below for how to obtain idp_sso_target_urlIDP SSO URL. Obtain it in BambooCloud IDaaS Enterprise Center - Settings > Service Configuration > IDP Configuration. Example: https://{your-domain}/api/v1/saml2/idp/ssoissuerGitLab domain address, example: https://gitlab.example.comname_identifier_formatSupported NameID format, default 'urn:oasis:names:tc:SAML:2.0:nameid-format:persistent'labelThe name of the SSO button label on the GitLab login interface TIP
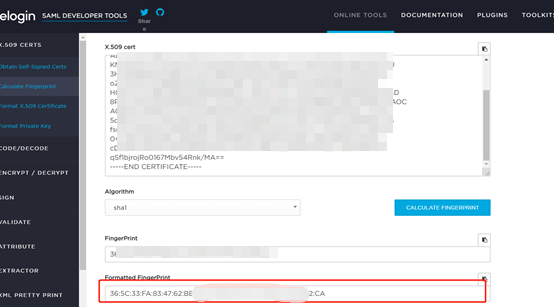
How to obtain the IDP certificate fingerprint (choose one):
Copy the IDP certificate content from BambooCloud IDaaS Enterprise Center - Settings > Service Configuration > IDP Configuration, save it as an
idp.cerfile, and view the certificate file.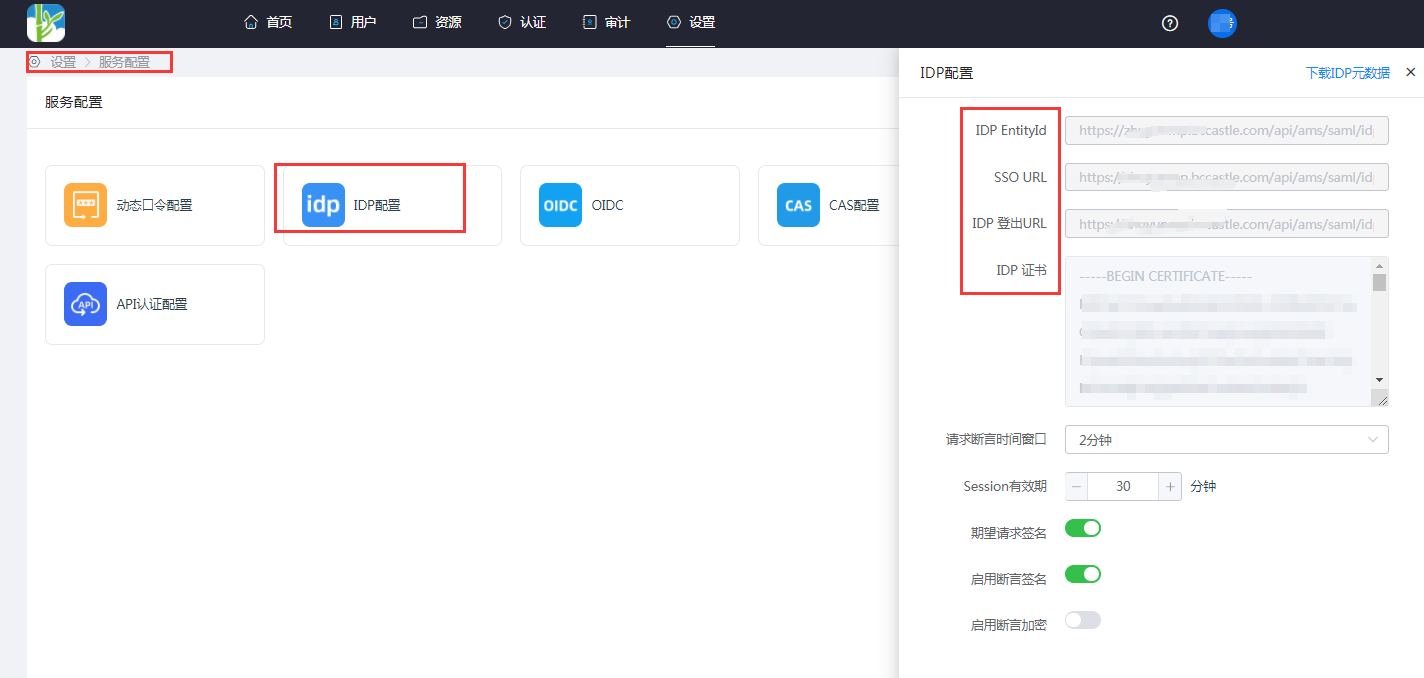
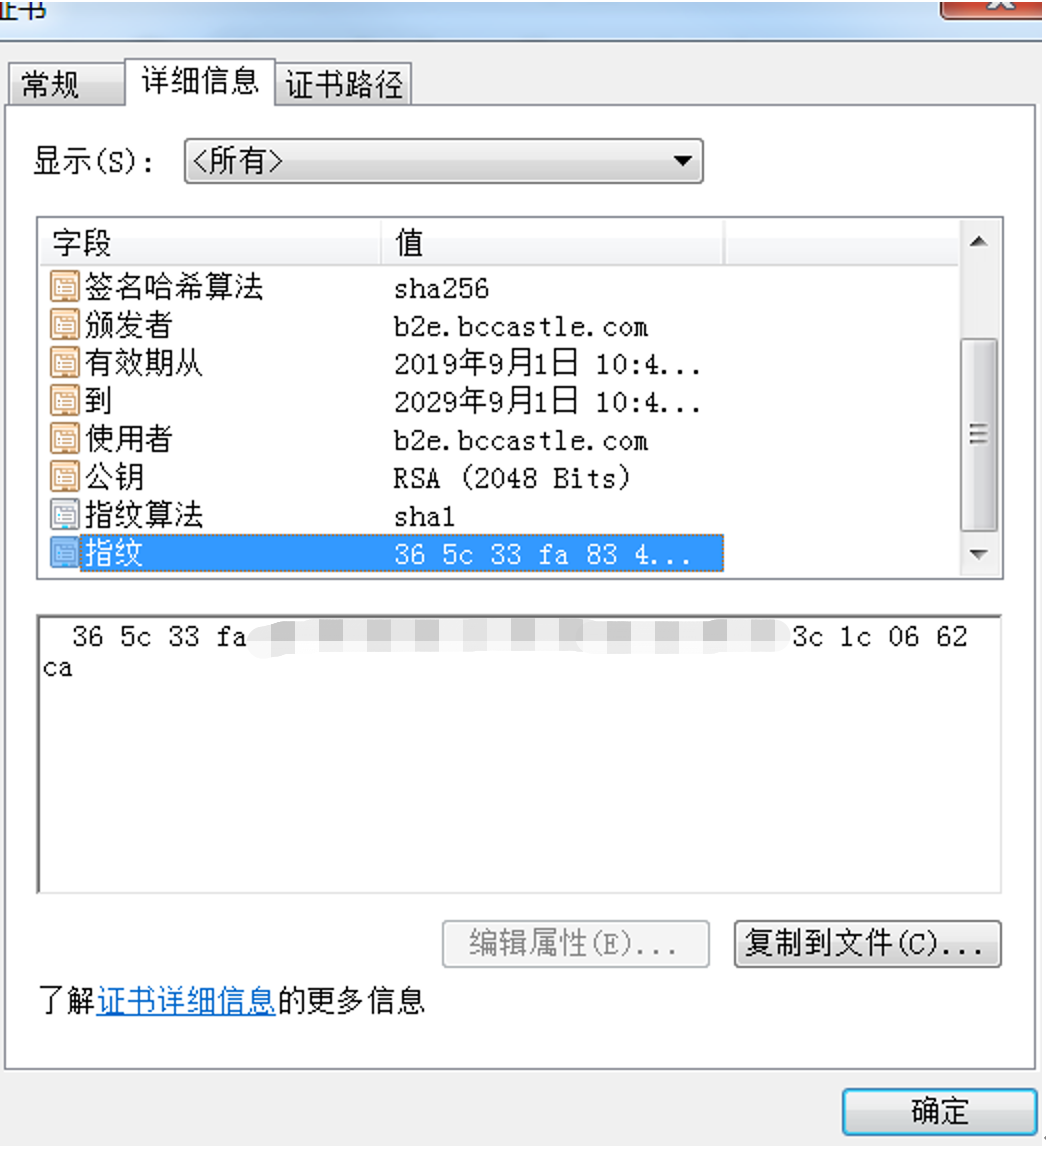
Copy the certificate content and calculate the certificate fingerprint through the online tool.
After modifying the configuration, restart GitLab.
# Stop GitLab service
gitlab-ctl stop

# Refresh GitLab configuration
gitlab-ctl reconfigure

# Start GitLab service
gitlab-ctl start
BambooCloud IDaaS Configuration
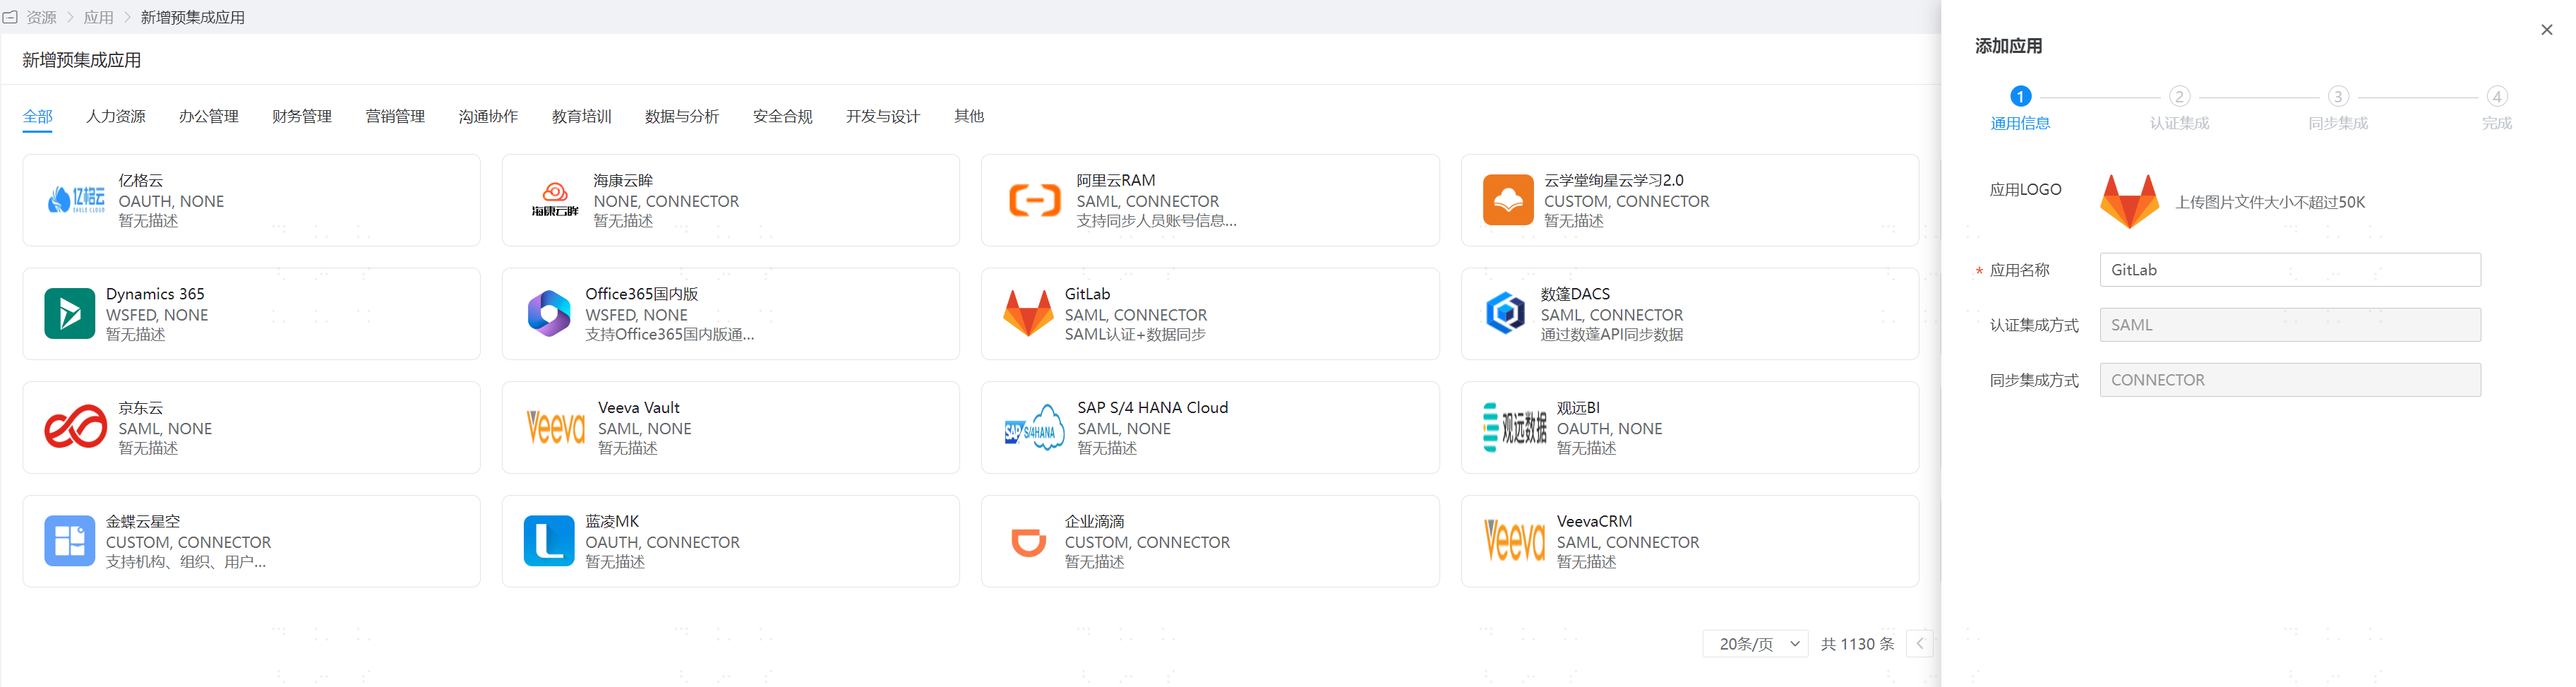
Log in to the Enterprise Center and add the GitLab pre-integrated application.
Configure authentication parameters. You can directly import the metadata file. The metadata file download address is the GitLab service address, such as
https://{gitlab.example.com:8880}/users/auth/saml/metadata.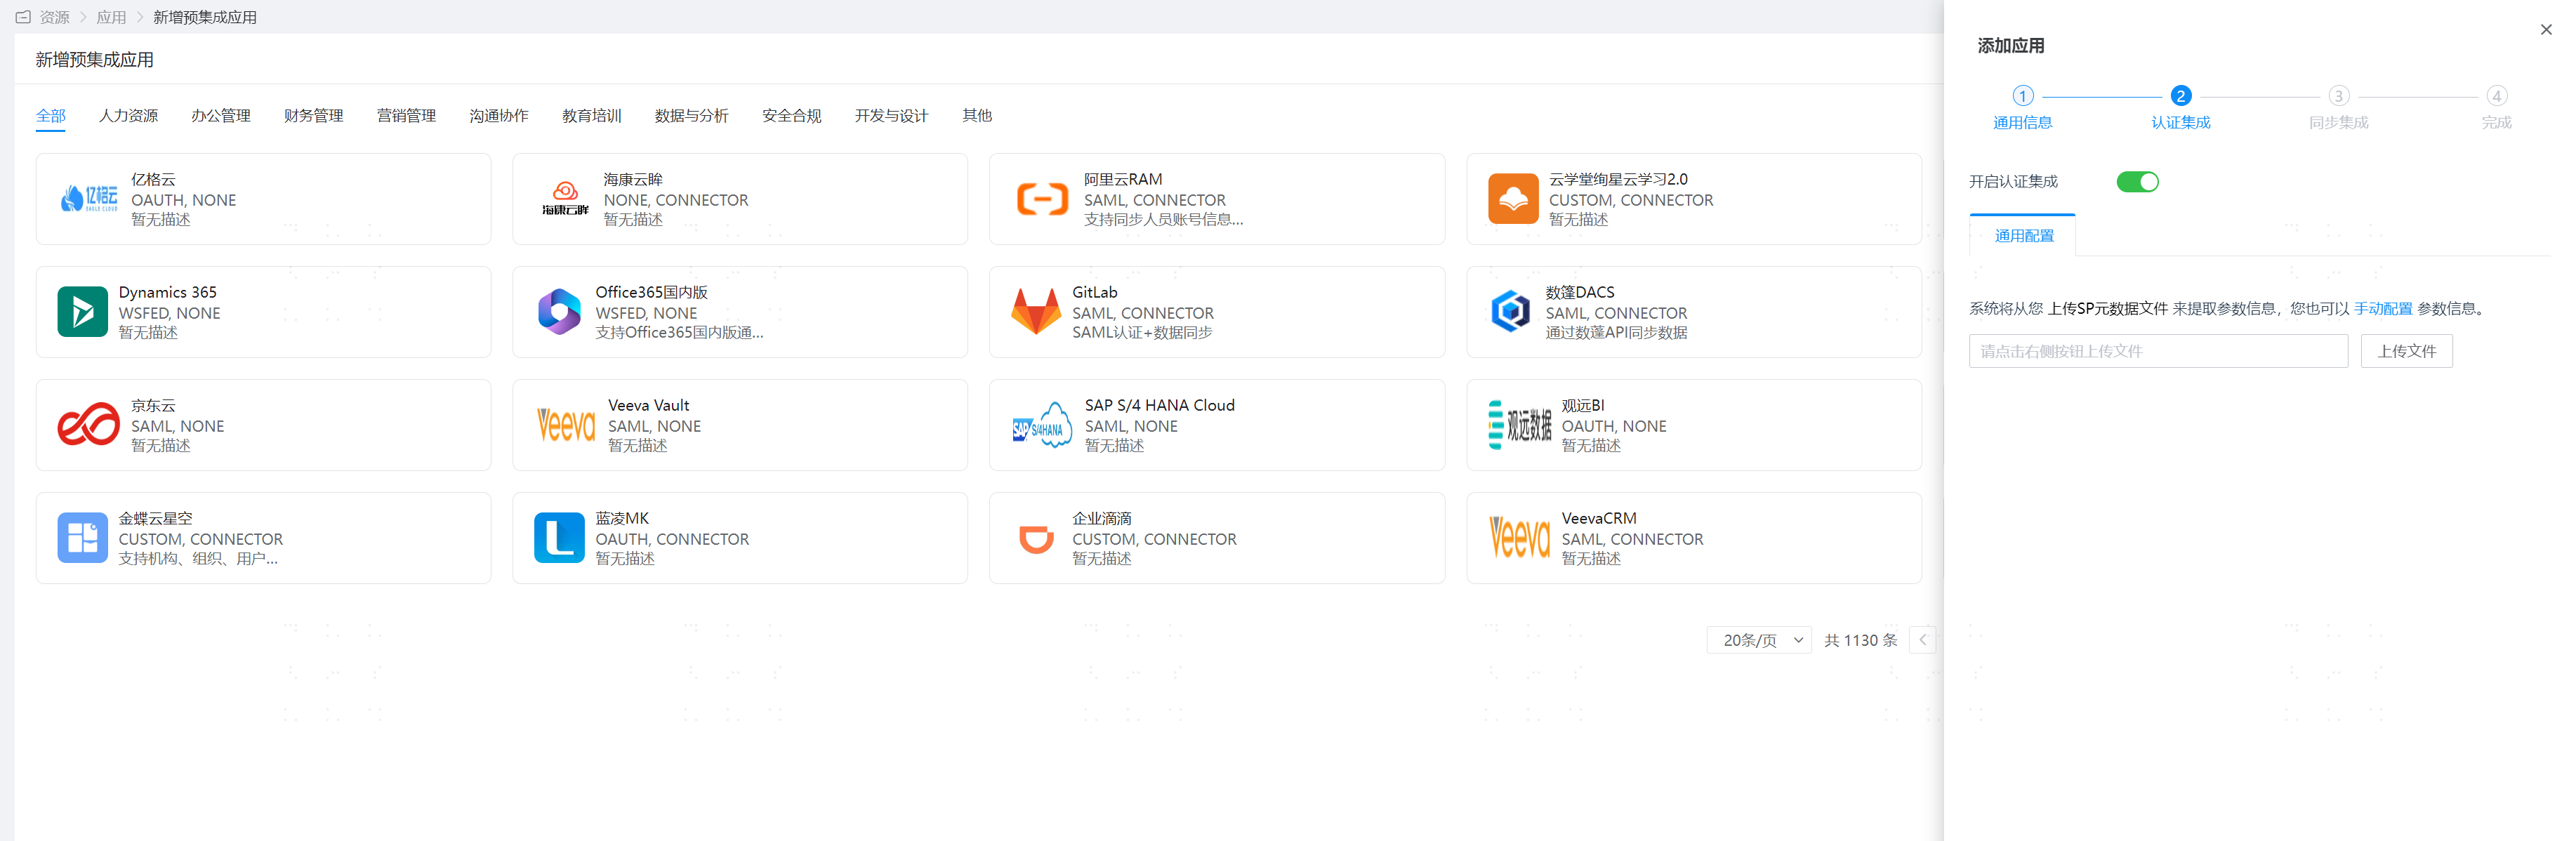
Enter the application details and configure authentication integration.
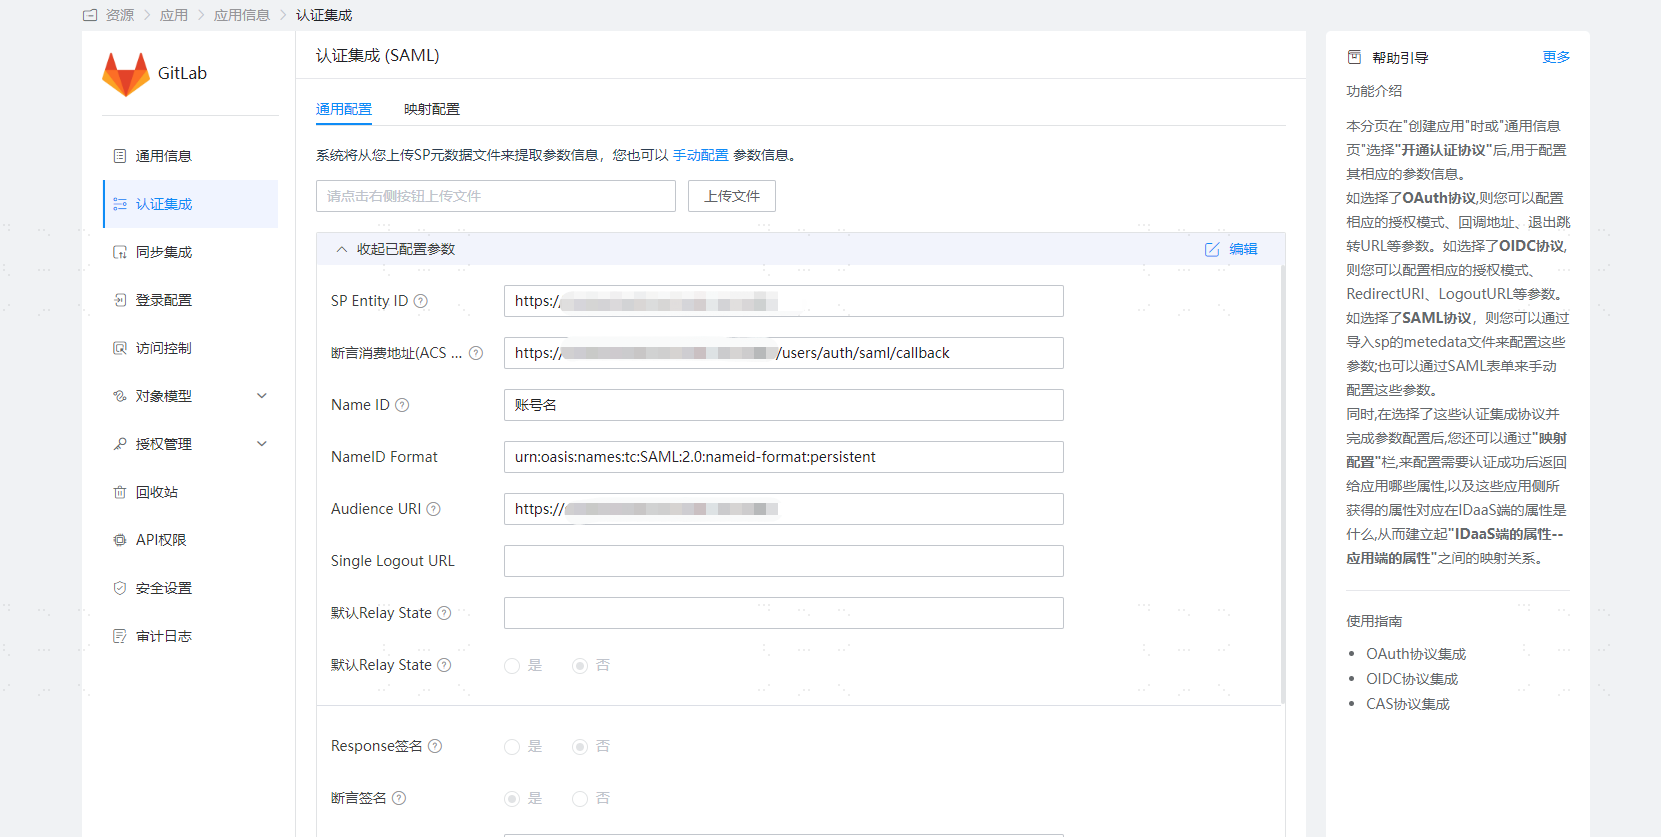
Parameter Parameter Description SP Entity ID The issuerparameter in thegitlab.rbfileAssertion Consumer Service URL (ACS URL) The assertion_consumer_service_urlin thegitlab.rbfileNameID Account Name NameID Format The name_identifier_formatin thegitlab.rbfileAudience URI The issuerparameter in thegitlab.rbfileConfigure attribute mapping and add the
emailattribute.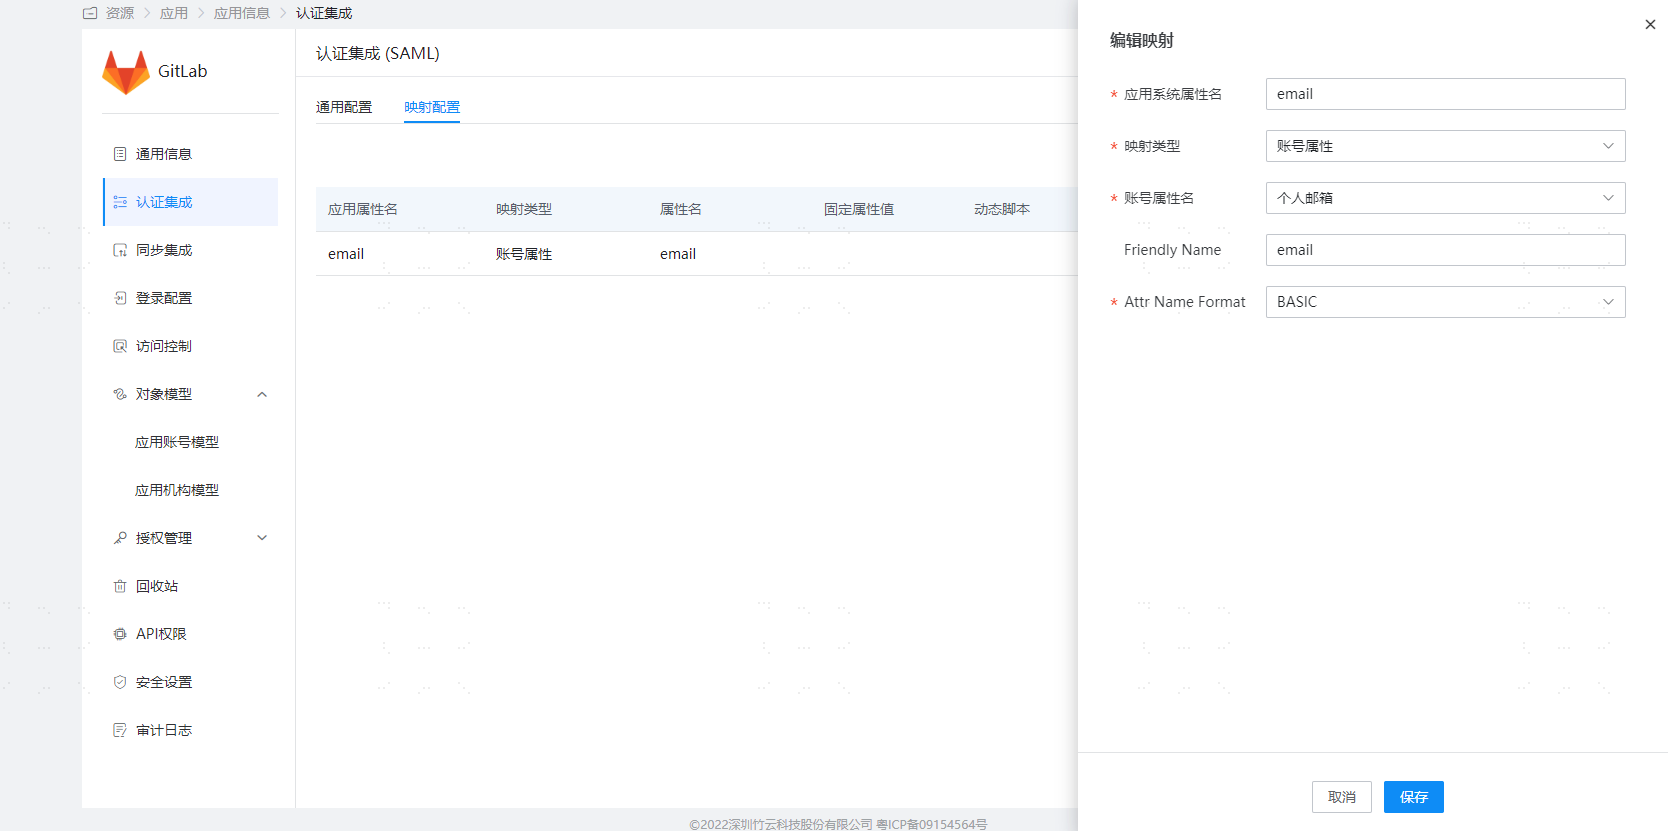
Enter the application details, Authorization Management > Application Account, click the Add Account button, and select the authorized user.
Login Verification
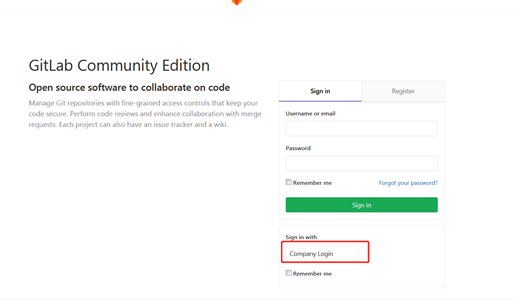
After integrating GitLab with BambooCloud IDaaS, there are two access methods:
Initiated from the GitLab login page:
Users click the GitLab icon in the BambooCloud IDaaS User Center to log in: