Dynamics 365 (On-Premises) Single Sign-On
Overview
This article describes how Dynamics 365 uses the WS-Federation protocol to configure single sign-on with BambooCloud IDaaS. This document is based on the local Microsoft Dynamics 2016 version.
Authentication Configuration
Add Dynamics 365 Application on BambooCloud IDaaS
Log in to the BambooCloud IDaaS Enterprise Center as an administrator, go to Resources > Applications > Add Pre-integrated Application, search for and add the Dynamics 365 application.
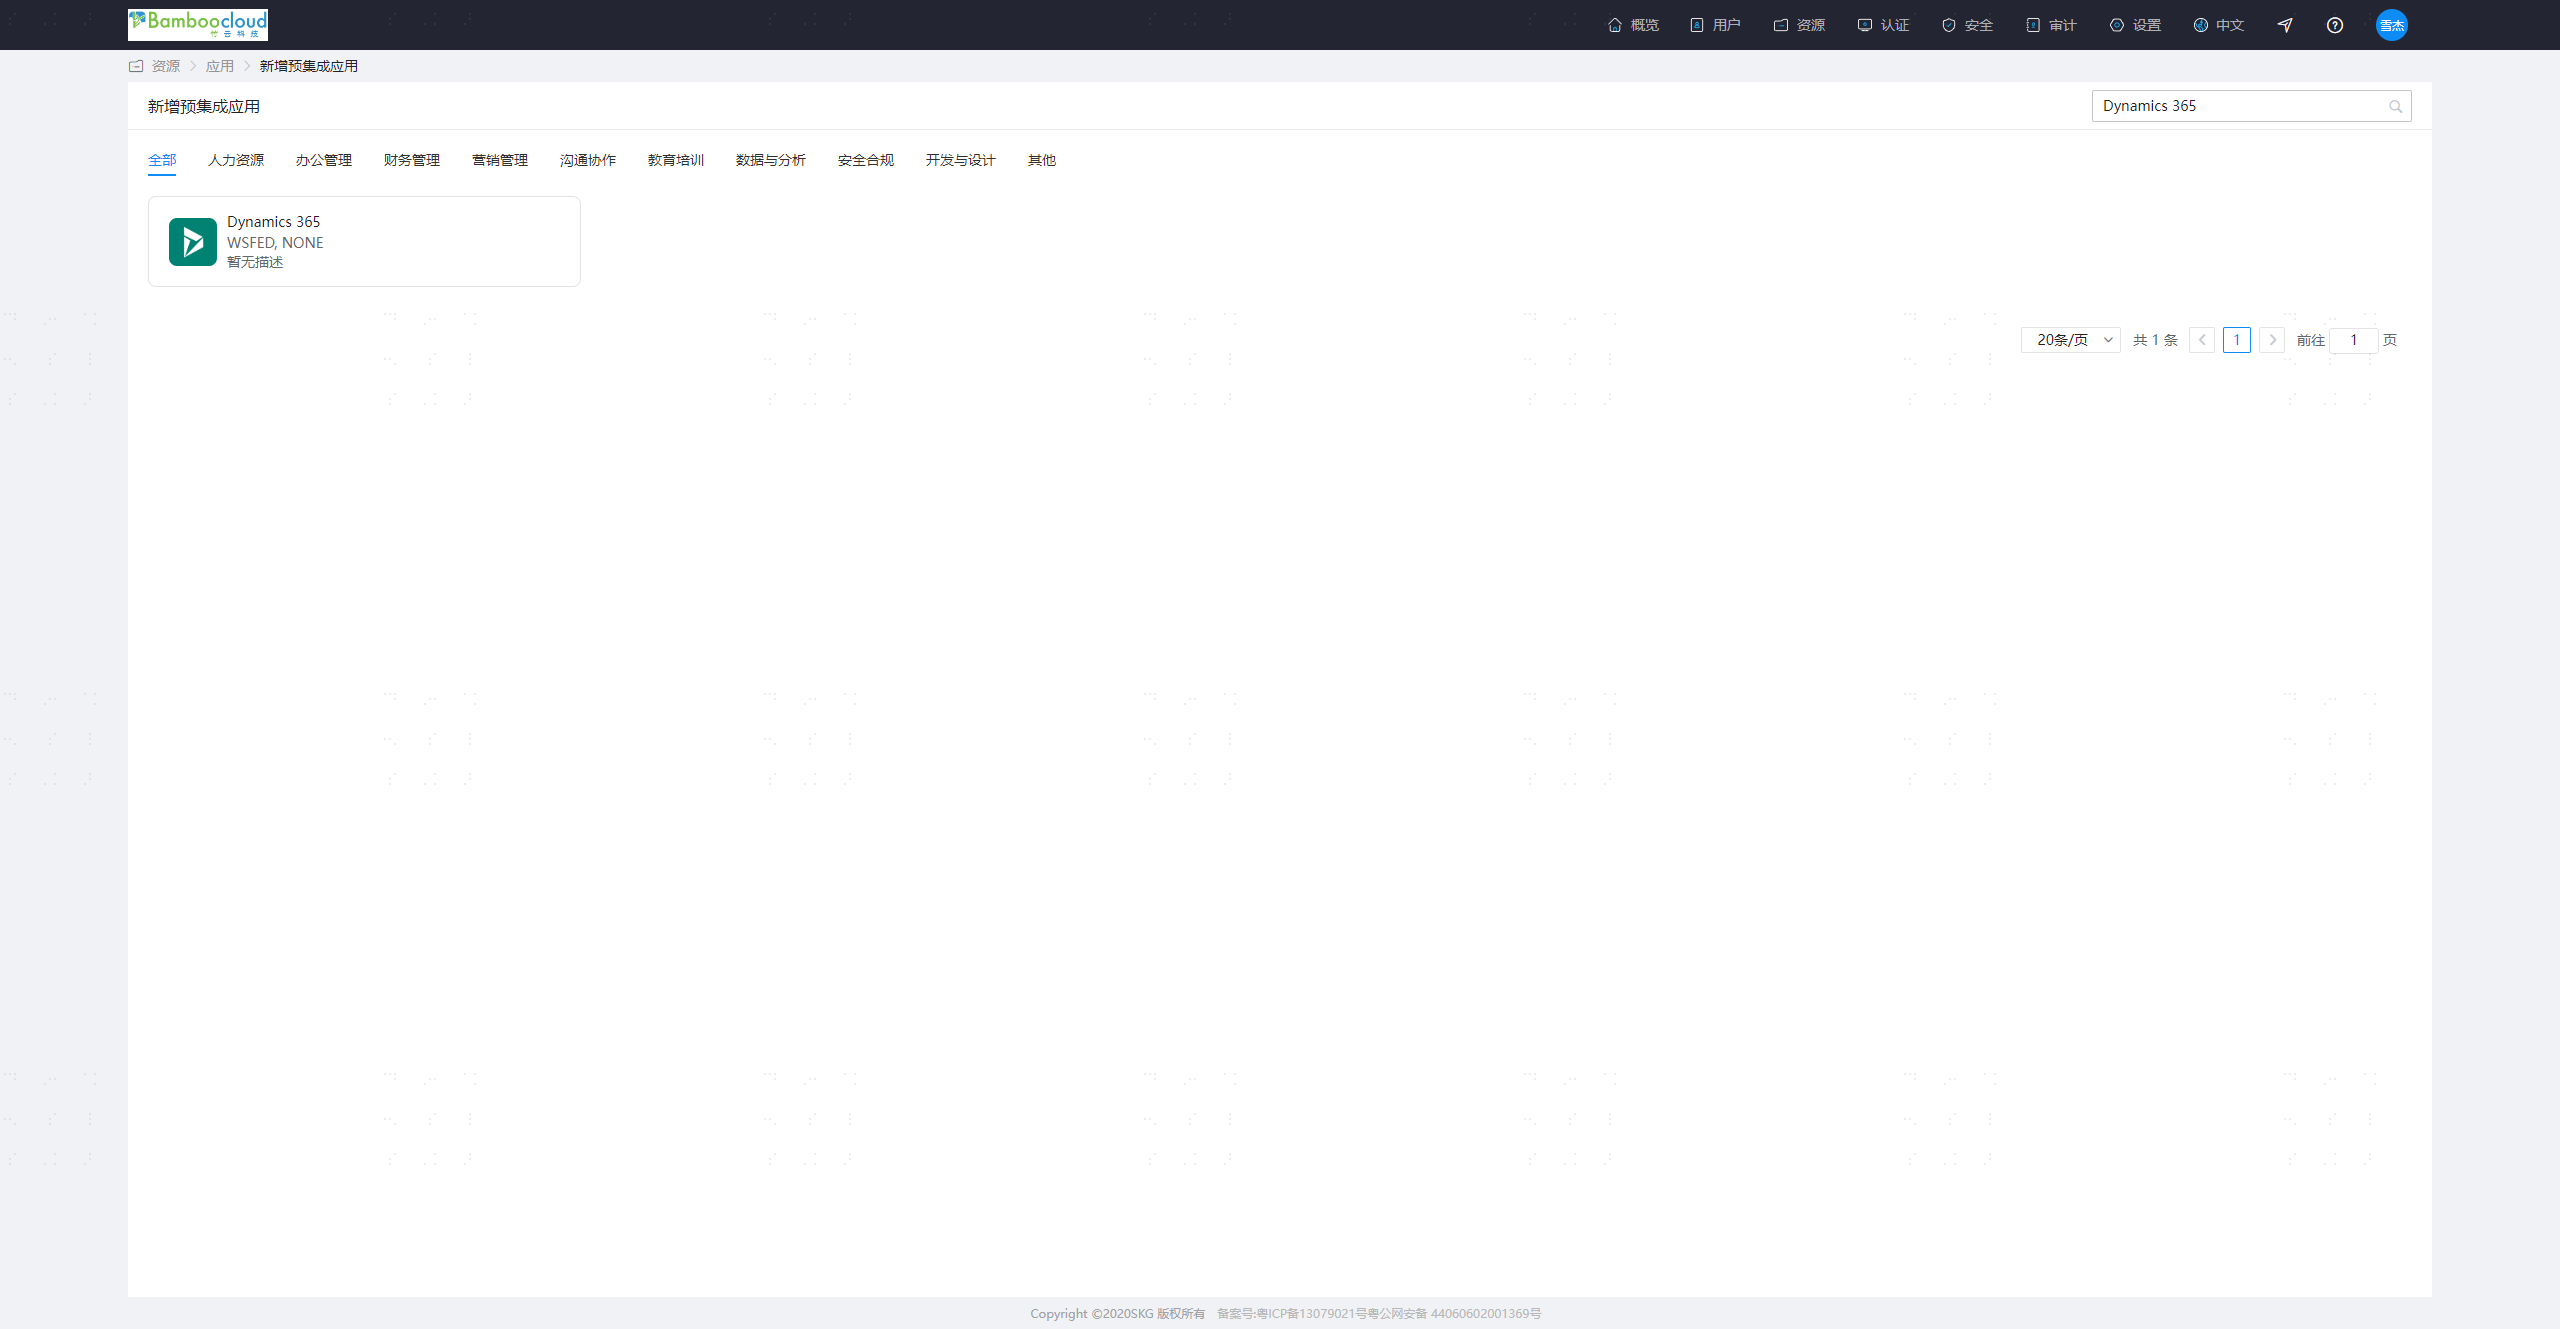
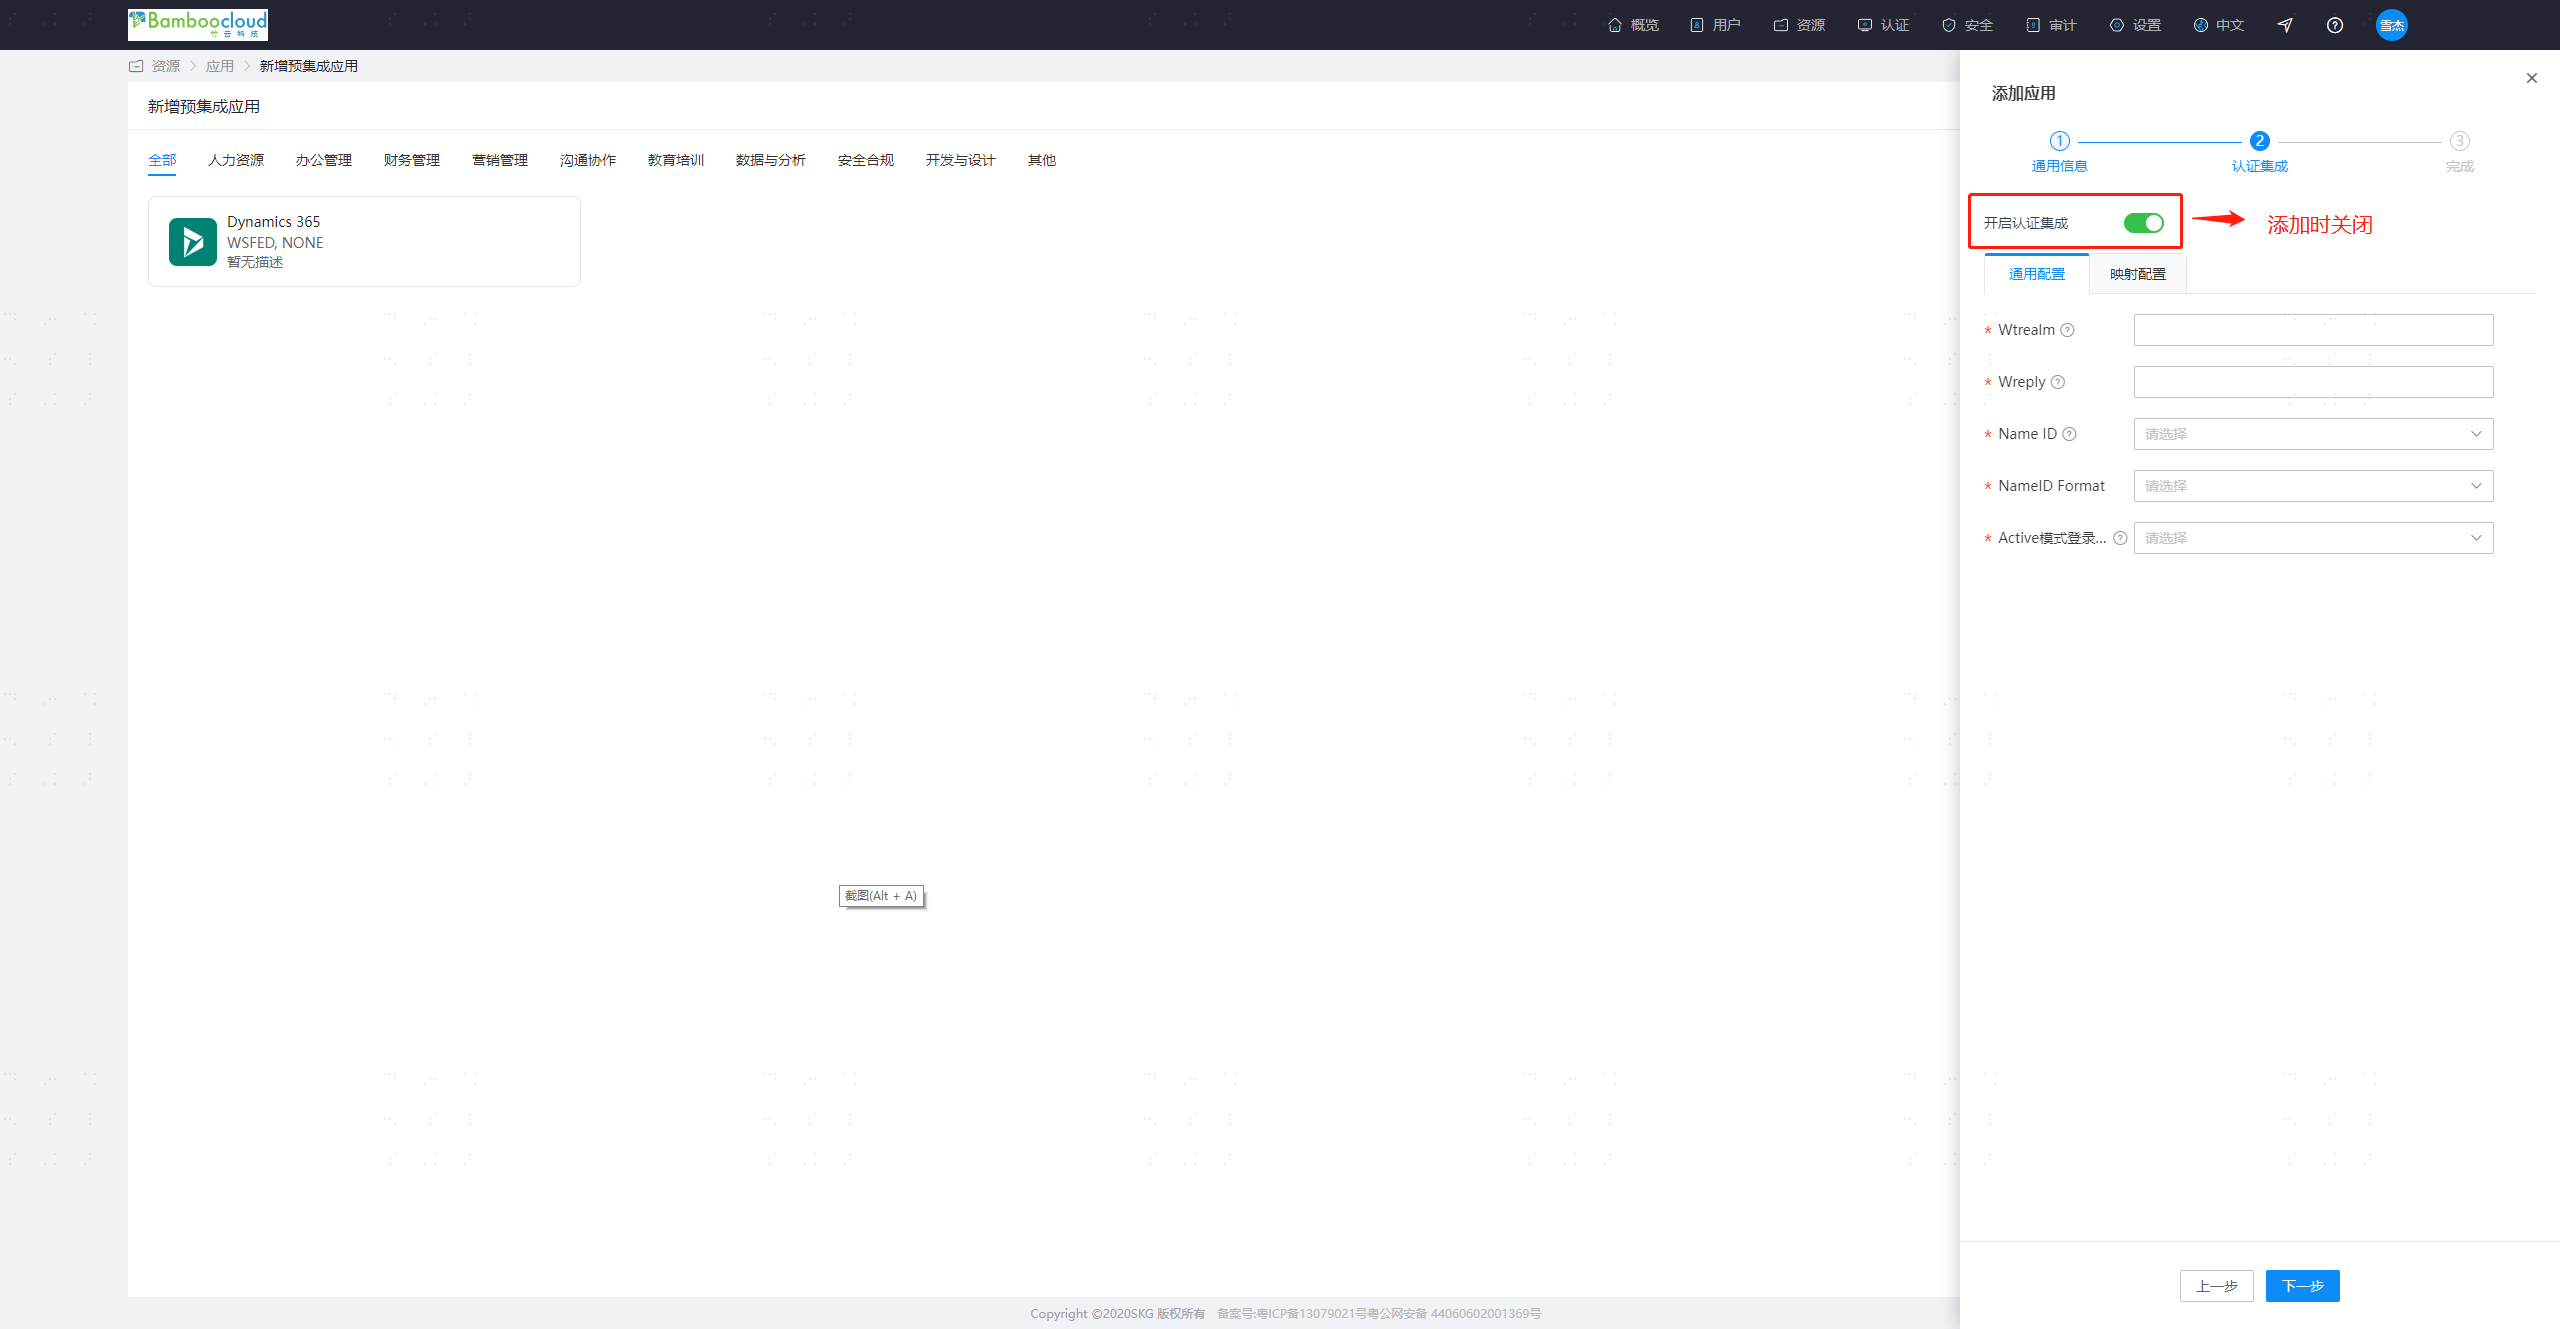
Configure application authentication parameters.
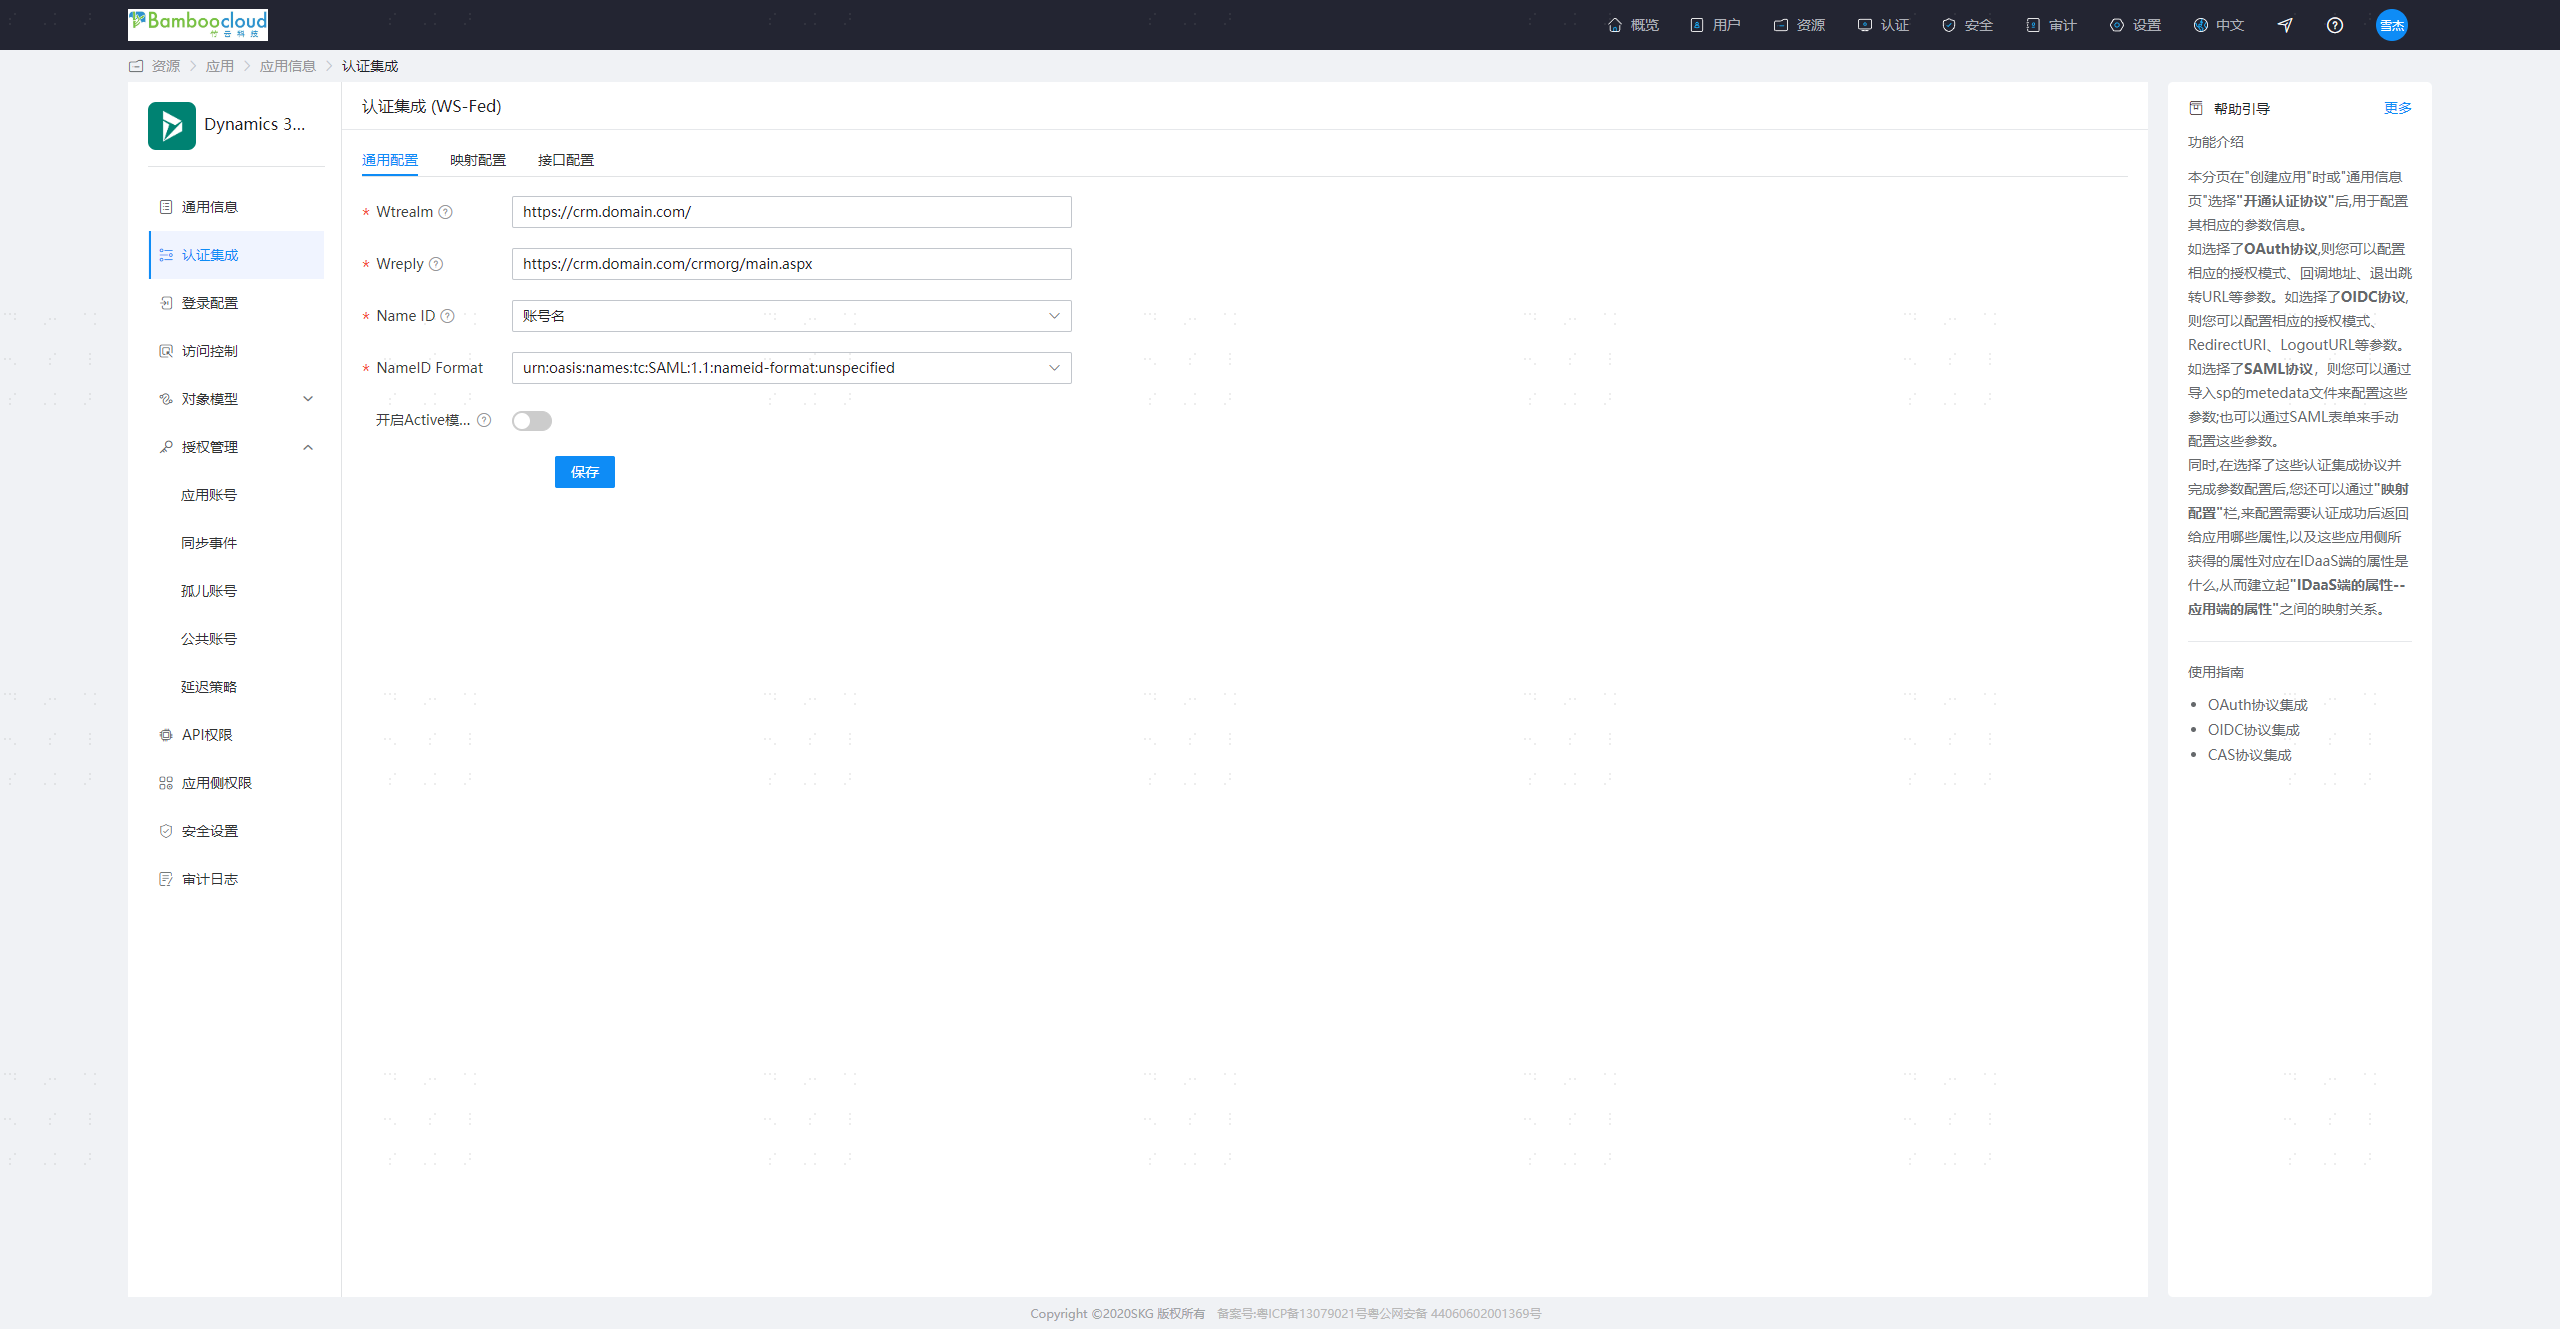
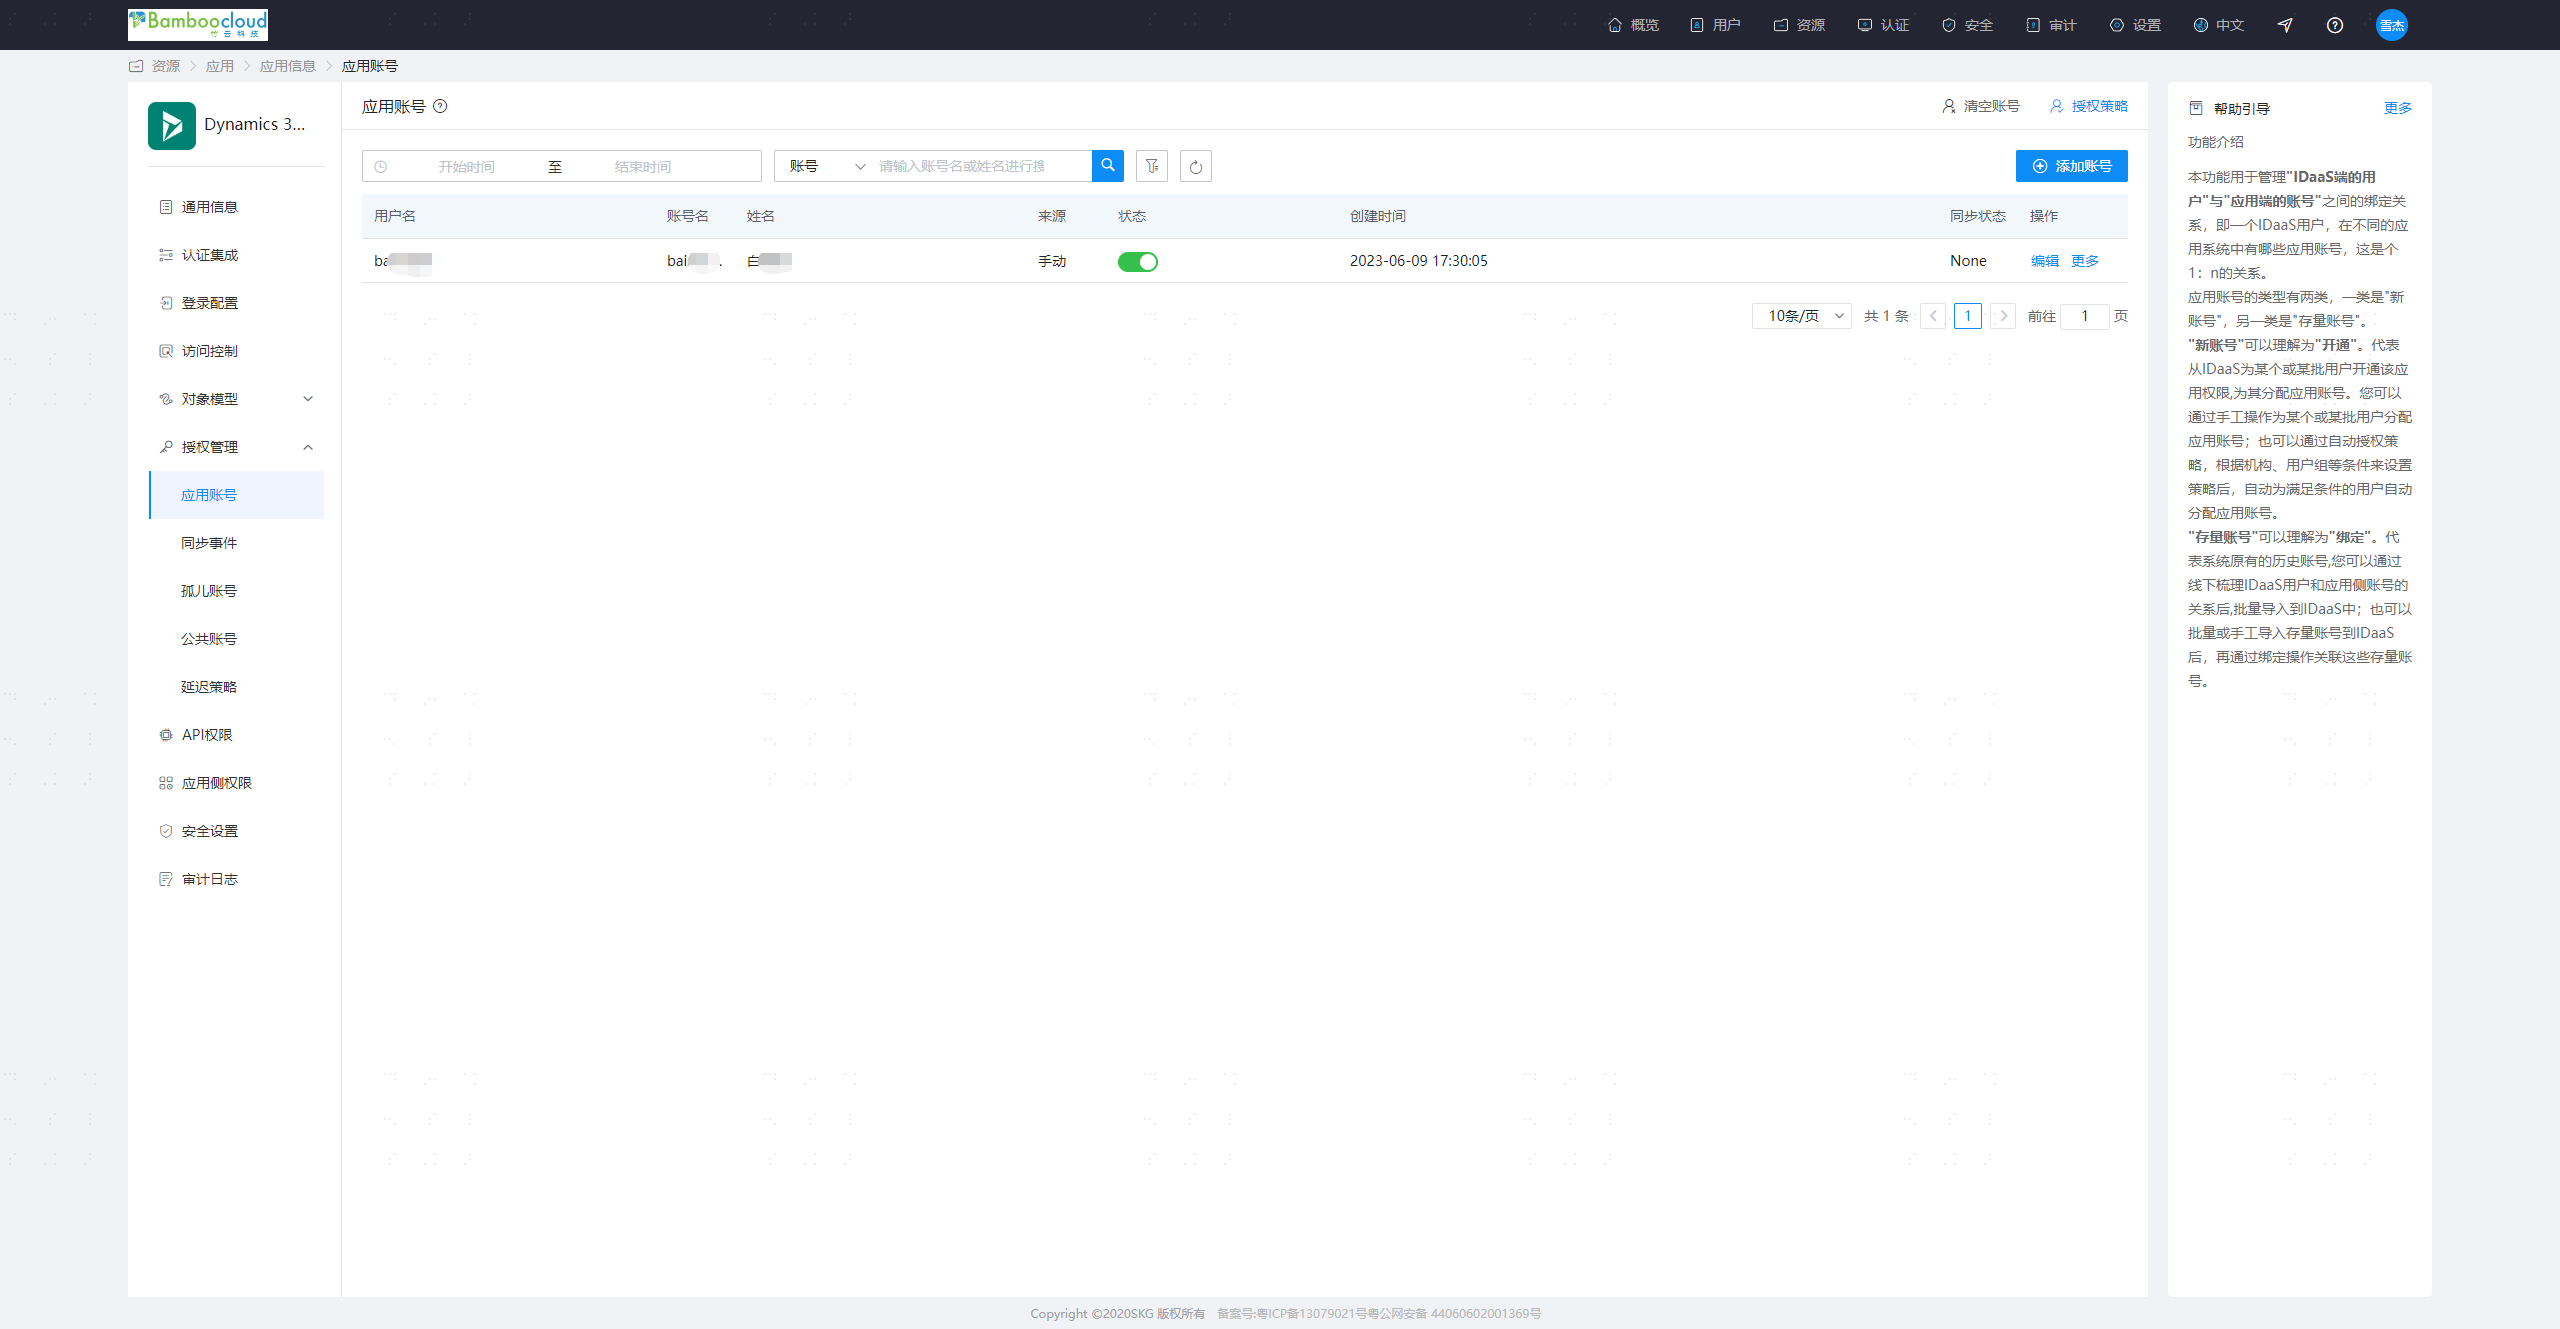
Parameter Description Wtrealm Microsoft Dynamics 365 service address, example: https://[Dynamics-system-domain]/Wreply Microsoft Dynamics 365 callback address, example: https://[Dynamics-system-domain]/[organization-name]/main.aspxName ID Default is Application Account NameID Format Select Default Enable Active Mode No Authorize users: Authorization Management > Application Account > Add Account. The account name should be consistent with the account name in Microsoft Dynamics 365.
Obtain BambooCloud IDaaS WS-Fed Service Configuration
- Log in to the BambooCloud IDaaS Enterprise Center as an administrator, go to Settings > Service Configuration > WS-Fed Configuration.
- Signing Certificate: WS-Fed service signing certificate
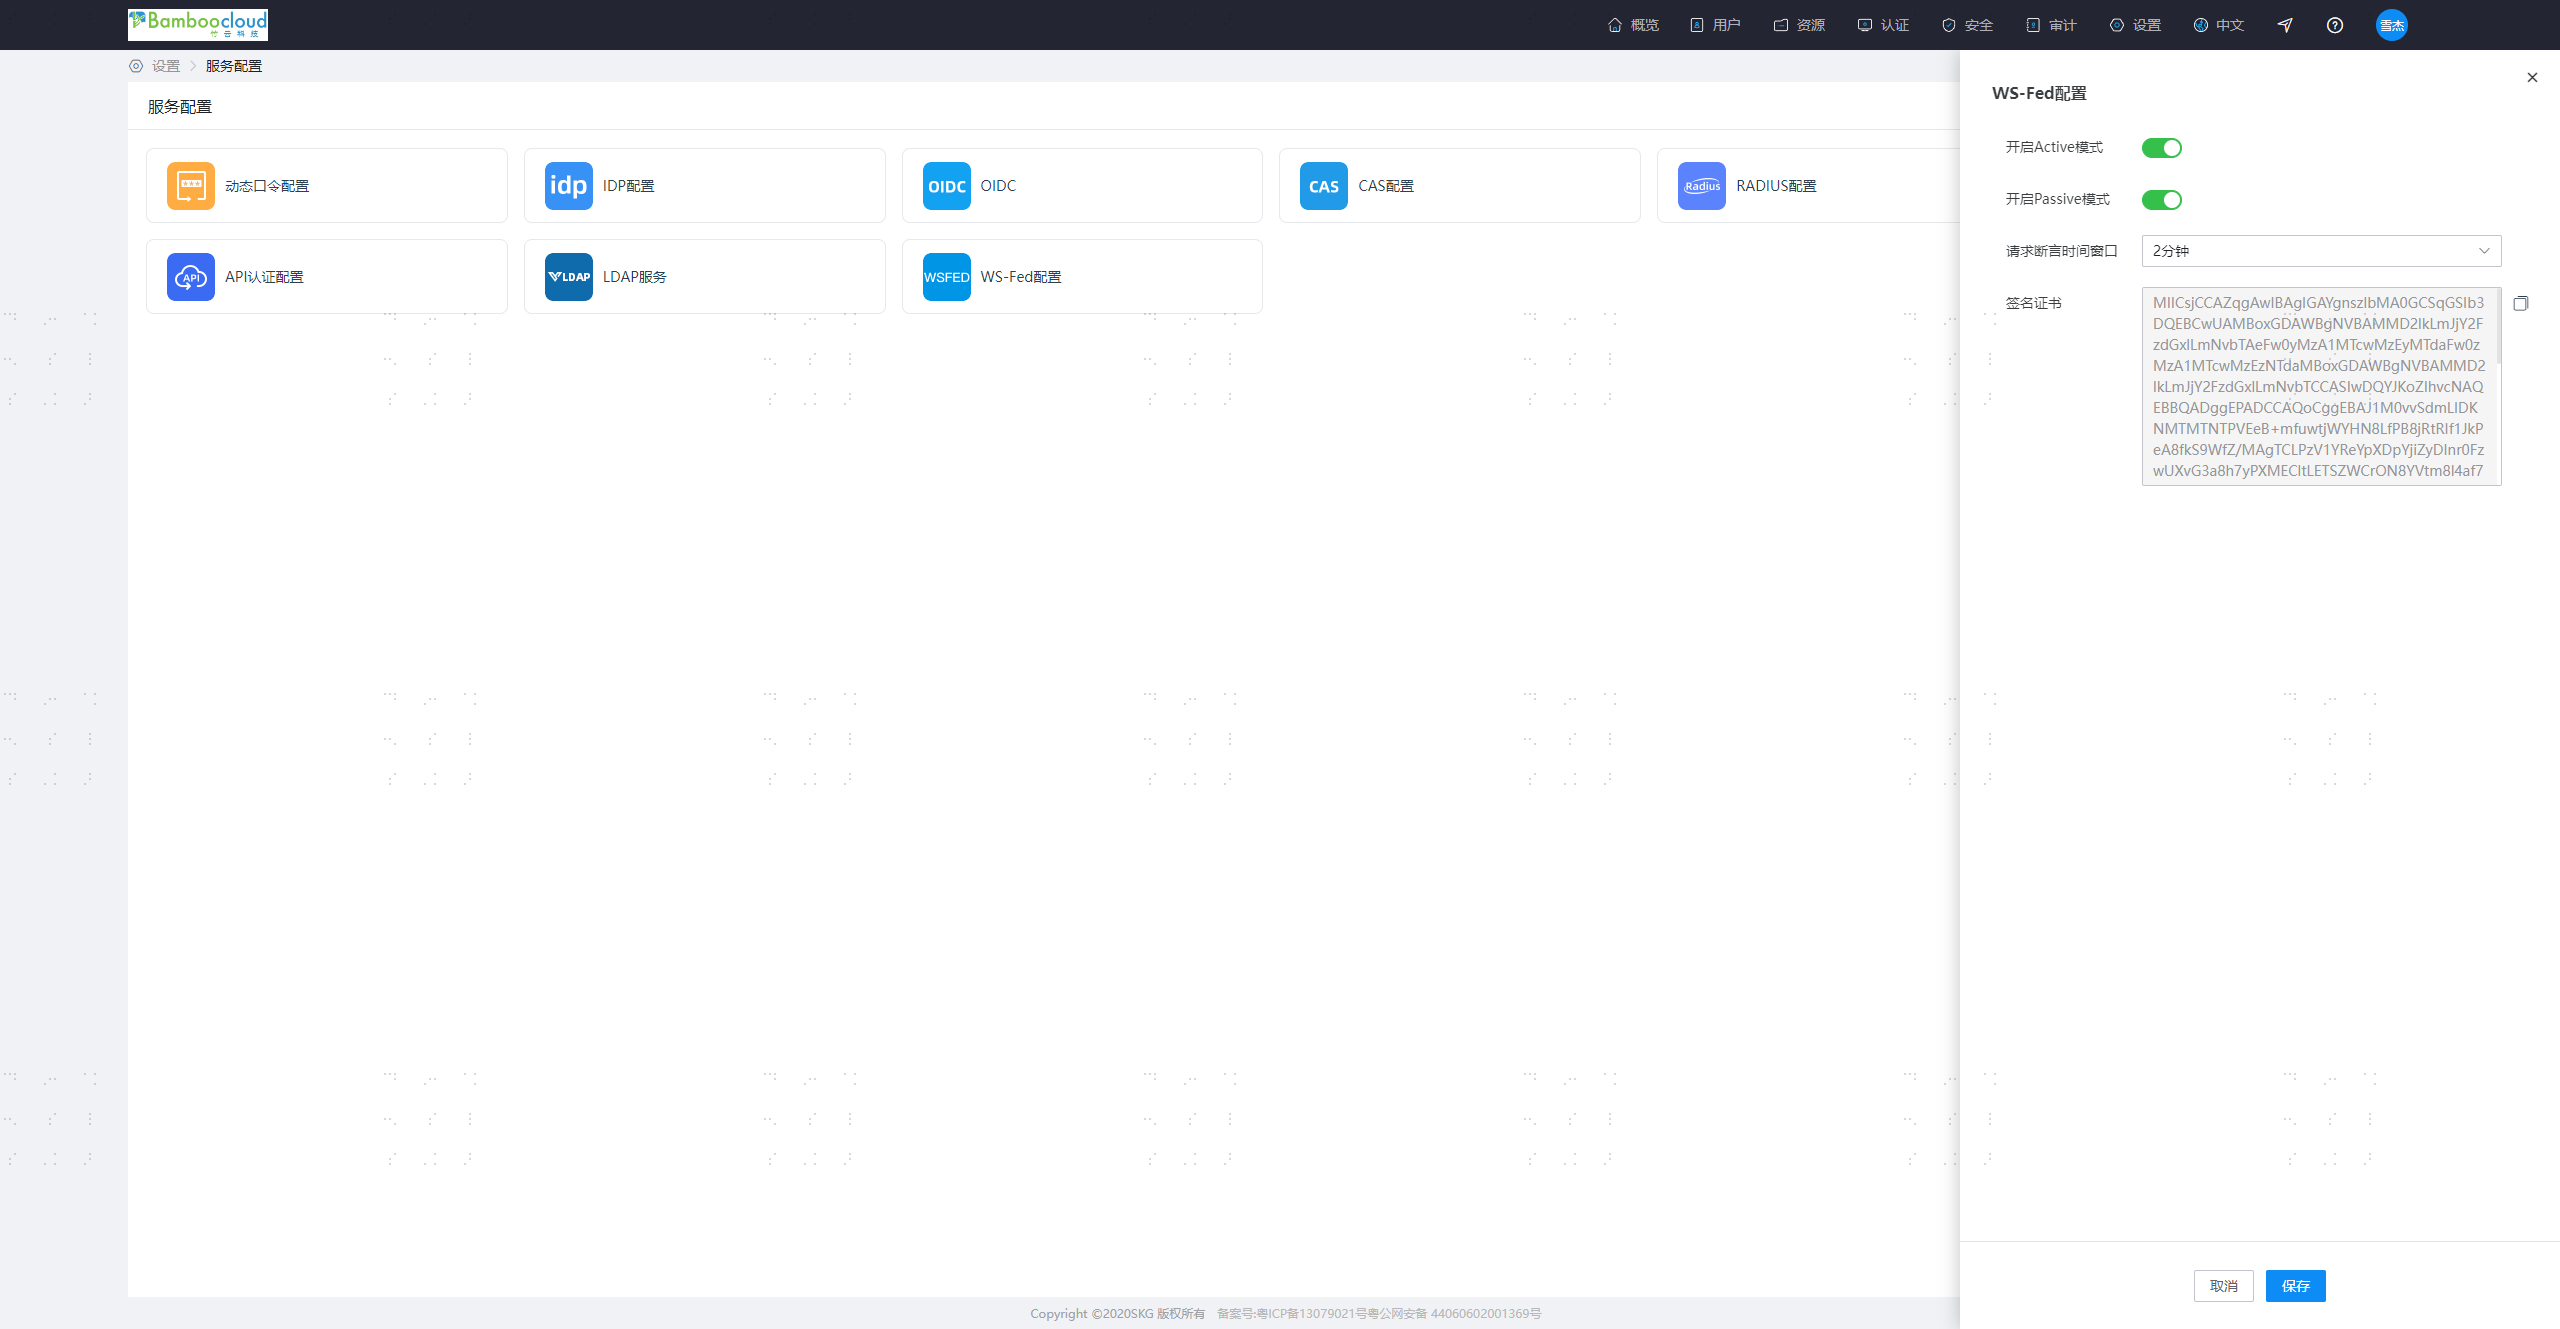
- Signing Certificate: WS-Fed service signing certificate
- Log in to the BambooCloud IDaaS Enterprise Center as an administrator, go to Resources > Applications > Dynamics 365 > Authentication Integration > Interface Configuration.
- Passive Uri: WS-Federation protocol authentication interface
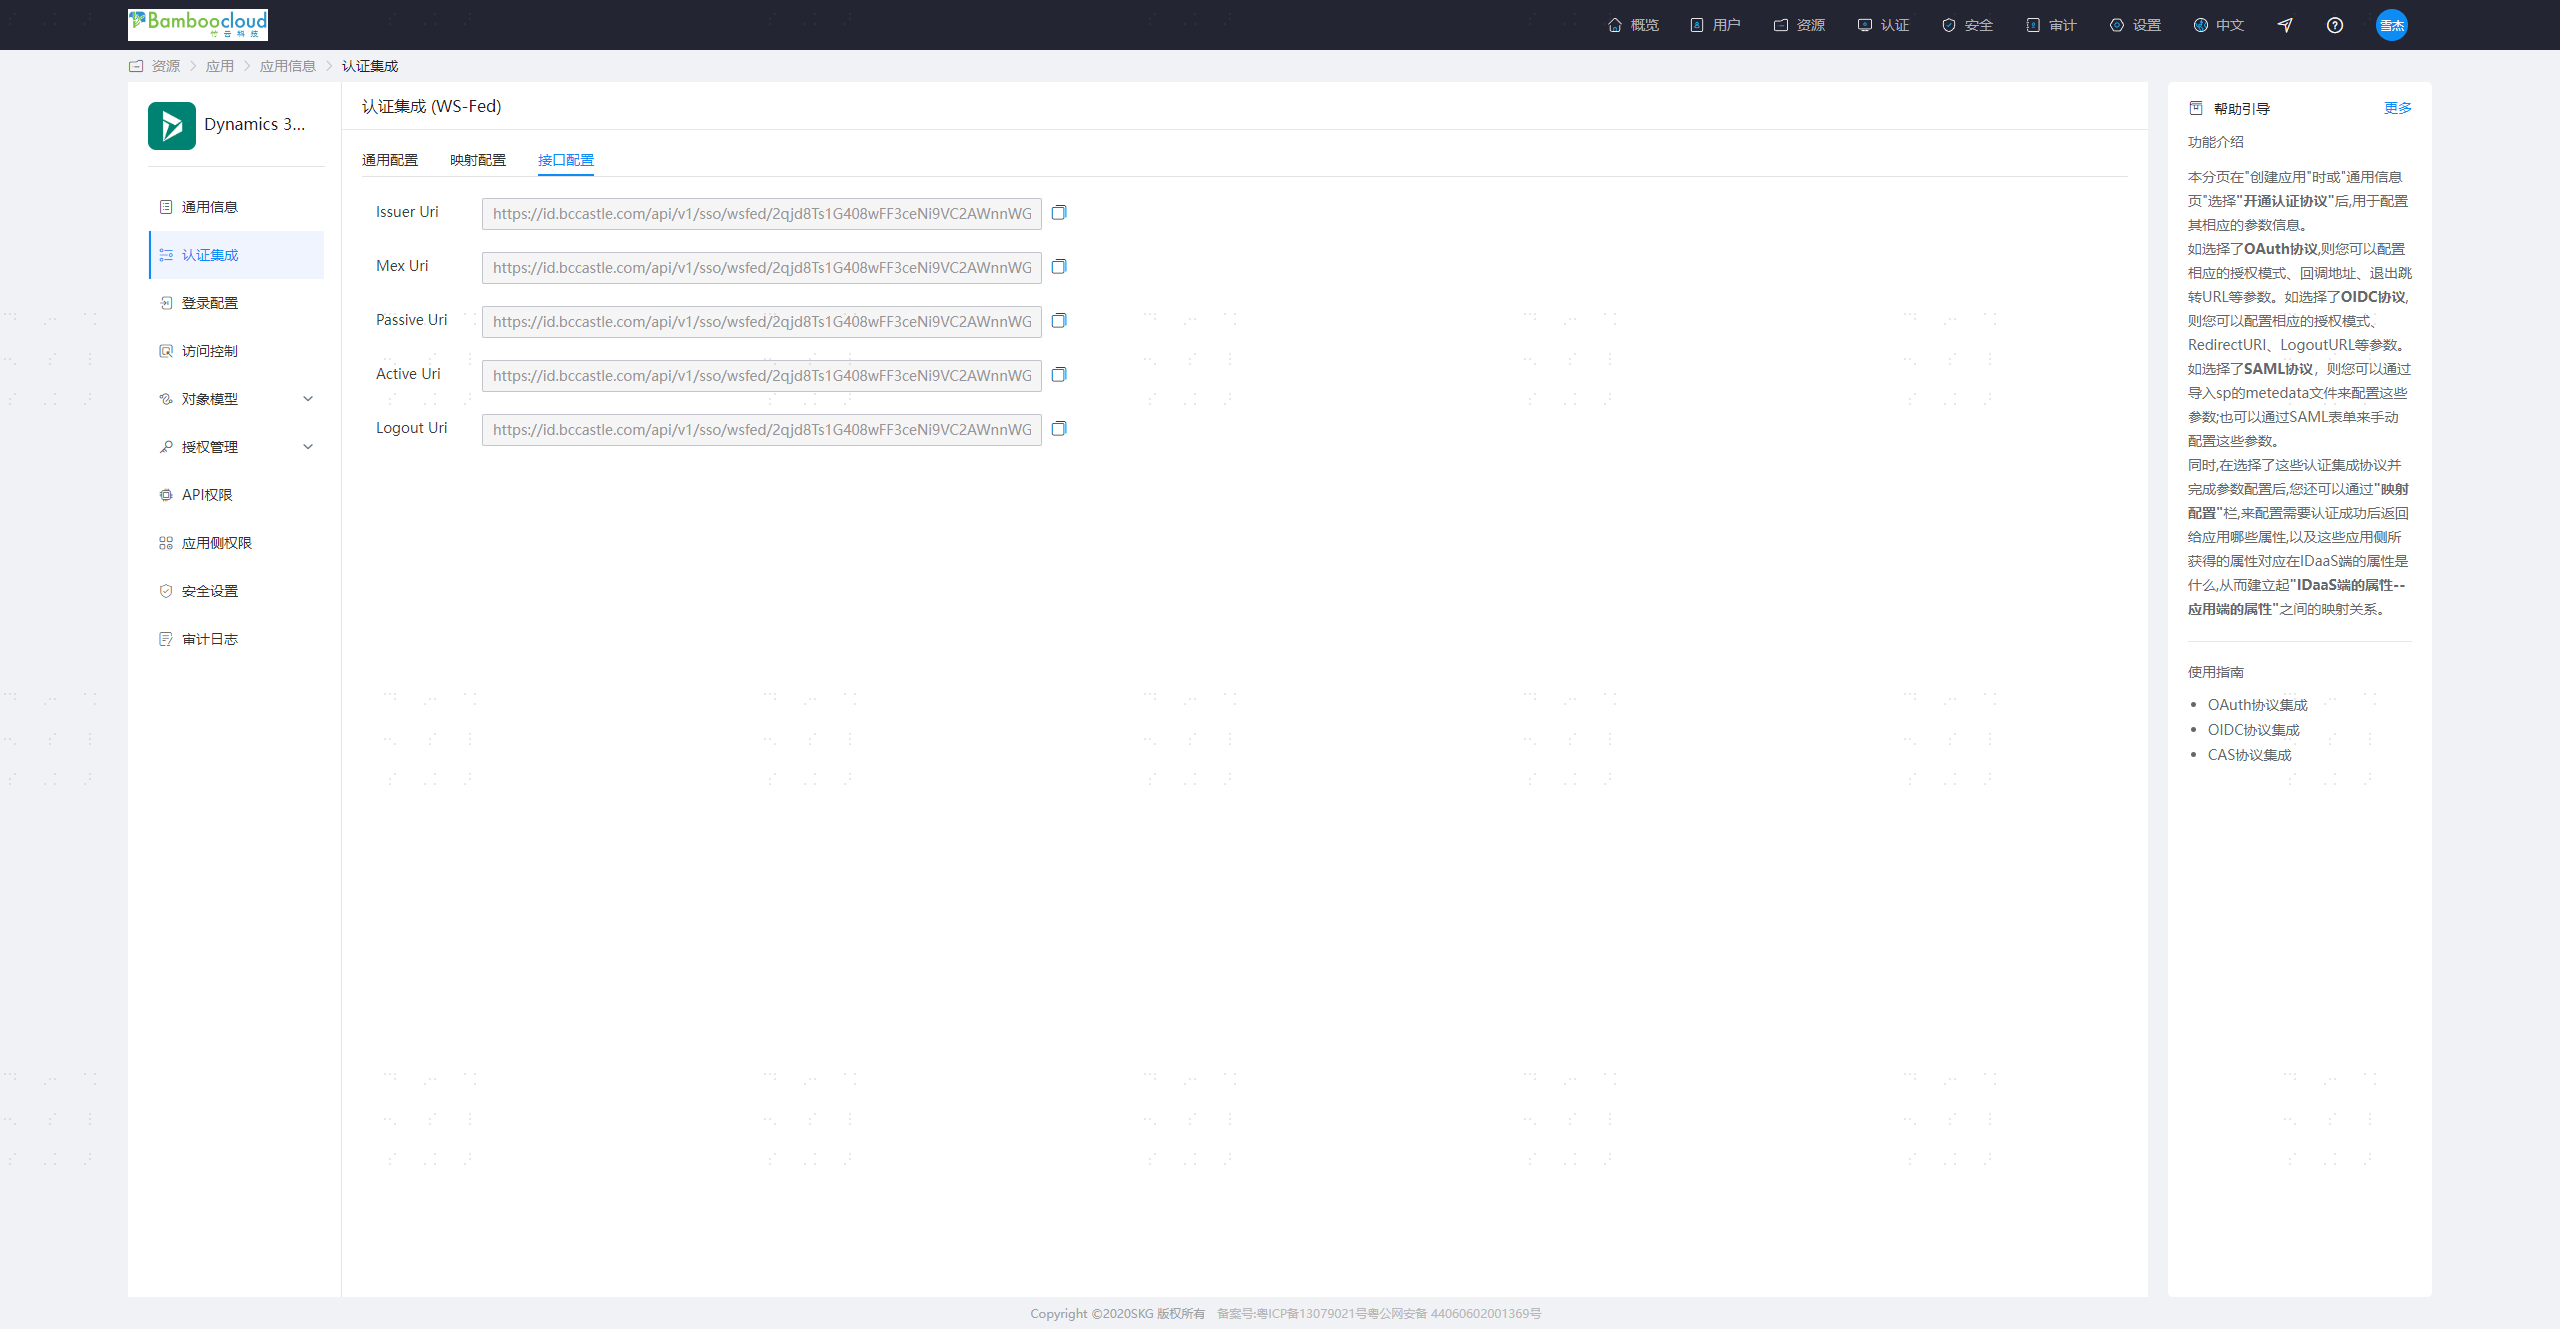
- Passive Uri: WS-Federation protocol authentication interface
- Download the federationmetadata.xml file and fill in the configurations obtained in the previous two steps into the XML file.
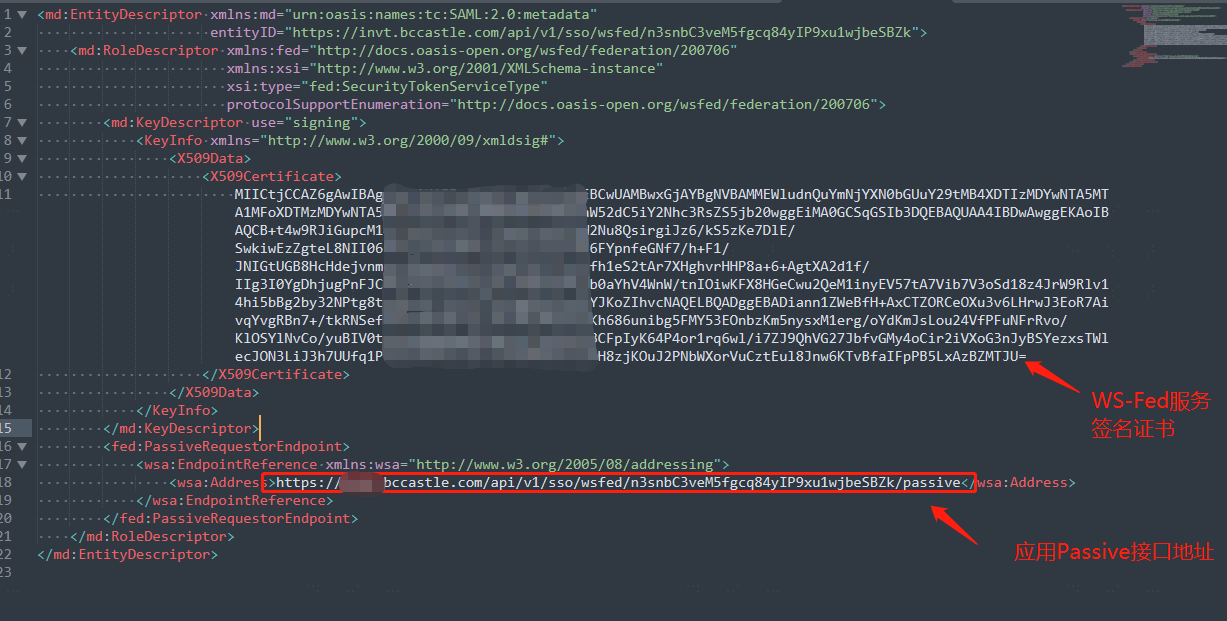
- Upload the file to the Microsoft Dynamics 365 server and save it to the C:\Program Files\Microsoft Dynamics CRM\CRMWeb directory.
Microsoft Dynamics 365 Configure SSO
Set Microsoft Dynamics 365 Server Binding to HTTPS and Configure Root Domain Web Address
On the Microsoft Dynamics 365 server, start Deployment Manager.
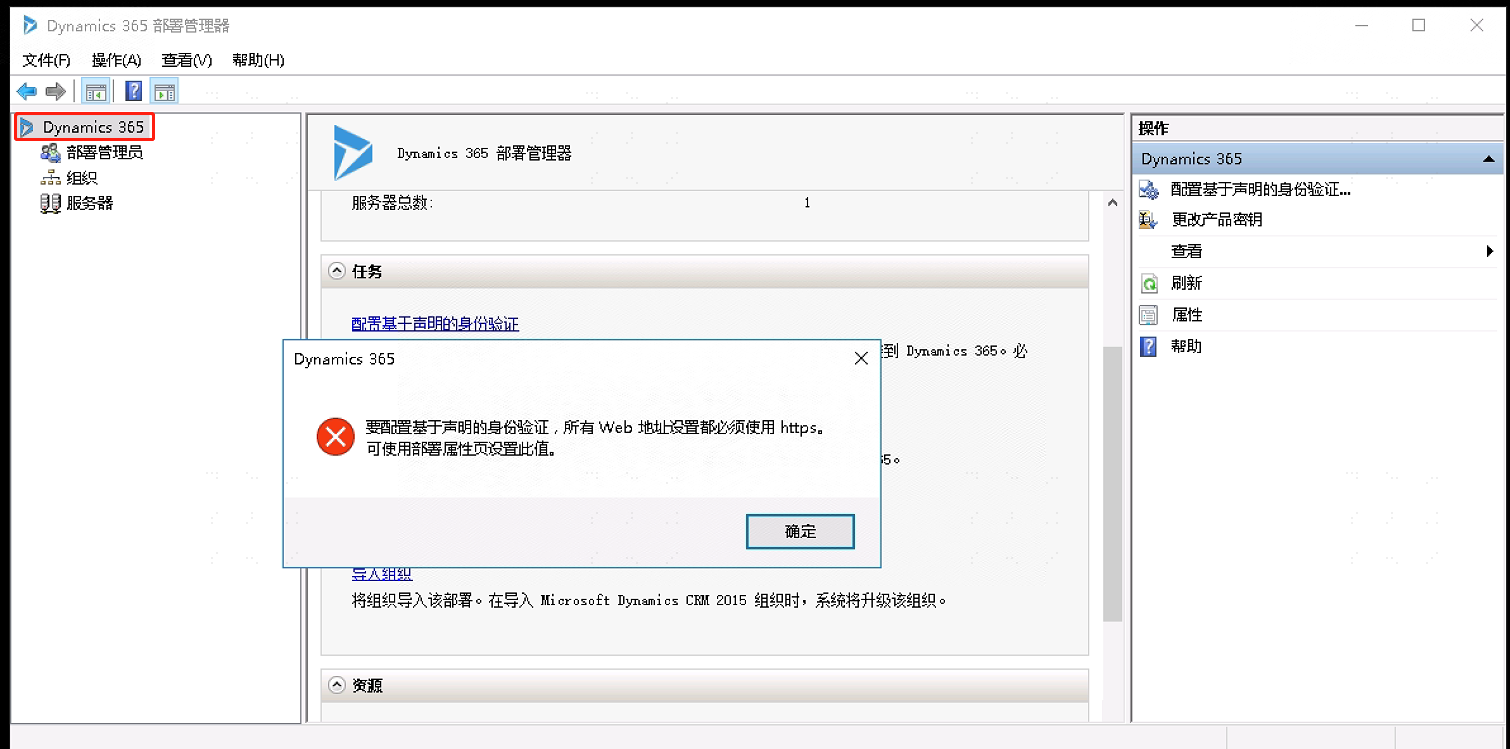
In the Actions pane, click Properties.
Click the Web Address tab.
Under Binding Type, select HTTPS.
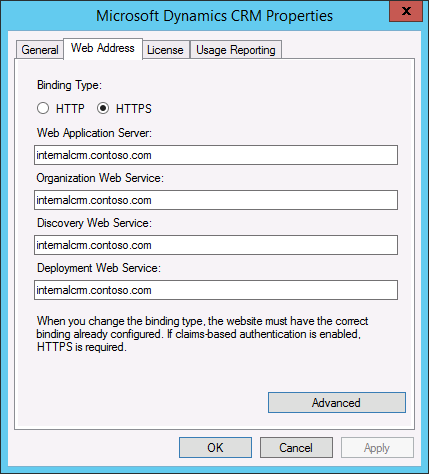
- Confirm that the Web address is valid for the TLS/SSL certificate and TLS/SSL port bound to the Microsoft Dynamics 365 website. Since you are configuring the Microsoft Dynamics 365 server to use claims authentication for internal access, use the host name for the root domain Web address.
Microsoft Dynamics 365 Configure Claims-Based Authentication
In the Deployment Manager console tree, right-click Microsoft Dynamics 365, and then click Configure Claims-Based Authentication.
On the Specify Security Token Service page, enter the federation metadata URL:
http://localhost/federationmetadata.xml.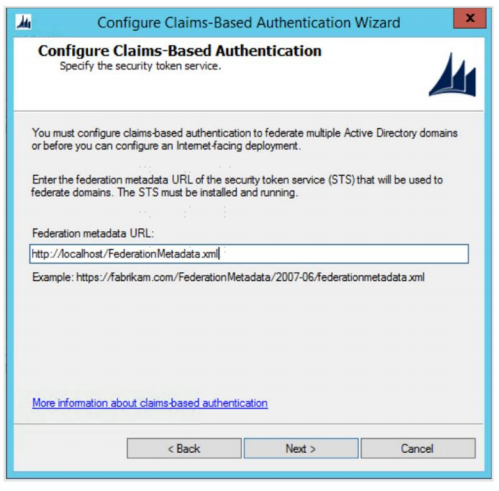
On the Specify Encryption Certificate page, specify the encryption certificate using one of the following two methods:
- In the Certificate box, type the fully qualified common name (CN) of the certificate, in the format
CN=certificate_subject_name. - Under Certificate, click Select, and then select a certificate.
- In the Certificate box, type the fully qualified common name (CN) of the certificate, in the format
Next, verify and complete the configuration.
Microsoft Dynamics 365 Configure Internet-Facing Deployment
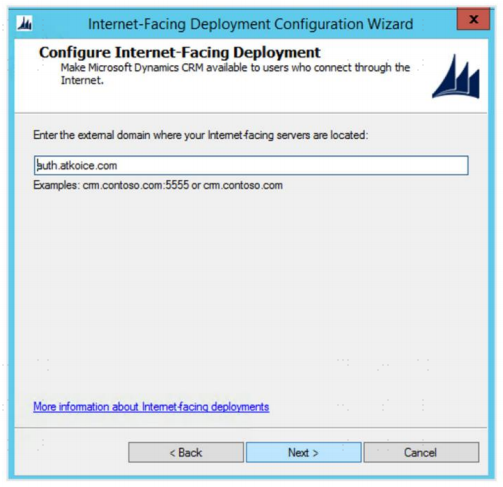
- In the Deployment Manager console tree, right-click Microsoft Dynamics 365, and then click Configure Internet-Facing Deployment.
- Internal Internet access configuration
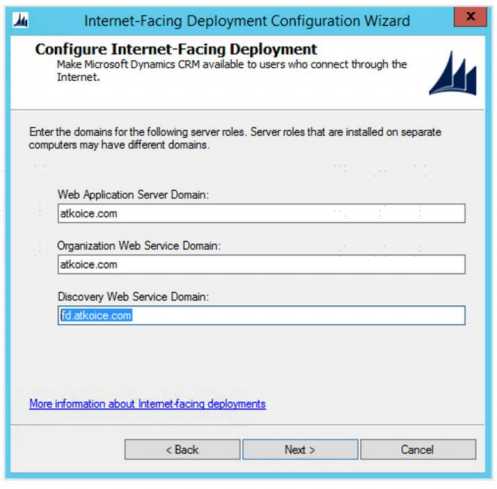
| Parameter | Description |
|---|---|
| Web Application Server Domain | Microsoft Dynamics 365 system domain name, example: crm.domain.com, used for internal access |
| Organization Web Service Domain | Microsoft Dynamics 365 system domain name, example: crm.domain.com |
| Discovery Web Service Domain | Microsoft Dynamics 365 system domain name, example: crm.domain.com |
- Click Next to configure external Internet access configuration.
- The domain name filled in this step can only be a subdomain, not the root domain, example: auth.domain.com
- If external network access is required, the network policy of this domain name needs to be set to allow external access. For internal access only, you can set any secondary domain name in this step.
Internet Information Service Configuration
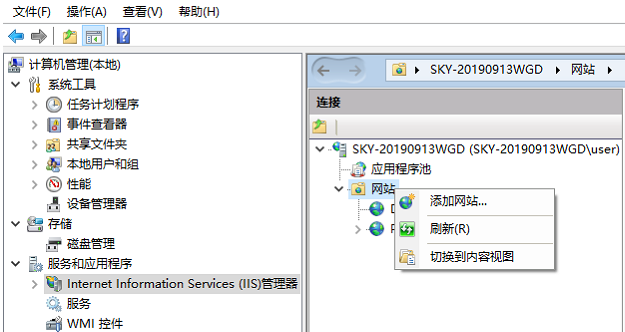
- Right-click My Computer, select Manage > Services and Applications > Internet Information Service (IIS) Manager.
- Select and add a website. Domain name: crm.domain.com, Port: 443. For external network access, add domain name: auth.domain.com, Port 443.
Login Verification
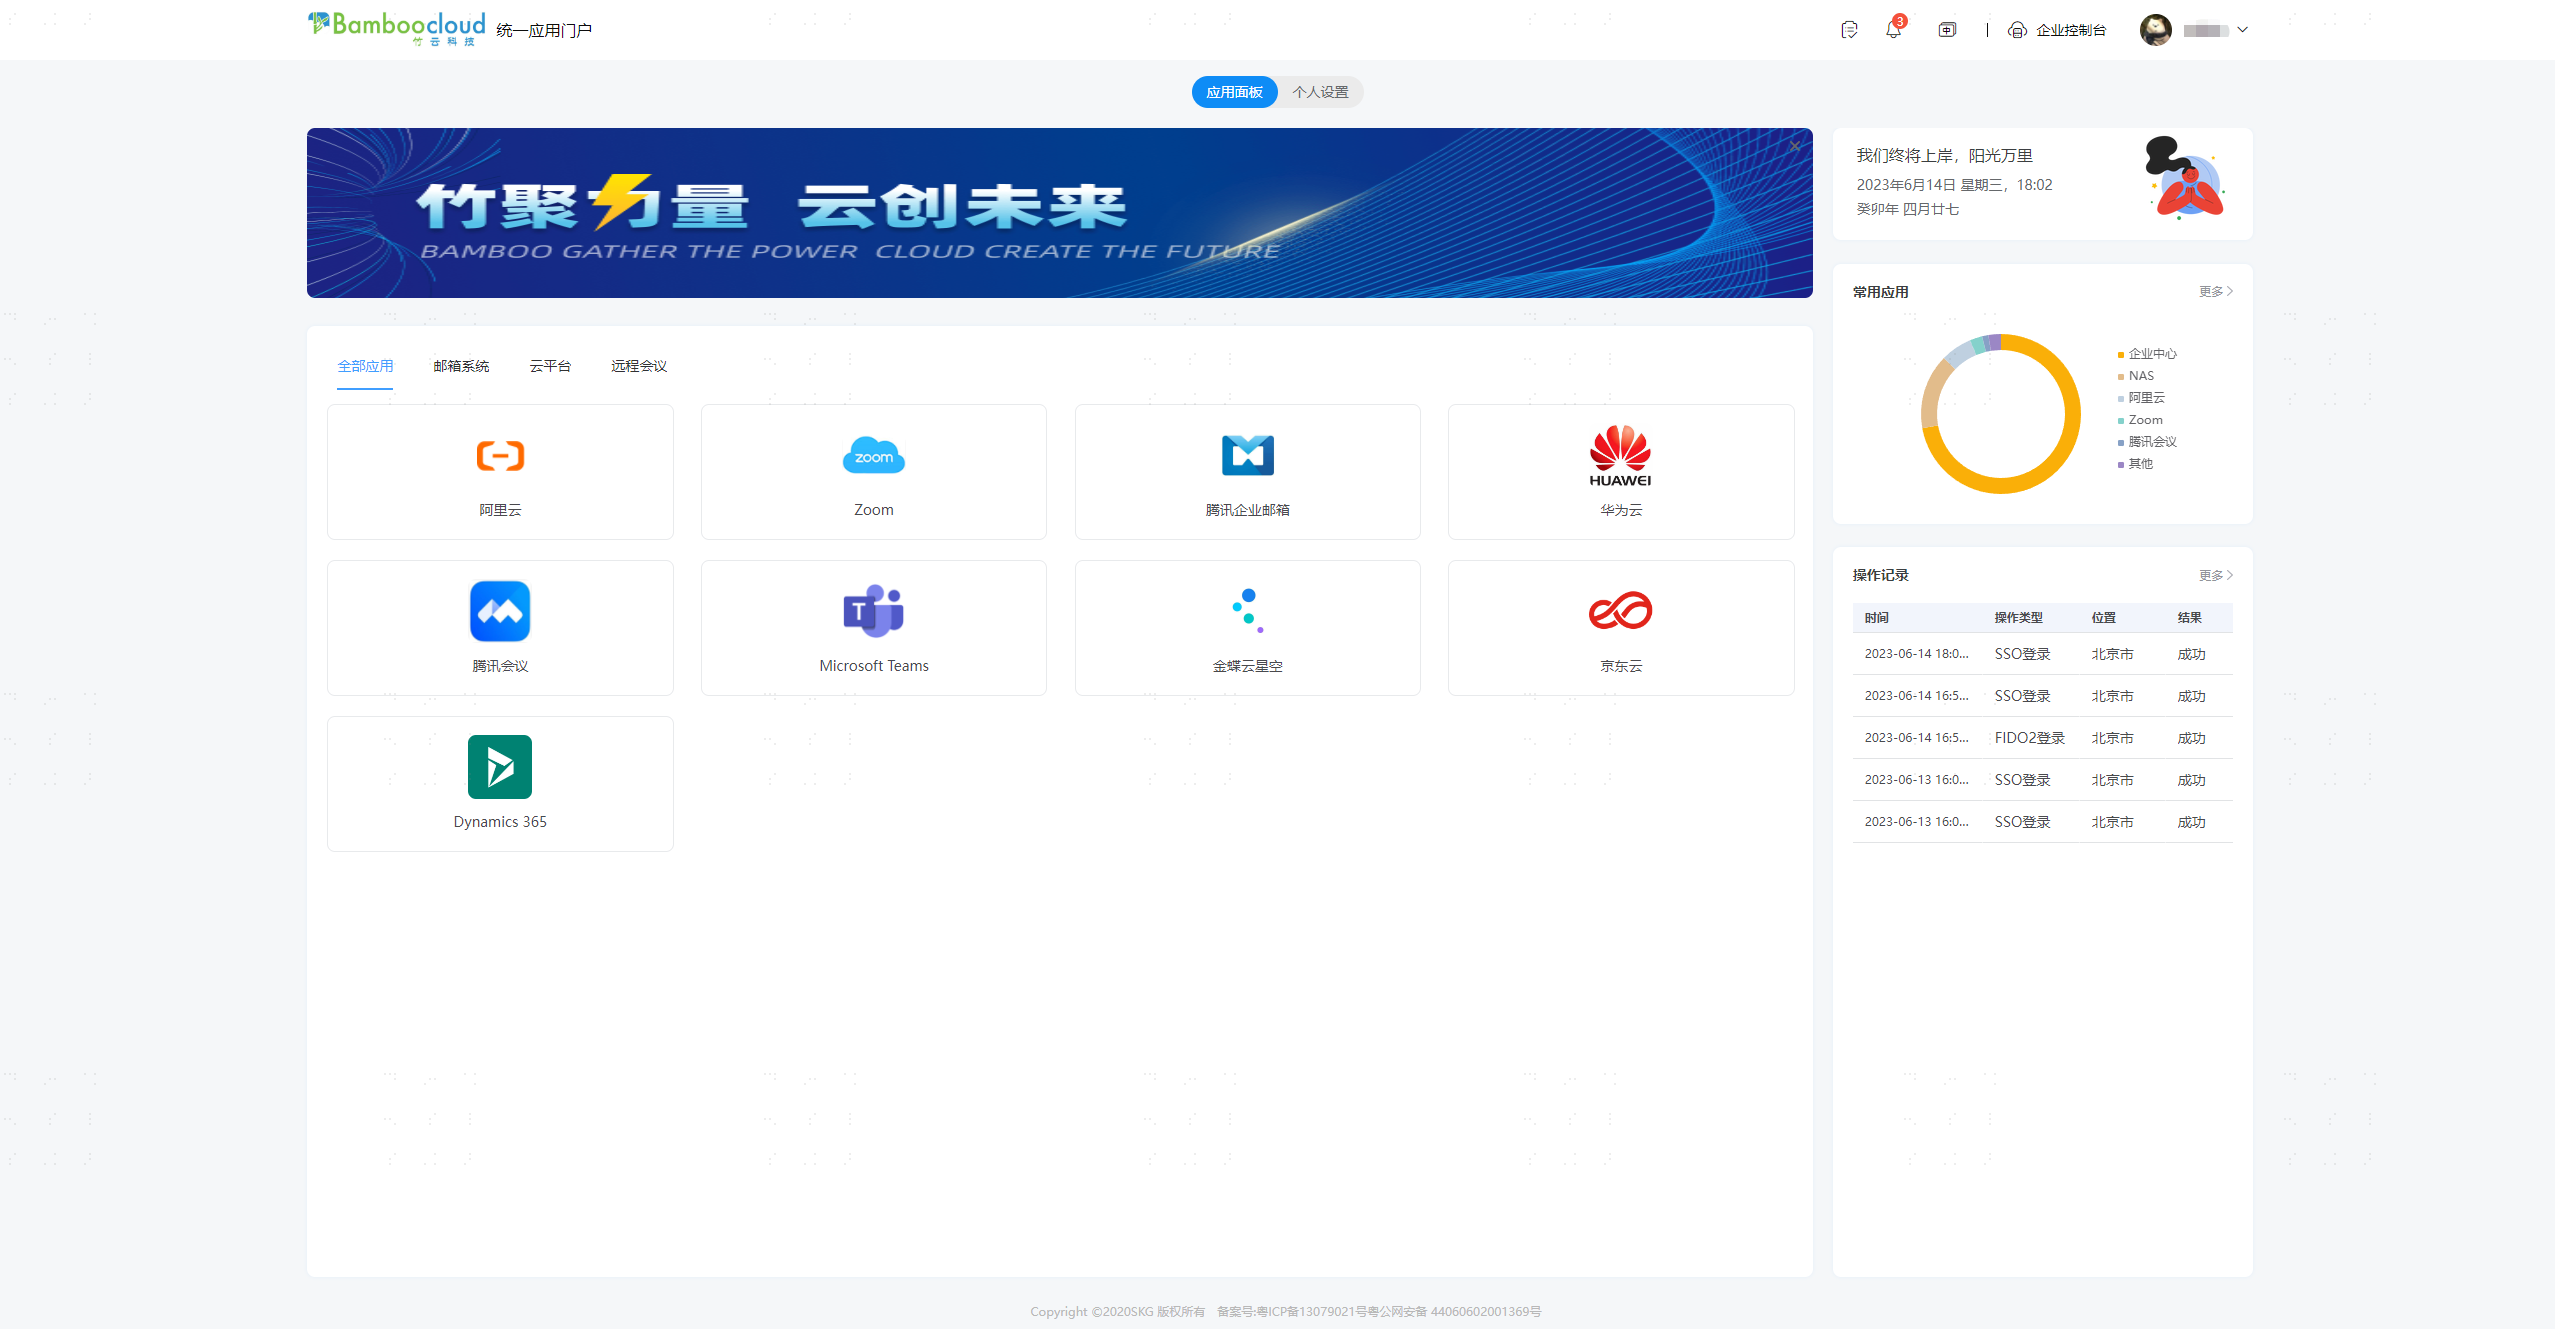
Log in to the BambooCloud IDaaS User Center, click the application logo, and single sign-on into the application system.