JIRA & Confluence JIT Configuration
Overview
This article describes the steps to enable JIT configuration for JIRA or Confluence.
Jira & Confluence Configure JIT
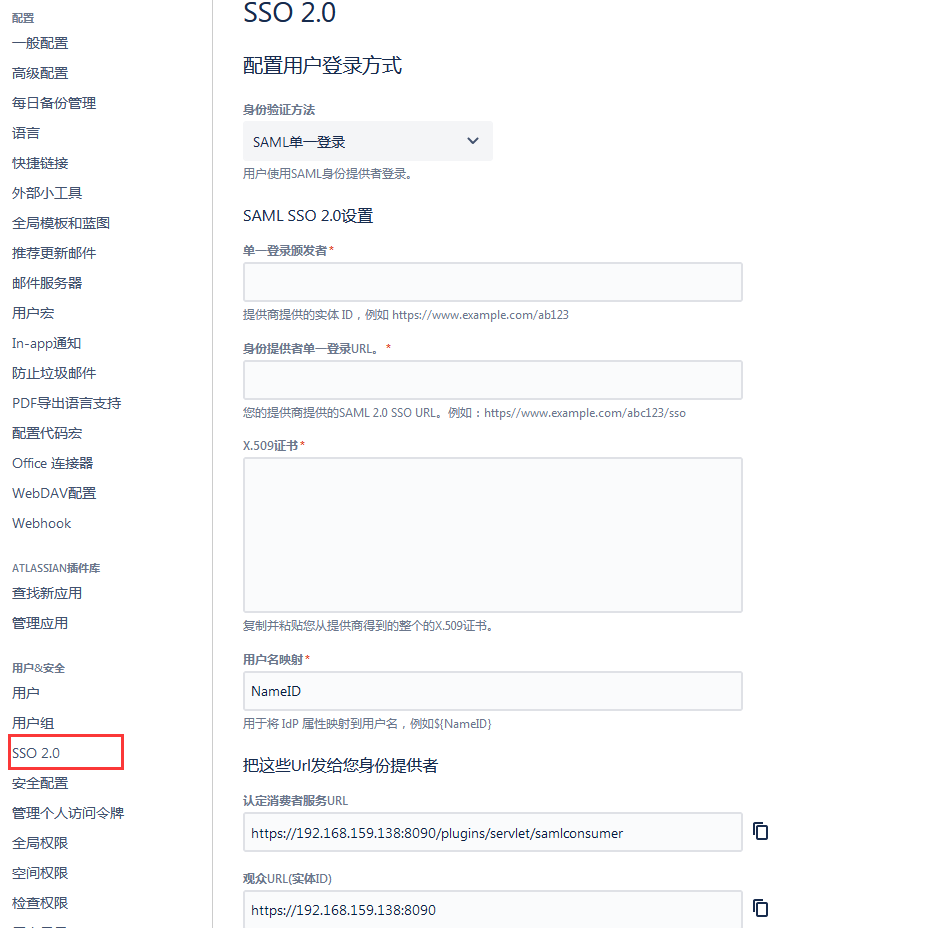
Log in to the site management interface as an administrator and select SSO 2.0.
Configure the user login method, and select SAML Single Sign-On as the authentication method.
Check the JIT configuration option.
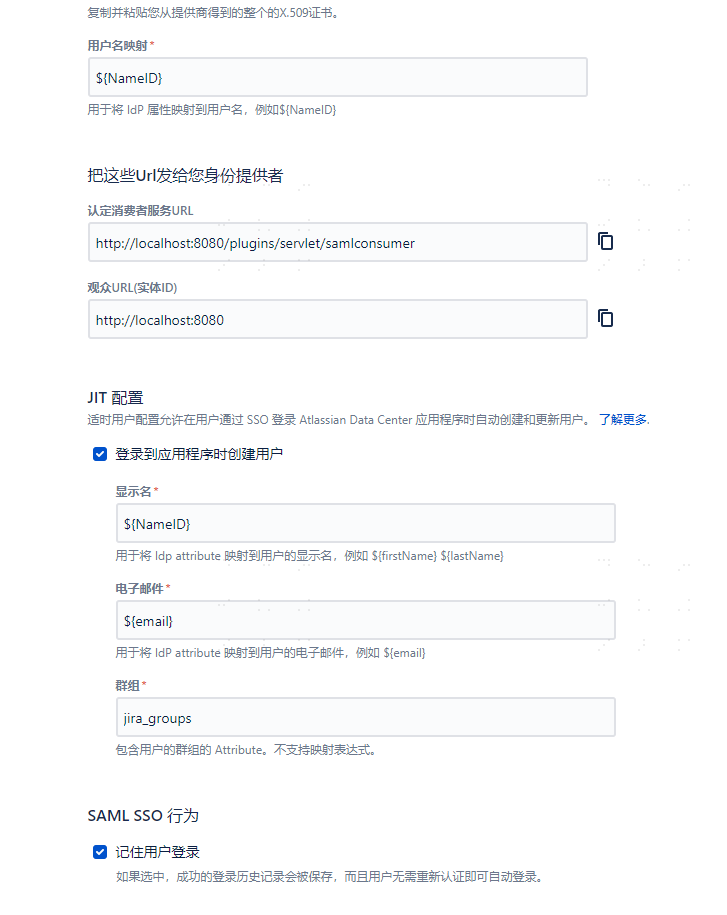
| Parameter | Description |
|---|---|
| Display Name | Login name when creating user, value: ${NameID} |
Email when creating user, value: ${email} | |
| Group | Group to which the Jira user belongs, value: jira_groups |
BambooCloud IDaaS Configuration
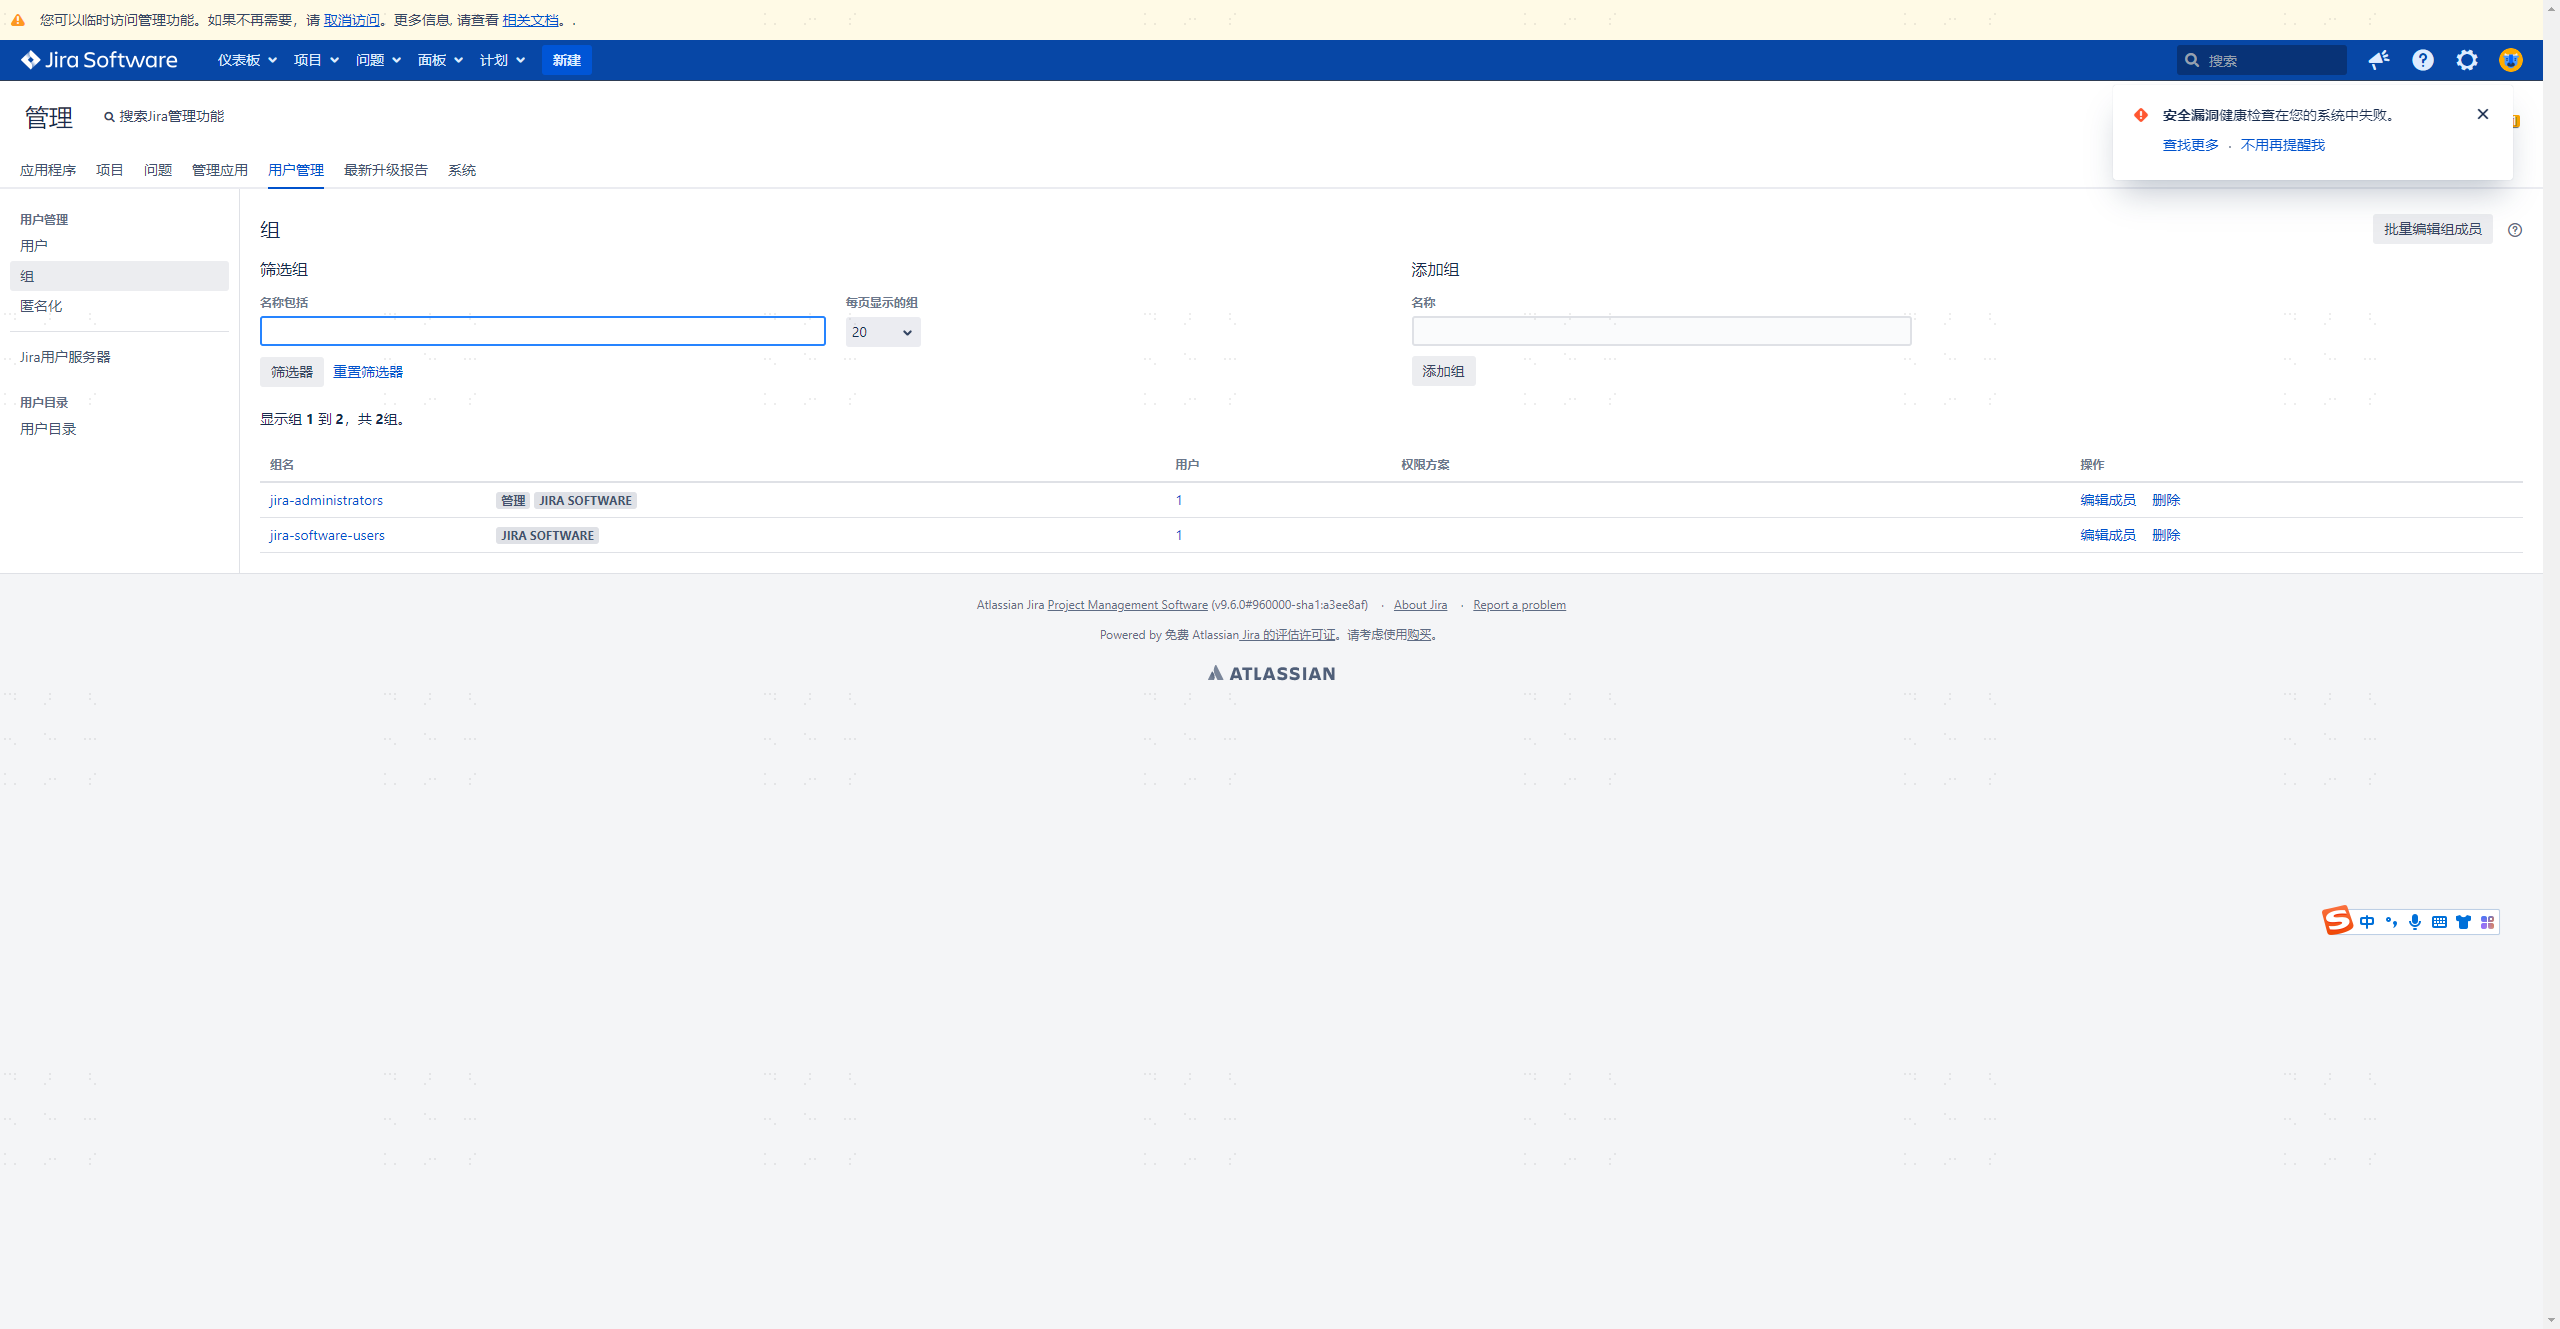
View the Jira group list.
Log in to the BambooCloud IDaaS Enterprise Center as an administrator, go to Settings > Data Dictionary > Add Dictionary.
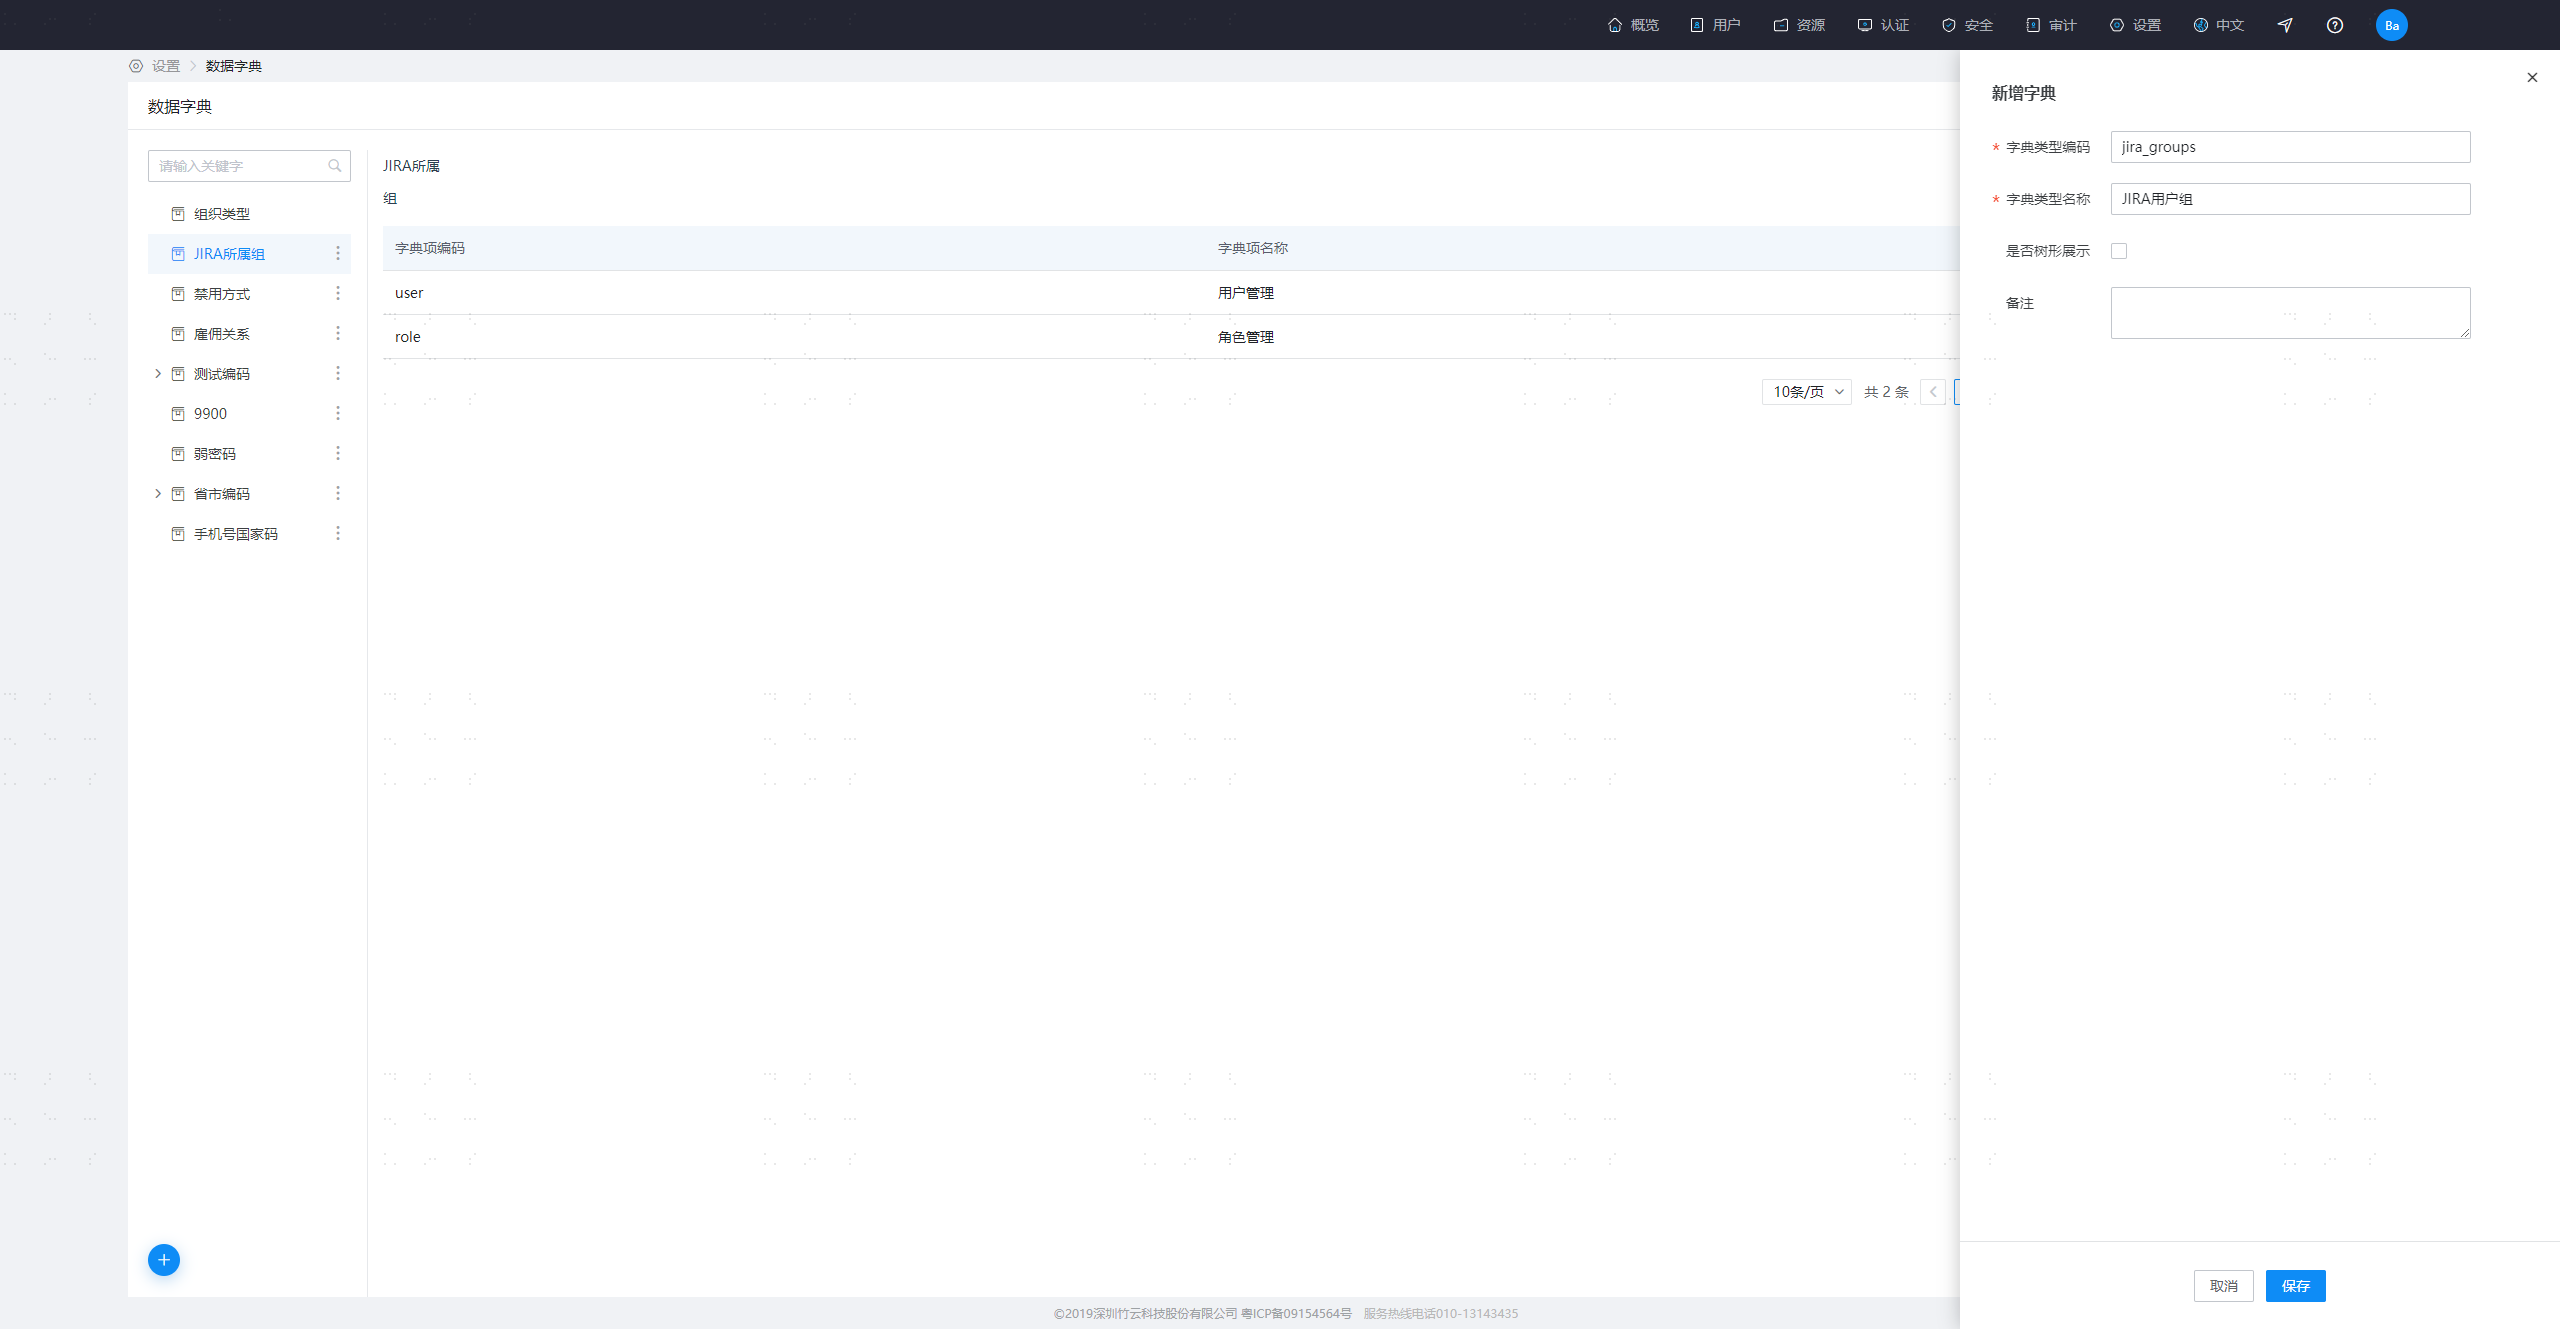
Set the dictionary type code to
jira_groupsand the dictionary name toJIRA User Groups.Log in to the BambooCloud IDaaS Enterprise Center as an administrator, go to Settings > Data Dictionary, select the JIRA User Groups dictionary on the left, and click Add Dictionary Item.
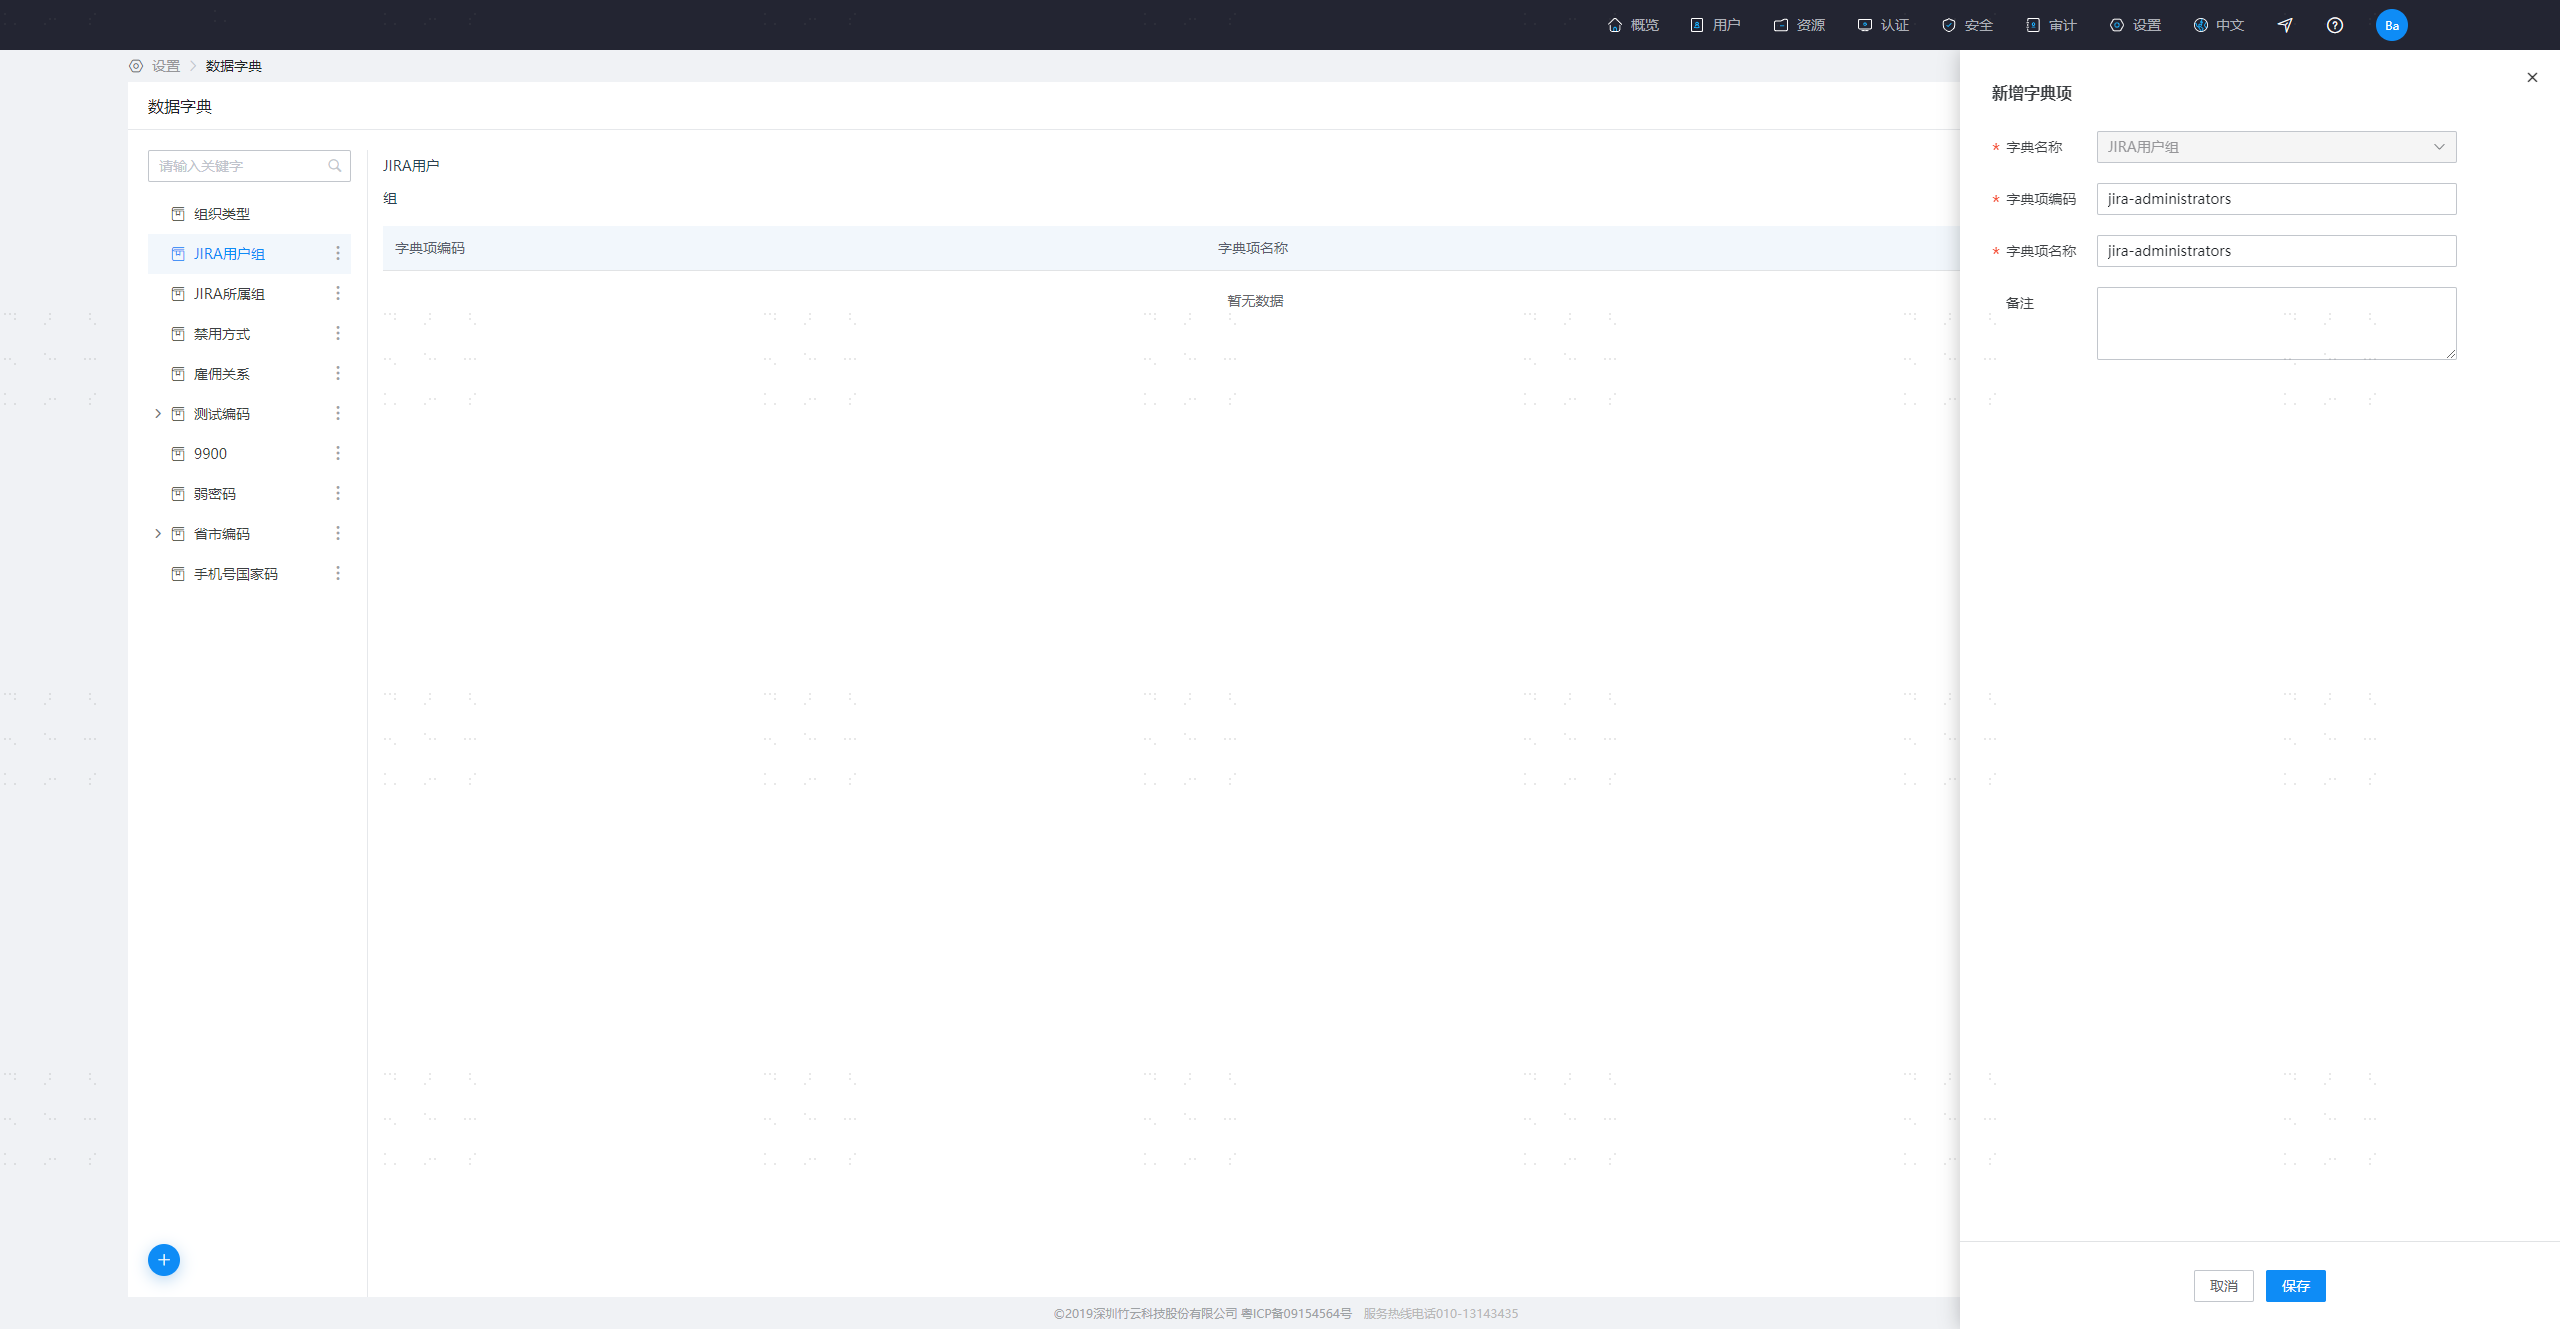
Add dictionary items based on the Jira group list queried in step 1. Both the dictionary item code and dictionary item name are the Jira group names.
Go to BambooCloud IDaaS Users > Attribute Definition > User Attribute Definition > Work Information > Settings > Add Field.
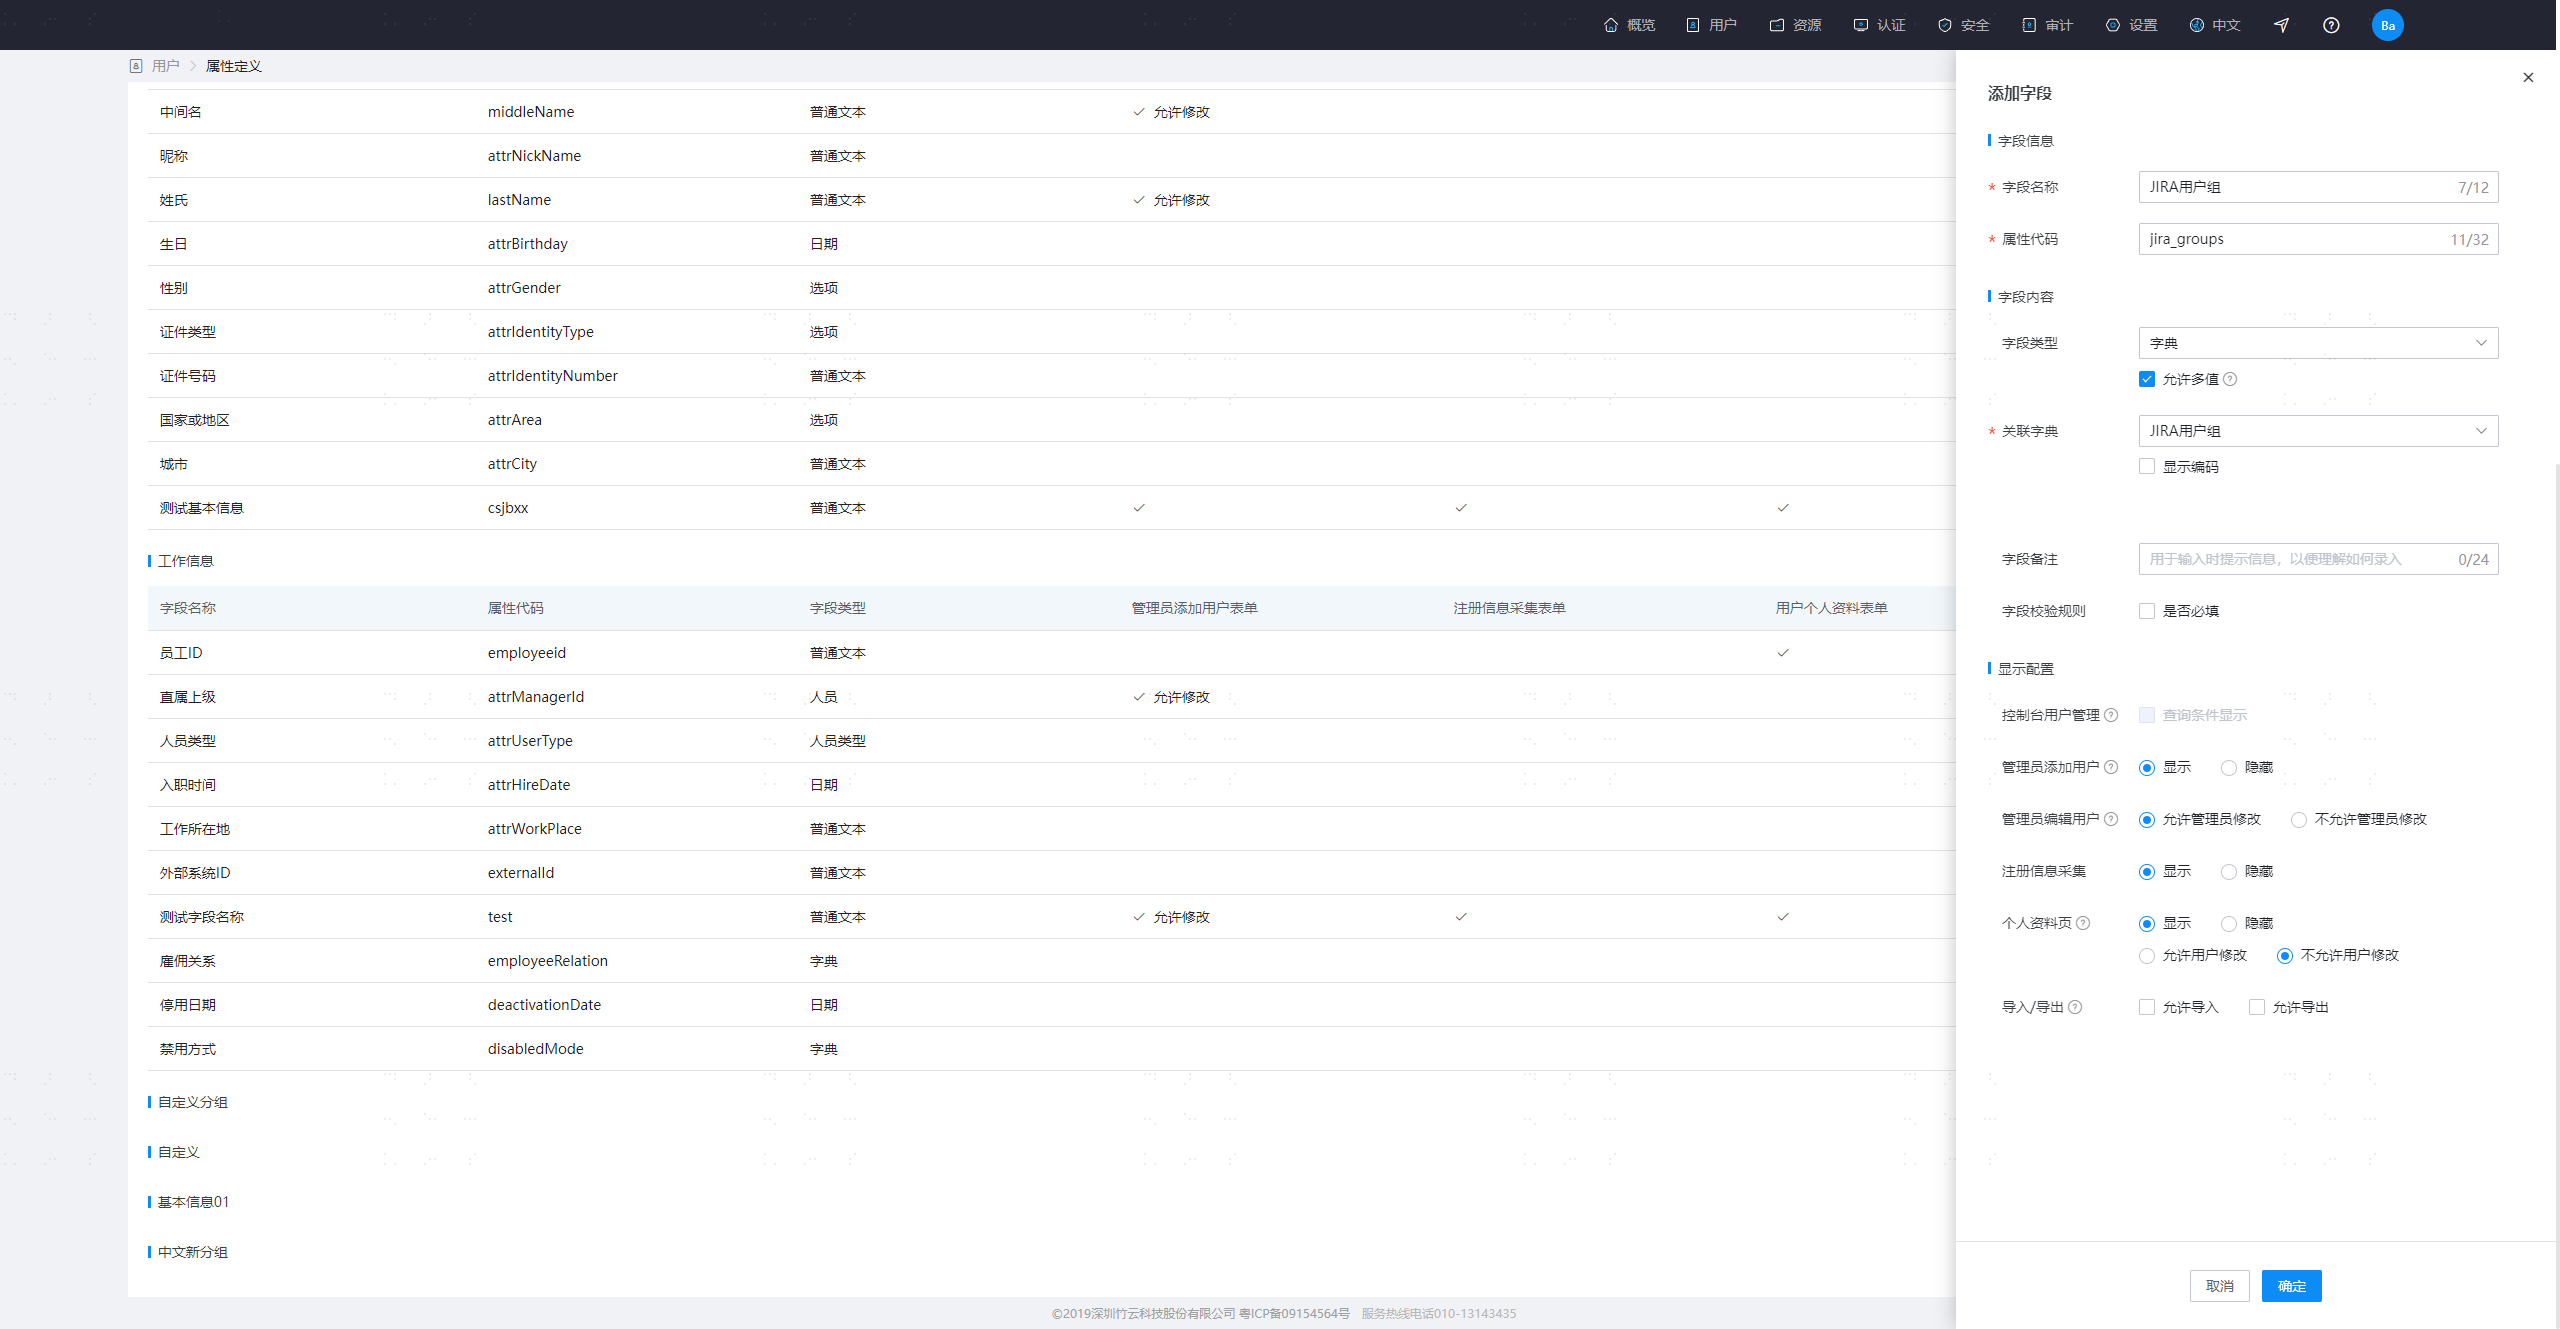
Fill in the attribute definition information as shown above and save.
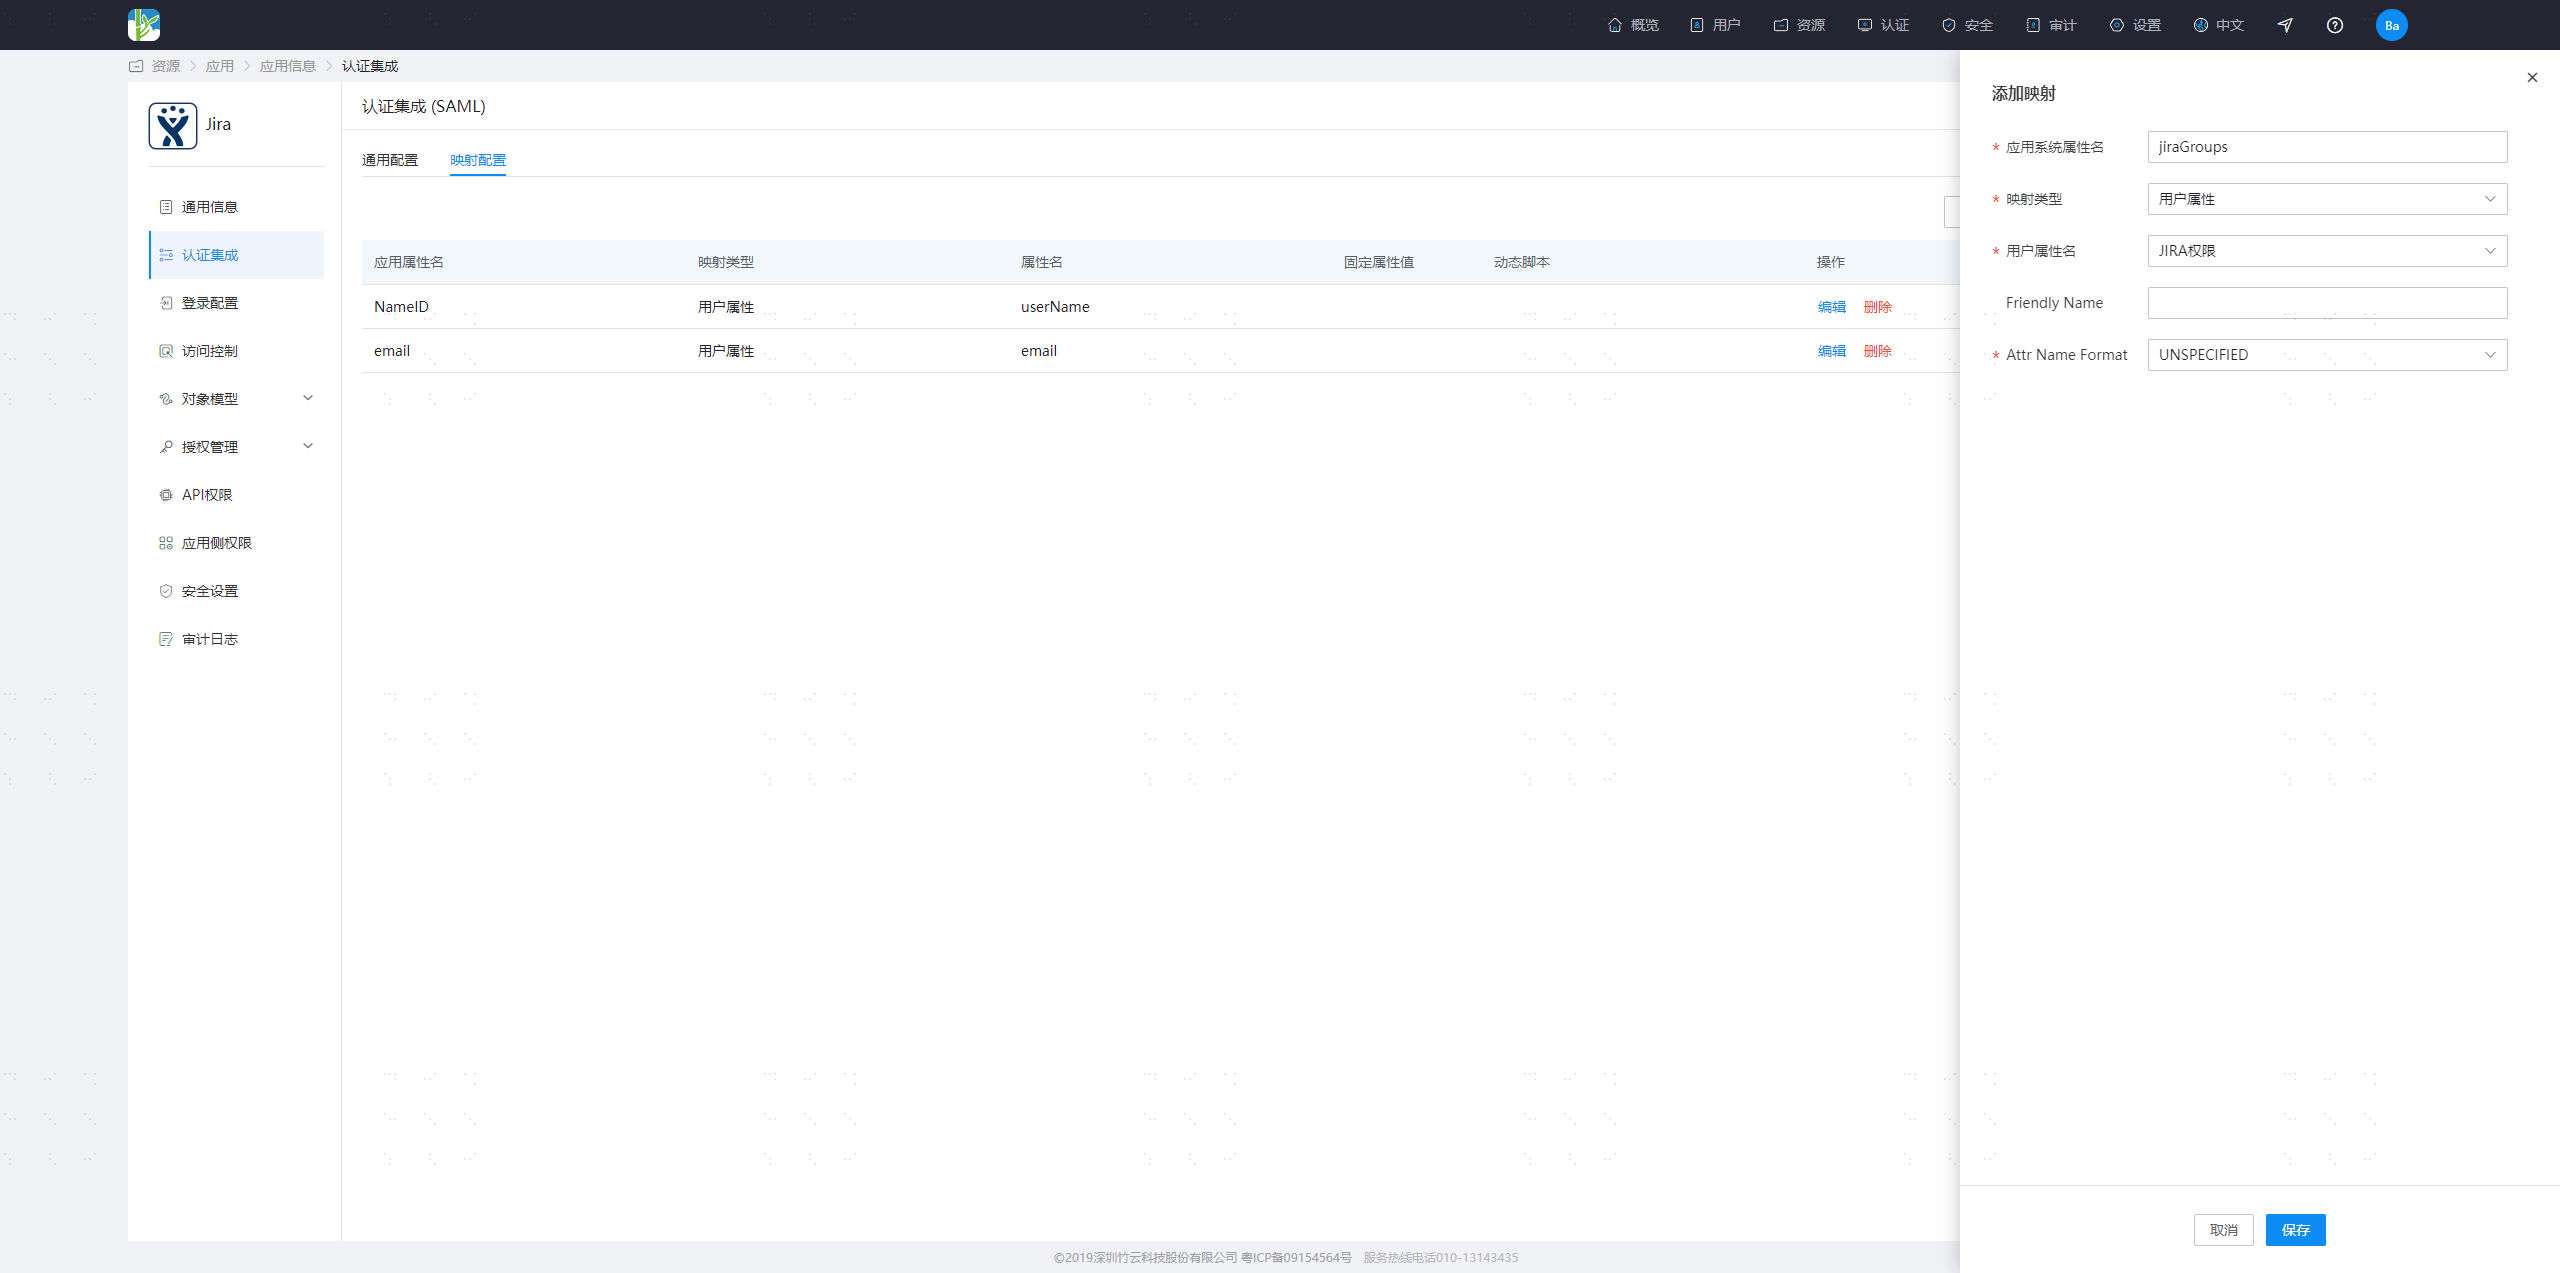
Configure mappings. Enter the application details, Authentication Configuration > Mapping Configuration, and add mappings.
jiraGroups: JIRA user groups