
Role-Based Authorization
This chapter guides you through managing application roles. After role management is complete, you can assign roles to application accounts, that is, authorize accounts based on roles.
Prerequisites
- You have administrator permissions for the IDaaS enterprise center platform.
- You have created the application and enabled the RBAC (role-based authorization) model.
Application Role Model Configuration
- Enter the application details page, and click Model Configuration on Application Role in the application model to open the application role model configuration page.
- Select the structure type of the application role. If your application roles have hierarchical relationships, select tree structure; this cannot be changed after selection.
Application Role Management
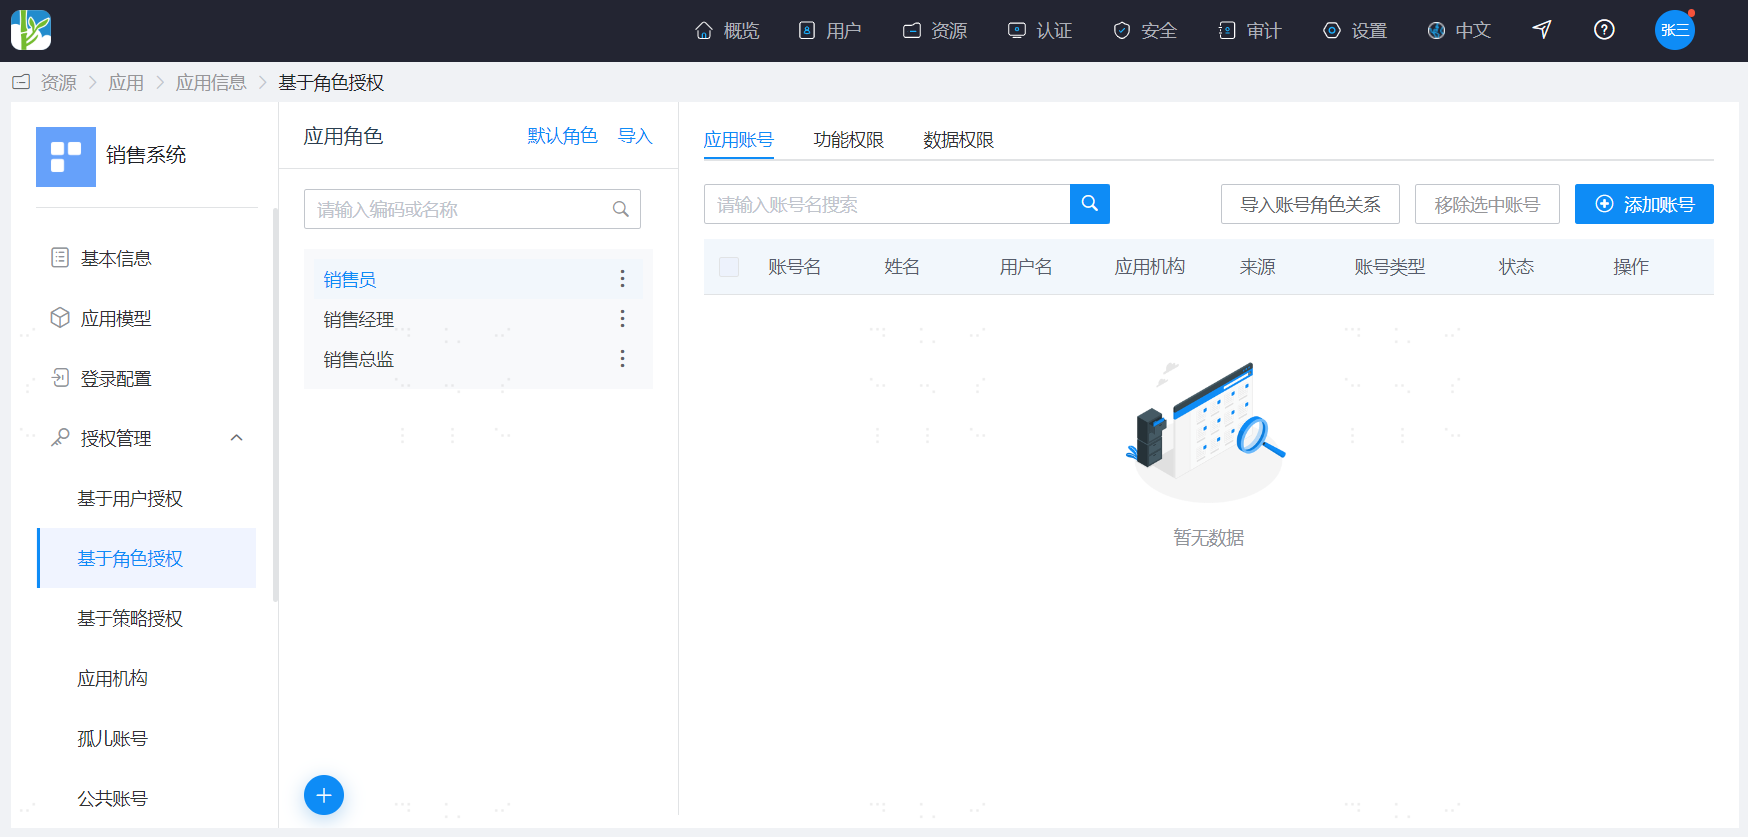
- Click Role-Based Authorization on Application Role in the application model to jump to the application role management page.
- The left side of the page displays application roles, and the right side displays application accounts already assigned to the selected role. When the relationship between roles and functional permissions/data permissions is enabled, the functional/data permissions assigned to the selected role are also displayed on the right.
Import Roles
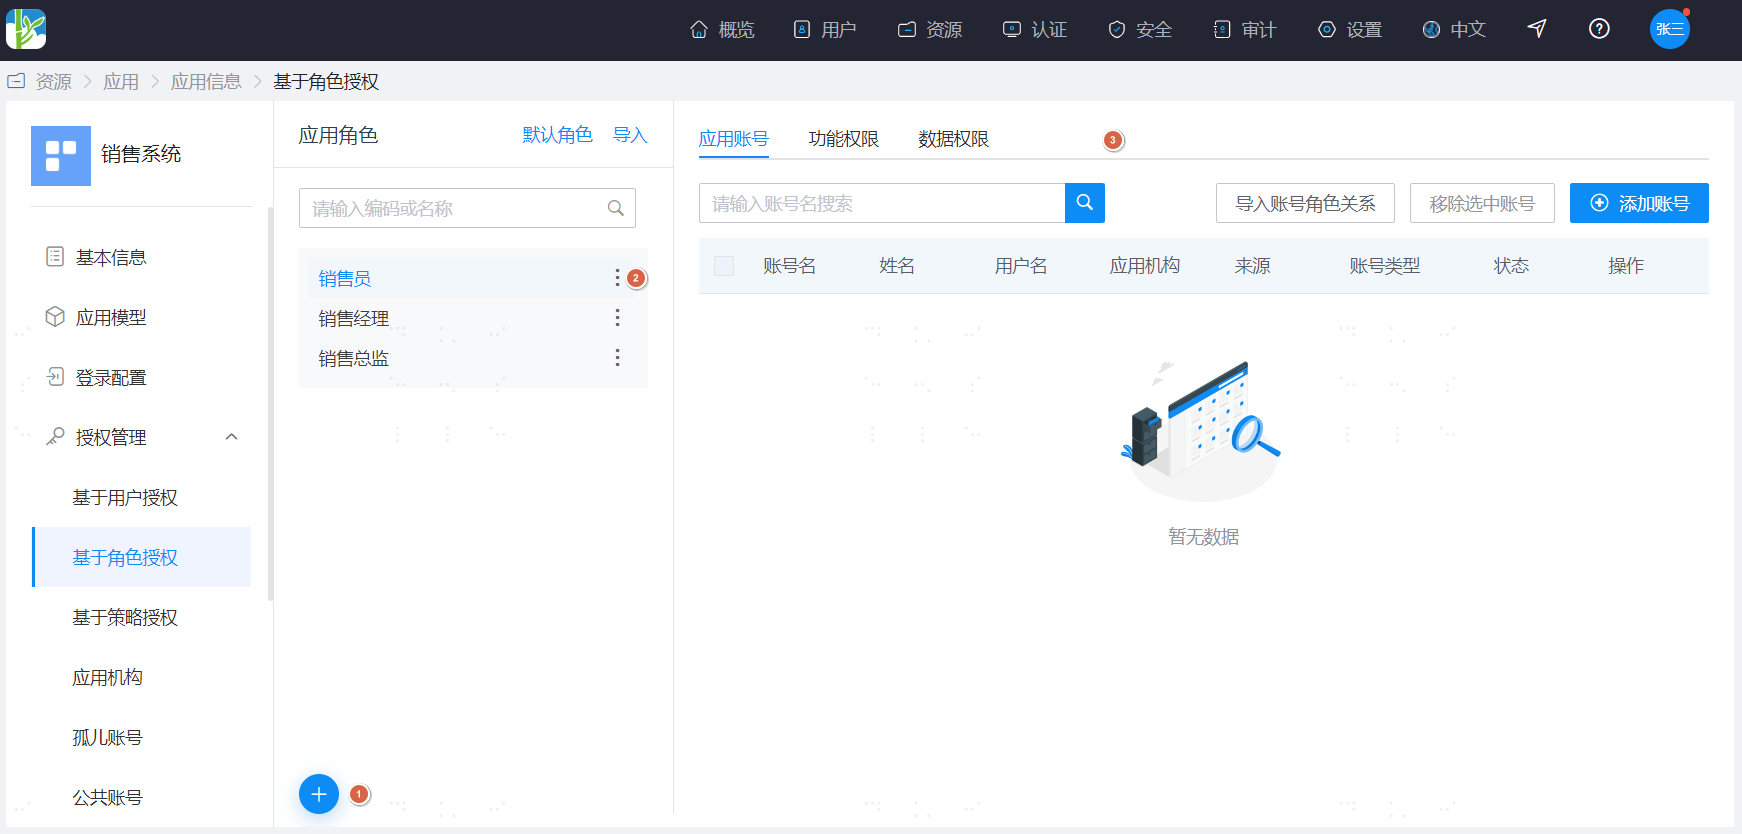
- You can batch import application roles via an Excel spreadsheet. Click the Import operation to jump to the application-side permission import page. Select the application, download the import template, prepare the data according to the template, and import.
- After importing roles, you can continue to import role-functional permission relationships or role-data permission relationships.
Manage Roles Manually
- Click the Add button under the application role area to add a role.
- Fill-in instructions:
- Affiliated Organization: when managing AD groups, you can select the affiliated organization.
- Role Code: unique, cannot be duplicated.
- Role Name: cannot be duplicated in list structure; no duplicates at the same level in tree structure.
- Display Order: smaller numbers are displayed first.
- Click More Operations after a role to edit, delete, or enable/disable it.
- Manage the relationships between roles and accounts and between roles and functional permissions/data permissions.
- Select a role; on the right-side application accounts page, you can batch add accounts to authorize a role to multiple accounts at once.
- On the functional/data permissions page, click Import Role-Functional Permission Relationship to enter the data import interface, where you can batch import relationships between roles and functional/data permissions.
- On the functional/data permissions page, you can select the functional/data permissions to grant to the role.
- Data permissions need to be selected by data object.
- Select all permissions is supported to meet super administrator permission assignment needs.
Set Default Role
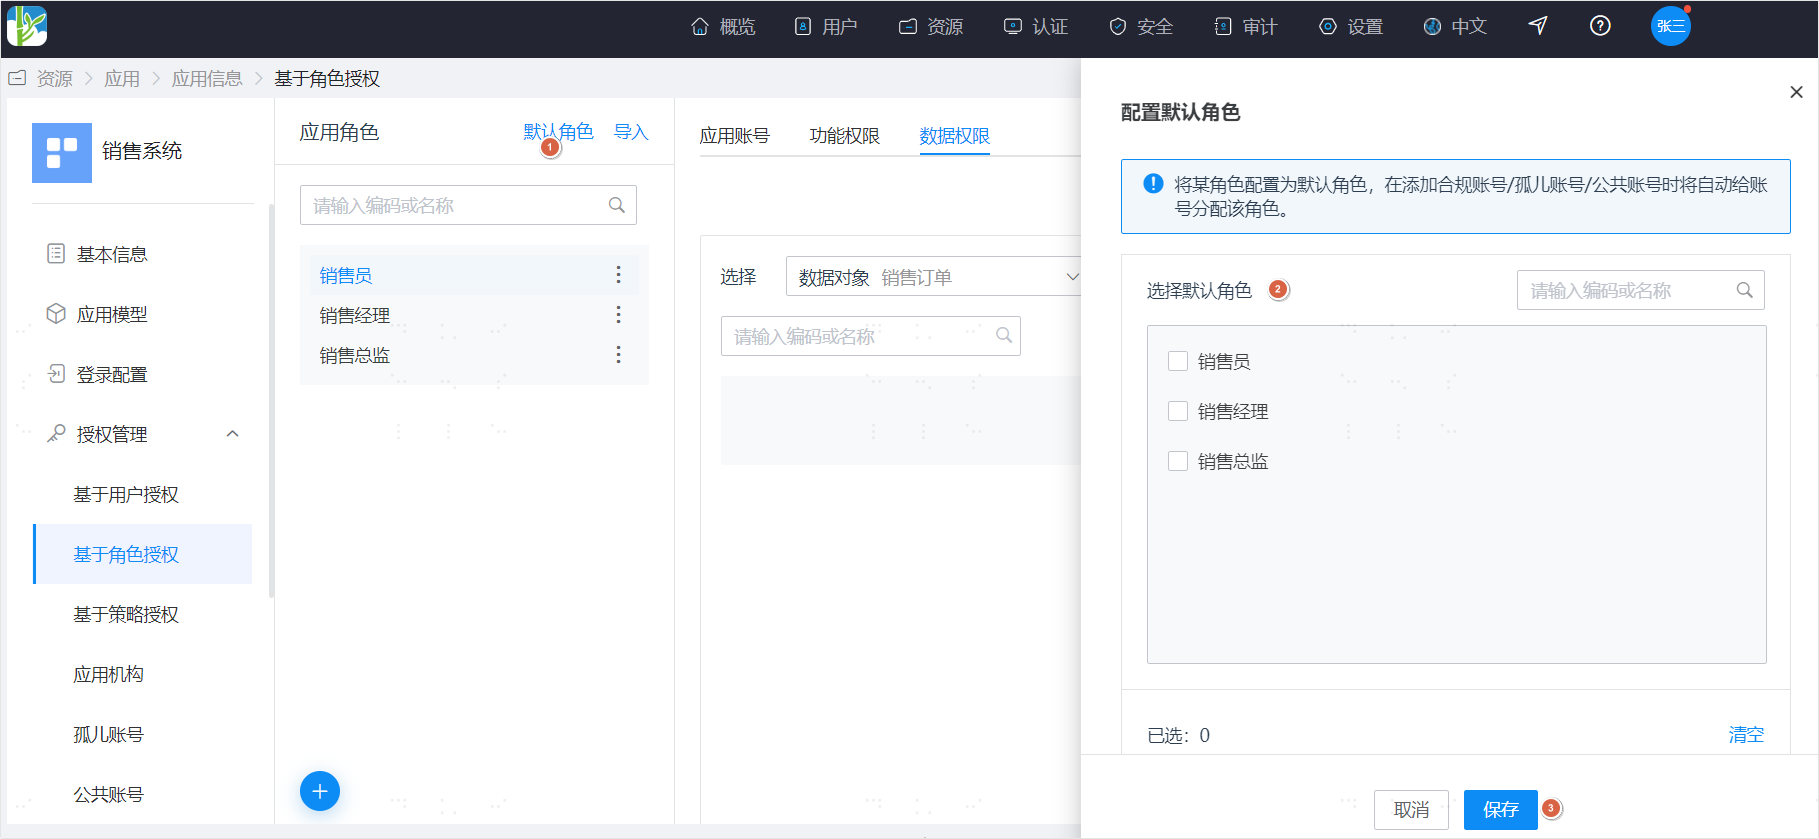
If your system needs to assign an initial default role to every account to ensure users can access normally, you can configure the system's default role. After the default role is set, when an application system adds an account, the default role is automatically assigned to that account.
Authorize Application Roles
There are two ways to authorize application roles:
- Associate accounts with a role.
- Grant roles to users through the User-Based Authorization guidance.